# null
Source: https://evalprotocol.io/community
Eval Protocol is an open standard for AI evaluation that helps developers build
better AI products through robust testing and iteration.
Most AI evaluation frameworks are proprietary or organization-specific, leading to:
* Duplicated evaluation code across teams
* Inconsistent benchmarking standards
* Limited access to proven evaluation methodologies
* Slow iteration cycles without community feedback
Our protocol standardizes AI evaluation, enabling you to:
* Share and reuse evaluation logic across projects
* Benchmark against established baselines
* Iterate faster with community-driven improvements
* Build reproducible evaluation pipelines
* Access evaluation tools used by production AI systems
Join [#eval-protocol](https://discord.com/channels/1137072072808472616/1400975572405850155) on Discord to discuss implementations, share evaluation strategies, and contribute to the standard.
# AIME 2025 (Open-Resource)
Source: https://evalprotocol.io/example/aime2025
Quick AIME-style math check using boxed final answers
This example wires up a lightweight AIME-style evaluation using the open `AIME2025` JSONL from Hugging Face. It is intended for quick model picking rather than a full reimplementation of the benchmark.
This example is now implemented as a suite in `eval_protocol/benchmarks/suites/aime25.py` and exported as `aime25`.
## What it does
* Pulls AIME2025 JSONL directly from Hugging Face.
* Prompts the model to reason and place the final answer inside `\\boxed{...}`.
* Parses the boxed value and compares it against ground truth for exact match scoring.
## How it’s configured
Key pieces in the SDK example:
* Dataset adapter converts raw rows with `question` and `answer` into `EvaluationRow`s.
* `@evaluation_test` provides URLs, model, and rollout parameters (including optional reasoning-effort variants).
* Evaluator extracts a final integer from the assistant message and checks equality with the ground truth.
## Run it locally
After installing eval-protocol, you can run the benchmark from anywhere:
```bash
pytest --pyargs eval_protocol.benchmarks.test_aime25 -v \
--ep-print-summary --ep-summary-json artifacts/aime25.json
```
Tip: use `--ep-max-rows=50` to limit dataset size, or `--ep-max-rows=all` for the full dataset. You can also use `--ep-reasoning-effort=high` and `--ep-input-param temperature=0.0` to adjust model settings.
## Notes
* This is a convenience wrapper for model selection, not a canonical reproduction of AIME.
* The evaluation is strict exact match over a parsed integer from `\\boxed{...}`.
# APPS Coding Evaluation
Source: https://evalprotocol.io/example/apps-coding
Evaluate competitive programming abilities using APPS dataset with comprehensive test suites
This example demonstrates how to create comprehensive competitive programming evaluations using the APPS (Automated Programming Progress Standard) dataset from CodeParrot. The evaluation tests AI models' ability to solve complex algorithmic challenges similar to those found in competitive programming contests.
You can find the complete code for this example at [test\_apps\_coding.py](https://github.com/eval-protocol/python-sdk/blob/main/tests/pytest/test_apps_coding.py).
## Understanding APPS Coding Evaluation
APPS coding evaluation assesses a model's ability to:
* **Solve complex algorithmic problems**: Handle competitive programming challenges with multiple constraints
* **Implement sophisticated logic**: Design algorithms for graph theory, dynamic programming, and data structures
* **Handle multiple test cases**: Pass comprehensive test suites with edge cases and boundary conditions
* **Work with competitive formats**: Process standard input/output formats used in programming contests
Unlike basic coding tasks that test simple function implementation, APPS evaluation tests **advanced algorithmic thinking and competitive programming skills** - essential for building AI systems capable of complex problem-solving.
## Understanding the APPS Dataset Structure
The APPS dataset from CodeParrot contains 10,000 competitive programming problems sourced from platforms like Codeforces, AtCoder, Kattis, and Codewars, providing realistic algorithmic challenges at three difficulty levels.
### Dataset Format
Each entry in the APPS dataset contains:
* **`problem_id`**: Unique identifier for the problem
* **`question`**: Detailed problem description with constraints, examples, and input/output format
* **`solutions`**: Array of reference Python solutions that correctly solve the problem
* **`input_output`**: JSON containing comprehensive test cases with inputs and expected outputs
* **`difficulty`**: Classification as "introductory", "interview", or "competition"
* **`url`**: Source URL of the original problem from competitive programming platforms
* **`starter_code`**: Optional template code to begin implementation
### Example APPS Dataset Entry
**Competitive Programming Problem:**
```json
{
"id": 1,
"question": "Mikhail walks on a Cartesian plane. He starts at the point $(0, 0)$, and in one move he can go to any of eight adjacent points. For example, if Mikhail is currently at the point $(0, 0)$, he can go to any of the following points in one move: $(1, 0)$; $(1, 1)$; $(0, 1)$; $(-1, 1)$; $(-1, 0)$; $(-1, -1)$; $(0, -1)$; $(1, -1)$.\n\nIf Mikhail goes from the point $(x1, y1)$ to the point $(x2, y2)$ in one move, and $x1 \ne x2$ and $y1 \ne y2$, then such a move is called a diagonal move.\n\nMikhail has $q$ queries. For the $i$-th query Mikhail's target is to go to the point $(n_i, m_i)$ from the point $(0, 0)$ in exactly $k_i$ moves...",
"solutions": [
"q=int(input())\n\nfor e in range(q):\n x,y,k=list(map(int,input().split()))\n x,y=abs(x),abs(y)\n x,y=max(x,y),min(x,y)\n # ... complete solution"
],
"input_output": {
"inputs": [
"3
2 2 3
4 3 7
10 1 9"
],
"outputs": [
"1
6
-1"
]
},
"difficulty": "interview",
"url": "https://codeforces.com/problemset/problem/1036/B",
"starter_code": ""
}
```
### Dataset Characteristics
**Problem Complexity**: APPS problems feature advanced algorithmic concepts:
* **Graph algorithms**: Shortest paths, minimum spanning trees, graph traversal
* **Dynamic programming**: Optimization problems with overlapping subproblems
* **Data structures**: Advanced usage of heaps, trees, and custom data structures
* **Mathematical algorithms**: Number theory, combinatorics, and geometric problems
* **String algorithms**: Pattern matching, string manipulation, and parsing
**Difficulty Progression**:
* **Introductory (2,889 problems)**: Basic algorithmic concepts and simple implementations
* **Interview (3,592 problems)**: Common coding interview problems with moderate complexity
* **Competition (572 problems)**: Advanced competitive programming challenges
**Test Coverage**: Comprehensive testing ensures robust evaluation:
* **Multiple test cases**: Average of 21.2 test cases per problem
* **Edge cases**: Boundary conditions and corner cases included
* **Performance constraints**: Problems include time and memory limits
* **Real contest data**: Authentic test cases from actual programming competitions
**Sample Dataset**: The EP python-sdk includes a sample APPS dataset with just 3 problems for testing and demonstration purposes. The full CodeParrot APPS dataset contains 10,000 problems across all difficulty levels.
## Step 1: Import Required Dependencies
First, we import the necessary modules from the EP framework:
```python
import json
from typing import Any, Dict, List
from eval_protocol.models import EvaluateResult, EvaluationRow, Message
from eval_protocol.pytest import SingleTurnRolloutProcessor, evaluation_test
from eval_protocol.rewards.apps_coding_reward import evaluate_apps_solution
```
* `json`: For parsing the complex input/output test case data
* `typing`: Python's typing module for type hints
* `EvaluateResult`, `EvaluationRow`, `Message`: Core EP data structures
* `default_single_turn_rollout_processor`: Default processor for single-turn conversations
* `evaluation_test`: Decorator for configuring evaluation tests
* `evaluate_apps_solution`: Specialized function for evaluating APPS competitive programming solutions
## Step 2: Create the Dataset Adapter
We need to convert the APPS dataset format to the EP's expected format:
```python
def apps_dataset_to_evaluation_row(data: List[Dict[str, Any]]) -> List[EvaluationRow]:
"""
Convert entries from APPS dataset to EvaluationRow objects.
This adapter extracts the problem statement and stores the comprehensive
test cases (input/output pairs) as ground truth for evaluation.
Args:
data: List of APPS dataset entries with problem descriptions and test cases
Returns:
List of EvaluationRow objects ready for evaluation
"""
return [
EvaluationRow(
messages=[Message(role="user", content=row["question"])],
ground_truth=row["input_output"]
)
for row in data
]
```
This adapter:
* Uses the complete problem description as the user message
* Stores the JSON test case data as ground truth for comprehensive evaluation
* Preserves the complex input/output format required for competitive programming
* Creates proper Message objects for the evaluation framework
**Key transformations:**
* **Problem preservation**: Maintains full problem statements with constraints and examples
* **Test case handling**: Preserves multiple test cases with complex input/output formats
* **Ground truth format**: Keeps JSON structure for sophisticated evaluation logic
## Step 3: Configure and Run the Evaluation
We use the `@evaluation_test` decorator to configure the APPS evaluation:
```python
@evaluation_test(
input_dataset=["tests/pytest/data/apps_sample_dataset.jsonl"],
dataset_adapter=apps_dataset_to_evaluation_row,
completion_params=[{"model": "accounts/fireworks/models/kimi-k2-instruct", "temperature": 0.0, "max_tokens": 4096}],
passed_threshold=0.33,
rollout_processor=SingleTurnRolloutProcessor(),
num_runs=1,
mode="pointwise",
)
def test_apps_code_evaluation(row: EvaluationRow) -> EvaluationRow:
"""
Evaluation function that tests APPS coding problems using evaluate_apps_solution.
Args:
row: EvaluationRow containing the conversation messages and ground_truth as JSON string
Returns:
EvaluationRow with the evaluation result
"""
# Use evaluate_apps_solution directly
result = evaluate_apps_solution(
messages=row.messages,
ground_truth=row.ground_truth,
)
# Set the evaluation result on the row
row.evaluation_result = result
return row
```
**Configuration parameters:**
* `input_dataset`: Path to the APPS dataset JSONL file
* `model`: The model to evaluate (uses a capable model for complex problems)
* `rollout_input_params`: Model parameters with higher token limit for complex solutions
* `threshold_of_success`: 33% success rate threshold (competitive programming is challenging)
* `mode`: `pointwise` for evaluating individual problems independently
* `dataset_adapter`: Function that converts APPS format to EvaluationRow objects
* `rollout_processor`: Uses default single-turn processor
**Evaluation process:**
1. **Problem presentation**: Present the full competitive programming problem to the model
2. **Solution generation**: Model generates a complete algorithmic solution
3. **Code extraction**: Extract Python code from the model's response
4. **Comprehensive testing**: Run solution against all test cases in the problem
5. **Pass rate calculation**: Calculate percentage of test cases passed
## Core Functions Explained
### `evaluate_apps_solution` Function
The `evaluate_apps_solution` function is a specialized evaluation function designed for competitive programming problems that handles complex test case execution and scoring.
**Key Features:**
* **Code extraction**: Identifies and extracts Python code from model responses
* **Test case parsing**: Processes JSON test case data with multiple input/output pairs
* **Secure execution**: Runs code safely with timeouts and resource limitations
* **Comprehensive scoring**: Calculates pass rates across all test cases
* **Error handling**: Provides detailed feedback on compilation and runtime errors
* **Competitive format support**: Handles standard input/output format used in contests
**Function Signature:**
```python
def evaluate_apps_solution(
messages: List[Message],
ground_truth: Optional[str],
**kwargs
) -> EvaluateResult:
```
**Parameters:**
* `messages`: List of conversation messages (problem statement from user, solution from assistant)
* `ground_truth`: JSON string containing test cases with inputs and expected outputs
* `**kwargs`: Additional parameters including execution timeout settings
**Return Value:**
* `EvaluateResult` with pass rate score (0.0 to 1.0) and detailed metrics
### Implementation Details
The `evaluate_apps_solution` function implements a comprehensive evaluation pipeline with robust security and error handling:
**1. Code Extraction Process:**
````python
# Extract Python code from model response
code_solution = _extract_python_code(raw_solution_content)
# Handles various response formats:
# - Markdown code blocks: ```python ... ```
# - Inline code snippets
# - Mixed text and code responses
# - Removes verbose explanations and comments
````
**2. Ground Truth Processing:**
```python
# Parse JSON test case data
if isinstance(ground_truth, str):
in_outs = json.loads(ground_truth) # Parse JSON string
elif isinstance(ground_truth, dict):
in_outs = ground_truth # Already parsed by JSONL loader
# Validate required structure
assert "inputs" in in_outs and "outputs" in in_outs
```
**3. Secure Test Execution:**
The evaluation uses sandboxed execution with comprehensive security measures:
```python
# Force standard input execution path and prepare secure environment
in_outs_for_check = in_outs.copy()
if "fn_name" in in_outs_for_check:
del in_outs_for_check["fn_name"] # Use stdin/stdout testing
# For each test case in the problem:
for i, (test_input, expected_output) in enumerate(zip(inputs, outputs)):
# Prepare secure execution environment
wrapped_code = f"""
import sys
sys.setrecursionlimit(6*10**5)
{standard_imports} # Common competitive programming imports
{user_generated_code}
"""
# Execute in isolated subprocess with resource limits
process = subprocess.run(
[sys.executable, "-c", wrapped_code],
input=test_input,
capture_output=True,
timeout=timeout,
text=True
)
# Compare outputs and record result
if process.returncode == 0:
actual_output = process.stdout.strip()
results.append(actual_output == expected_output.strip())
else:
results.append(False) # Runtime error
```
**Security Features:**
* **Sandboxed execution**: Code runs in isolated subprocess with resource limits
* **Standard I/O redirection**: Test inputs via stdin, outputs captured from stdout
* **Security restrictions**: File system access, network operations, and dangerous imports disabled
* **Resource monitoring**: Memory usage, CPU time, and execution duration tracked
* **Timeout enforcement**: Long-running or infinite loops automatically terminated
**4. Scoring and Error Analysis:**
```python
# Calculate pass rate from results
actual_results = results_list # List of True/False for each test case
num_tests = len(actual_results)
passed_count = sum(1 for res in actual_results if res is True)
score = float(passed_count) / num_tests
# Process execution metadata for detailed error reporting
if exec_metadata_list:
if len(exec_metadata_list) == 1 and exec_metadata_list[0].get("error"):
# Global compilation error
reason_msg += f" Execution Error: {exec_metadata_list[0]['error']}"
elif score == 0.0 and exec_metadata_list[0].get("error_message") == "Wrong Answer":
# Detailed failure analysis with specific test case details
first_fail_meta = exec_metadata_list[0]
reason_msg += (
f". First fail details: Inputs: {first_fail_meta.get('inputs', 'N/A')}, "
f"Expected: {first_fail_meta.get('expected', 'N/A')}, "
f"Got: {first_fail_meta.get('output', 'N/A')}"
)
```
**Error Handling Hierarchy:**
1. **Code extraction failure**: Score 0.0 - No valid Python code found
2. **Compilation errors**: Score 0.0 - Syntax errors prevent execution
3. **Runtime errors**: Per-test-case failure - Exceptions during execution
4. **Timeout errors**: Per-test-case failure - Exceeded time limits
5. **Wrong output**: Per-test-case failure - Incorrect results but valid execution
6. **Perfect execution**: Score 1.0 - All test cases pass with correct outputs
**Result Types:**
* **True**: Test case passed with correct output
* **False**: Test case failed (wrong output)
* **-1**: Runtime error or timeout
* **-2**: Compilation error
**Example Evaluation Flow:**
```python
# Problem: Mikhail's diagonal moves (from example above)
# Model generates solution
result = evaluate_apps_solution(
messages=[Message(role="user", content=problem_description)],
ground_truth='{"inputs": ["3\\n2 2 3\\n4 3 7\\n10 1 9\\n"], "outputs": ["1\\n6\\n-1\\n"]}'
)
# Result might be:
# EvaluateResult(
# score=1.0, # All test cases passed
# reason="Passed 1/1 test cases",
# metrics={
# "pass_rate": MetricResult(score=1.0, reason="1/1"),
# "execution_metadata": MetricResult(...)
# }
# )
```
## Evaluation Scenarios and Results
The APPS coding evaluation handles various competitive programming scenarios:
### Perfect Solution (Score: 1.0)
**Scenario**: Model correctly solves all test cases
```python
# Problem: Mikhail's diagonal moves
# Model provides optimal solution using coordinate geometry
q = int(input())
for _ in range(q):
x, y, k = list(map(int, input().split()))
x, y = abs(x), abs(y)
# ... correct algorithm implementation
# Handles all coordinate movement constraints
# Result: ✅ Passed 3/3 test cases (100% success rate)
```
### Partial Solution (Score: 0.67)
**Scenario**: Model solves most test cases but fails on edge cases
```python
# Problem: Mikhail's diagonal moves
# Model has correct main logic but misses boundary condition
q = int(input())
for _ in range(q):
x, y, k = list(map(int, input().split()))
# ... mostly correct implementation
# Fails on impossible movement case
# Result: ⚠️ Passed 2/3 test cases (67% success rate)
```
### Algorithmic Error (Score: 0.0)
**Scenario**: Model uses incorrect algorithm approach
```python
# Problem: Mikhail's diagonal moves
# Model uses incorrect movement calculation
q = int(input())
for _ in range(q):
x, y, k = list(map(int, input().split()))
# Incorrect approach - doesn't consider diagonal optimization
print(k) # Always outputs k regardless of constraints
# Result: ❌ Passed 0/3 test cases - Wrong algorithmic approach
```
### Timeout Error (Score: 0.0)
**Scenario**: Model solution exceeds time limits
```python
# Problem: Mikhail's diagonal moves
# Model uses inefficient brute force instead of mathematical approach
q = int(input())
for _ in range(q):
x, y, k = list(map(int, input().split()))
# Simulates all possible paths - exponential complexity
# Times out on larger coordinate values
# Result: ❌ Execution timeout - Algorithm too slow for constraints
```
### Compilation Error (Score: 0.0)
**Scenario**: Model generates syntactically incorrect code
```python
# Problem: Mikhail's diagonal moves
# Model has syntax errors
q = int(input())
for _ in range(q) # Missing colon
x, y, k = list(map(int, input().split()))
# ... rest of solution
# Result: ❌ Compilation error: SyntaxError - Invalid Python syntax
```
## Conclusion
This APPS coding evaluation demonstrates how to assess AI models' competitive programming capabilities using comprehensive algorithmic challenges. The evaluation ensures models can understand complex problem statements, design efficient algorithms, and implement solutions that pass rigorous test suites.
This evaluation is particularly valuable for:
* **Algorithmic reasoning assessment**: Testing advanced problem-solving capabilities
* **Competitive programming preparation**: Validating solutions against contest-quality problems
* **Algorithm implementation**: Ensuring correct and efficient code generation
The APPS evaluation focuses on **algorithmic correctness and efficiency** rather than simple function implementation, making it essential for building AI systems capable of sophisticated problem-solving. It provides comprehensive testing with real competitive programming challenges and detailed performance metrics.
# Basic Coding Evaluation
Source: https://evalprotocol.io/example/basic-coding
Evaluate code correctness by executing Python functions and comparing outputs
This example demonstrates how to create comprehensive basic coding evaluations using the Eval Protocol (EP) framework. The evaluation uses code execution functions to test whether models can write correct Python functions that produce expected outputs when executed with specific inputs.
You can find the complete code for this example at [test\_basic\_coding.py](https://github.com/eval-protocol/python-sdk/blob/main/tests/pytest/test_basic_coding.py).
## Understanding Basic Coding Evaluation
Basic coding evaluation assesses a model's ability to:
* **Write syntactically correct code**: Generate valid Python syntax without errors
* **Implement correct logic**: Create functions that perform the specified operations
* **Handle different inputs**: Process various input values correctly (positive, negative, zero, edge cases)
* **Produce exact outputs**: Return results that match expected values precisely
Unlike text-based evaluations that focus on natural language generation, coding evaluations test a model's **programming capabilities and logical reasoning** - essential skills for AI systems that need to write functional code.
## Understanding the Dataset Structure
The basic coding dataset contains simple programming tasks that evaluate fundamental coding skills, from arithmetic operations to data structure manipulation.
### Dataset Format
Each entry in the dataset contains:
* **`prompt`**: The coding task description specifying what function to write
* **`input`**: Test input value to pass to the function
* **`expected_output`**: The correct output the function should return
### Example Dataset Entries
**Simple Addition Function:**
```json
{
"prompt": "Write a Python function `add_one` that takes an integer and returns the integer incremented by 1.",
"input": "5",
"expected_output": "6"
}
```
**Multiplication Function:**
```json
{
"prompt": "Write a Python function `multiply_by_two` that takes an integer and returns the integer multiplied by 2.",
"input": "3",
"expected_output": "6"
}
```
**List Operations:**
```json
{
"prompt": "Write a Python function `get_length` that takes a list and returns its length.",
"input": "[1, 2, 3]",
"expected_output": "3"
}
```
## Step 1: Import Required Dependencies
First, we import the necessary modules from the EP framework:
```python
from typing import Any, Dict, List
from eval_protocol.models import EvaluateResult, EvaluationRow, Message
from eval_protocol.pytest import SingleTurnRolloutProcessor, evaluation_test
from eval_protocol.rewards.code_execution import extract_code_blocks, execute_python_code
```
* `typing`: Python's typing module for type hints (Any, Dict, List)
* `EvaluateResult`: Result object containing evaluation score and reasoning
* `EvaluationRow`: Data structure containing conversation messages and ground truth
* `Message`: Individual message in the conversation
* `default_single_turn_rollout_processor`: Default processor for single-turn conversations
* `evaluation_test`: Decorator for configuring evaluation tests
* `extract_code_blocks`: Function to extract Python code from markdown code blocks
* `execute_python_code`: Function to safely execute Python code and capture output
## Step 2: Create the Dataset Adapter
We need to convert the basic coding dataset format to the EP's expected format:
```python
def coding_dataset_to_evaluation_row(data: List[Dict[str, Any]]) -> List[EvaluationRow]:
"""
Convert entries from coding dataset to EvaluationRow objects.
This adapter combines the coding prompt with the test input to create
a complete user message, and stores the expected output as ground truth
for comparison during evaluation.
Args:
data: List of coding dataset entries with prompt, input, and expected_output
Returns:
List of EvaluationRow objects ready for evaluation
"""
return [
EvaluationRow(
messages=[Message(role="user", content=f"{row['prompt']} Input: {row['input']}")],
ground_truth=row["expected_output"]
)
for row in data
]
```
This adapter:
* Combines the coding prompt with the test input into a single user message
* Stores the expected output as ground truth for comparison
* Creates Message objects with the proper role and content structure
* Returns a list of EvaluationRow objects that the framework can process
**Key transformations:**
* **Message construction**: Combines prompt and input into clear instructions
* **Ground truth preservation**: Maintains expected output for exact comparison
* **Role assignment**: Sets proper user role for the coding request
## Step 3: Configure and Run the Evaluation
We use the `@evaluation_test` decorator to configure the evaluation:
```python
@evaluation_test(
input_dataset=["tests/pytest/data/basic_coding_dataset.jsonl"],
dataset_adapter=coding_dataset_to_evaluation_row,
completion_params=[{"model": "accounts/fireworks/models/kimi-k2-instruct", "temperature": 0.0, "max_tokens": 4096}],
passed_threshold=0.8,
rollout_processor=SingleTurnRolloutProcessor(),
num_runs=1,
mode="pointwise",
)
async def test_coding_code_evaluation(row: EvaluationRow) -> EvaluationRow:
"""
Evaluation function that tests code correctness by executing it locally.
This function:
1. Extracts Python code from the assistant's response
2. Executes the code locally with timeout=10
3. Compares the output to ground_truth
4. Returns a score of 1.0 if output matches, 0.0 otherwise
Args:
row: EvaluationRow containing the conversation messages and expected_output in ground_truth
Returns:
EvaluationRow with the evaluation result
"""
# Check if we have an assistant response
if len(row.messages) < 2 or row.messages[-1].role != "assistant":
row.evaluation_result = EvaluateResult(score=0.0, reason="No assistant response found")
return row
assistant_content = row.messages[-1].content or ""
expected_output = (row.ground_truth or "").strip()
# Extract Python code blocks
code_blocks = extract_code_blocks(assistant_content, language="python")
if not code_blocks:
row.evaluation_result = EvaluateResult(score=0.0, reason="No Python code block found")
return row
code = code_blocks[0]["code"]
# Execute the code locally
execution_result = execute_python_code(code, timeout=10)
if not execution_result.get("success", False):
error_msg = execution_result.get("error", "Code execution failed")
row.evaluation_result = EvaluateResult(score=0.0, reason=f"Execution error: {error_msg}")
return row
# Compare output with expected
actual_output = (execution_result.get("output", "") or "").strip()
if actual_output == expected_output:
row.evaluation_result = EvaluateResult(
score=1.0,
reason=f"✅ Output matches: '{actual_output}'"
)
else:
row.evaluation_result = EvaluateResult(
score=0.0,
reason=f"❌ Expected: '{expected_output}', Got: '{actual_output}'"
)
return row
```
**Configuration parameters:**
* `input_dataset`: Path to the basic coding dataset JSONL file
* `model`: The model to evaluate (Fireworks Kimi model in this case)
* `rollout_input_params`: Model parameters including temperature=0.0 for deterministic results
* `threshold_of_success`: 80% success rate threshold for the evaluation
* `mode`: `pointwise` for evaluating individual rows independently
* `dataset_adapter`: Function that converts coding format to EvaluationRow objects
* `rollout_processor`: Uses default single-turn processor for coding evaluations
**Evaluation process:**
1. **Validate response**: Ensure we have a valid assistant response containing code
2. **Extract code**: Use `extract_code_blocks` to find Python code in markdown blocks
3. **Execute safely**: Run the code in a secure environment with timeout protection
4. **Compare output**: Perform exact string comparison between actual and expected results
5. **Return score**: Provide binary score (1.0 for exact match, 0.0 for any difference)
## Core Functions Explained
### `extract_code_blocks` Function
The `extract_code_blocks` function identifies and extracts Python code from the model's response, typically from markdown code blocks.
**Key Features:**
* **Markdown parsing**: Identifies \`\`\`python code blocks in responses
* **Language filtering**: Can filter for specific programming languages
* **Content cleaning**: Removes verbose explanatory text that might interfere with execution
* **Multiple blocks**: Can extract multiple code blocks if present
**Function Signature:**
```python
def extract_code_blocks(text: str, language: Optional[str] = None) -> List[Dict[str, str]]:
```
**Parameters:**
* `text`: The assistant's response containing code
* `language`: Optional language filter (e.g., "python")
**Return Value:**
* List of dictionaries with "code" and "language" keys
**Example Usage:**
```python
response = """
Here's the solution:
\`\`\`python
def add_one(x):
return x + 1
\`\`\`
This function takes an integer and returns it incremented by 1.
"""
code_blocks = extract_code_blocks(response, language="python")
print(code_blocks[0]["code"]) # "def add_one(x):\n return x + 1"
```
### `execute_python_code` Function
The `execute_python_code` function safely executes Python code in a controlled environment with security restrictions and resource limits.
**Key Features:**
* **Secure execution**: Runs code in a subprocess with memory and time limits
* **Safety guards**: Disables dangerous operations like file system access
* **Timeout protection**: Prevents infinite loops and long-running code
* **Error handling**: Captures and reports execution errors clearly
* **Output capture**: Returns both stdout and stderr from execution
**Function Signature:**
```python
def execute_python_code(code: str, timeout: int = 5) -> Dict[str, Any]:
```
**Parameters:**
* `code`: Python code to execute
* `timeout`: Maximum execution time in seconds
**Return Value:**
* Dictionary with execution results including success status, output, and errors
**Example Usage:**
```python
code = """
def add_one(x):
return x + 1
result = add_one(5)
print(result)
"""
result = execute_python_code(code, timeout=10)
if result["success"]:
print(f"Output: {result['output']}") # "Output: 6"
else:
print(f"Error: {result['error']}")
```
### Security and Safety Features
The code execution environment includes several safety measures:
**Resource Limits:**
* **Memory limits**: Restricts memory usage to prevent excessive consumption
* **CPU limits**: Prevents long-running computations
* **Timeout enforcement**: Kills processes that exceed time limits
**Disabled Operations:**
* **File system access**: Prevents reading/writing files
* **Network operations**: Blocks network requests
* **System calls**: Disables potentially dangerous system operations
* **Process spawning**: Prevents creating new processes
**Error Handling:**
* **Exception capture**: Catches and reports Python exceptions
* **Timeout detection**: Identifies and reports timeout errors
* **Resource exhaustion**: Handles memory and CPU limit violations
## Evaluation Scenarios and Results
The basic coding evaluation handles various scenarios with different outcomes:
### Perfect Implementation (Score: 1.0)
**Scenario**: Model writes correct function that produces expected output
```python
# User prompt: "Write a Python function `add_one` that takes an integer and returns the integer incremented by 1. Input: 5"
# Model response:
def add_one(x):
return x + 1
result = add_one(5)
print(result)
```
**Result**: ✅ Output matches: '6' - Function correctly implements the required logic
### Syntax Error (Score: 0.0)
**Scenario**: Model writes code with syntax errors
```python
# User prompt: "Write a Python function `add_one` that takes an integer and returns the integer incremented by 1. Input: 5"
# Model response:
def add_one(x) # Missing colon
return x + 1
result = add_one(5)
print(result)
```
**Result**: ❌ Execution error: SyntaxError - Invalid Python syntax prevents execution
### Logic Error (Score: 0.0)
**Scenario**: Model writes syntactically correct but logically incorrect code
```python
# User prompt: "Write a Python function `add_one` that takes an integer and returns the integer incremented by 1. Input: 5"
# Model response:
def add_one(x):
return x + 2 # Wrong logic: adds 2 instead of 1
result = add_one(5)
print(result)
```
**Result**: ❌ Expected: '6', Got: '7' - Logic error produces wrong output
### Missing Function Call (Score: 0.0)
**Scenario**: Model defines function but doesn't call it with the input
```python
# User prompt: "Write a Python function `add_one` that takes an integer and returns the integer incremented by 1. Input: 5"
# Model response:
def add_one(x):
return x + 1
# Missing: result = add_one(5)
# Missing: print(result)
```
**Result**: ❌ Expected: '6', Got: '' - No output produced
### Runtime Error (Score: 0.0)
**Scenario**: Model writes code that fails during execution
```python
# User prompt: "Write a Python function `get_length` that takes a list and returns its length. Input: [1, 2, 3]"
# Model response:
def get_length(lst):
return lst.length() # Wrong method: should use len()
result = get_length([1, 2, 3])
print(result)
```
**Result**: ❌ Execution error: AttributeError - Runtime error during function call
### Edge Case Handling (Score: 1.0)
**Scenario**: Model correctly handles edge cases like empty lists or zero values
```python
# User prompt: "Write a Python function `get_length` that takes a list and returns its length. Input: []"
# Model response:
def get_length(lst):
return len(lst)
result = get_length([])
print(result)
```
**Result**: ✅ Output matches: '0' - Correctly handles empty list edge case
## Conclusion
This basic coding evaluation demonstrates how to assess AI models' programming capabilities using code execution and output comparison. The evaluation ensures models can write syntactically correct code, implement proper logic, handle various inputs, and produce exact expected outputs.
This evaluation is particularly valuable for:
* **AI model assessment**: Evaluating language models' programming capabilities
* **Code generation tools**: Validating the correctness of automatically generated code
* **Algorithm testing**: Ensuring implementations produce correct results
The basic coding evaluation focuses on **functional correctness** rather than code style or efficiency, making it essential for building reliable AI systems that can write working code. It provides objective scoring with secure execution, immediate feedback, and scalable automated testing.
# Function Calling Evaluation
Source: https://evalprotocol.io/example/function-calling
Evaluate function calling accuracy with exact tool match comparison
This example demonstrates how to create comprehensive function calling evaluations using the Eval Protocol (EP) framework. The evaluation uses the `exact_tool_match_reward` function to assess whether models correctly call the right functions with the correct arguments in the expected format.
You can find the complete code for this example at [test\_pytest\_function\_calling.py](https://github.com/eval-protocol/python-sdk/blob/main/tests/pytest/test_pytest_function_calling.py).
## Understanding Function Calling Evaluation
Function calling evaluation assesses a model's ability to:
* **Identify when to use tools**: Determine if a user query requires function execution
* **Select the correct function**: Choose the appropriate tool from available options
* **Provide accurate arguments**: Pass the right parameters with correct values
* **Follow proper formatting**: Use the expected tool call structure
Unlike text-based evaluations that focus on content generation, function calling evaluations test a model's **tool selection and parameterization capabilities** - critical skills for AI agents that interact with external systems.
## Understanding the Dataset Structure
The function calling dataset contains diverse test cases that evaluate different aspects of tool usage, from simple weather queries to complex nested object creation.
### Dataset Format
Each entry in the dataset contains:
* **`messages`**: Conversation history with user queries and assistant responses
* **`tools`**: Available function definitions with schemas
* **`ground_truth`**: Expected tool calls in JSON format
* **`evaluation_result`**: Pre-computed evaluation scores for validation
* **`input_metadata`**: Additional context including task type and difficulty
### Example Dataset Entries
**Perfect Match - Weather Query:**
```json
{
"messages": [
{"role": "user", "content": "What's the weather in London?"},
{
"role": "assistant",
"tool_calls": [
{
"type": "function",
"function": {
"name": "get_weather",
"arguments": "{\"location\": \"London\", \"unit\": \"celsius\"}"
}
}
]
}
],
"tools": [
{
"type": "function",
"function": {
"name": "get_weather",
"description": "Get weather information for a location",
"parameters": {
"type": "object",
"properties": {
"location": {"type": "string", "description": "The city name"},
"unit": {
"type": "string",
"enum": ["celsius", "fahrenheit"],
"description": "Temperature unit"
}
},
"required": ["location", "unit"]
}
}
}
],
"ground_truth": "{\"tool_calls\": [{\"type\": \"function\", \"function\": {\"name\": \"get_weather\", \"arguments\": \"{\\\"location\\\": \\\"London\\\", \\\"unit\\\": \\\"celsius\\\"}\"}}]}",
"input_metadata": {
"row_id": "weather_london_perfect",
"dataset_info": {"task_type": "function_calling", "difficulty": "easy"}
}
}
```
**Argument Mismatch - Wrong Unit:**
```json
{
"messages": [
{"role": "user", "content": "What's the weather in London?"},
{
"role": "assistant",
"tool_calls": [
{
"type": "function",
"function": {
"name": "get_weather",
"arguments": "{\"location\": \"London\", \"unit\": \"fahrenheit\"}"
}
}
]
}
],
"tools": [
{
"type": "function",
"function": {
"name": "get_weather",
"description": "Get weather information for a location",
"parameters": {
"type": "object",
"properties": {
"location": {"type": "string", "description": "The city name"},
"unit": {
"type": "string",
"enum": ["celsius", "fahrenheit"],
"description": "Temperature unit"
}
},
"required": ["location", "unit"]
}
}
}
],
"ground_truth": "{\"tool_calls\": [{\"type\": \"function\", \"function\": {\"name\": \"get_weather\", \"arguments\": \"{\\\"location\\\": \\\"London\\\", \\\"unit\\\": \\\"celsius\\\"}\"}}]}",
"input_metadata": {
"row_id": "weather_london_unit_mismatch",
"dataset_info": {"task_type": "function_calling", "difficulty": "easy"}
}
}
```
**Function Name Mismatch:**
```json
{
"messages": [
{"role": "user", "content": "What's the weather in London?"},
{
"role": "assistant",
"tool_calls": [
{
"type": "function",
"function": {
"name": "fetch_weather",
"arguments": "{\"location\": \"London\", \"unit\": \"celsius\"}"
}
}
]
}
],
"tools": [
{
"type": "function",
"function": {
"name": "get_weather",
"description": "Get weather information for a location",
"parameters": {
"type": "object",
"properties": {
"location": {"type": "string", "description": "The city name"},
"unit": {
"type": "string",
"enum": ["celsius", "fahrenheit"],
"description": "Temperature unit"
}
},
"required": ["location", "unit"]
}
}
}
],
"ground_truth": "{\"tool_calls\": [{\"type\": \"function\", \"function\": {\"name\": \"get_weather\", \"arguments\": \"{\\\"location\\\": \\\"London\\\", \\\"unit\\\": \\\"celsius\\\"}\"}}]}",
"input_metadata": {
"row_id": "weather_london_name_mismatch",
"dataset_info": {"task_type": "function_calling", "difficulty": "easy"}
}
}
```
**No Tool Call Expected:**
```json
{
"messages": [
{"role": "user", "content": "Tell me a joke."},
{"role": "assistant", "content": "Why did the chicken cross the road?"}
],
"tools": [],
"ground_truth": "{\"tool_calls\": []}",
"input_metadata": {
"row_id": "joke_no_calls",
"dataset_info": {"task_type": "function_calling", "difficulty": "easy"}
}
}
```
**Complex Nested Object Creation:**
```json
{
"messages": [
{"role": "user", "content": "Create a user for John Doe"},
{
"role": "assistant",
"tool_calls": [
{
"type": "function",
"function": {
"name": "create_user",
"arguments": "{\"user\": {\"firstName\": \"John\", \"lastName\": \"Doe\", \"age\": 30}}"
}
}
]
}
],
"tools": [
{
"type": "function",
"function": {
"name": "create_user",
"description": "Create a new user",
"parameters": {
"type": "object",
"properties": {
"user": {
"type": "object",
"properties": {
"firstName": {"type": "string"},
"lastName": {"type": "string"},
"age": {"type": "number"}
},
"required": ["firstName", "lastName", "age"]
}
},
"required": ["user"]
}
}
}
],
"ground_truth": "{\"tool_calls\": [{\"type\": \"function\", \"function\": {\"name\": \"create_user\", \"arguments\": \"{\\\"user\\\": {\\\"firstName\\\": \\\"John\\\", \\\"lastName\\\": \\\"Doe\\\", \\\"age\\\": 30}}\"}}]}",
"input_metadata": {
"row_id": "create_user_nested",
"dataset_info": {"task_type": "function_calling", "difficulty": "hard"}
}
}
```
### Dataset Characteristics
**Test Scenarios**: The dataset covers various function calling challenges:
* **Perfect matches**: Correct function name and arguments
* **Argument mismatches**: Wrong parameter values (e.g., wrong temperature unit)
* **Function name errors**: Calling non-existent or wrong functions
* **Extra calls**: Making unnecessary tool calls
* **Missing calls**: Failing to call required functions
* **No-call scenarios**: Queries that don't require function execution
* **Complex objects**: Nested parameter structures
* **Invalid JSON**: Malformed argument strings
**Tool Types**: Various function categories:
* **Weather services**: Location-based queries with units
* **User management**: CRUD operations with complex objects
* **Data retrieval**: Search and find operations
* **Utility functions**: Simple parameterized operations
**Difficulty Levels**: Progressive complexity:
* **Easy**: Simple single-parameter calls
* **Medium**: Multi-parameter calls with validation
* **Hard**: Nested object structures and complex schemas
## Step 1: Import Required Dependencies
First, we import the necessary modules from the EP framework:
```python
import json
from typing import Any, Dict, List
from eval_protocol.models import EvaluationRow
from eval_protocol.pytest import SingleTurnRolloutProcessor, evaluation_test
from eval_protocol.rewards.function_calling import exact_tool_match_reward
```
* `json`: Python's JSON module for parsing ground truth data
* `typing`: Python's typing module for type hints (Any, Dict, List)
* `EvaluationRow`: The data structure containing conversation messages and metadata
* `default_single_turn_rollout_processor`: Default processor for single-turn conversations
* `evaluation_test`: Decorator for configuring evaluation tests
* `exact_tool_match_reward`: Built-in function calling evaluation function
## Step 2: Create the Dataset Adapter
We need to convert the function calling dataset format to the EP's expected format:
```python
def function_calling_to_evaluation_row(rows: List[Dict[str, Any]]) -> List[EvaluationRow]:
"""
Convert function calling dataset entries to EvaluationRow objects.
This adapter extracts the conversation messages, available tools, and ground truth
from the function calling dataset format and creates EvaluationRow objects that
the EP framework can process.
Args:
rows: List of function calling dataset entries
Returns:
List of EvaluationRow objects ready for evaluation
"""
dataset: List[EvaluationRow] = []
for row in rows:
dataset.append(
EvaluationRow(
messages=row["messages"][:1], # Only the user message
tools=row["tools"], # Available function definitions
ground_truth=row["ground_truth"] # Expected tool calls
)
)
return dataset
```
This adapter:
* Takes the raw function calling dataset as a list of dictionaries
* Extracts the user message (first message in the conversation)
* Includes the available tools/function definitions
* Sets the ground truth to the expected tool calls
* Returns the list of evaluation rows
**Key transformations:**
* **Message extraction**: Uses only the user message since the assistant's response will be generated during evaluation
* **Tool preservation**: Maintains the function schemas for context
* **Ground truth**: Preserves the expected tool calls for comparison
## Step 3: Configure and Run the Evaluation
We use the `@evaluation_test` decorator to configure the evaluation:
```python
@evaluation_test(
input_dataset=["tests/pytest/data/function_calling.jsonl"],
completion_params=[{"model": "accounts/fireworks/models/kimi-k2-instruct"}],
mode="pointwise",
dataset_adapter=function_calling_to_evaluation_row,
rollout_processor=SingleTurnRolloutProcessor(),
)
async def test_pytest_function_calling(row: EvaluationRow) -> EvaluationRow:
"""Run pointwise evaluation on sample dataset using pytest interface."""
ground_truth = json.loads(row.ground_truth)
result = exact_tool_match_reward(row.messages, ground_truth)
row.evaluation_result = result
print(result)
return row
```
**Configuration parameters:**
* `input_dataset`: Path to the function calling dataset JSONL file
* `model`: The model to evaluate (Fireworks Kimi model in this case)
* `mode`: `pointwise` for evaluating individual rows since each row can be evaluated independently
* `dataset_adapter`: Function that converts function calling format to EvaluationRow objects
* `rollout_processor`: Uses default single-turn processor for function calling evaluations
**Evaluation process:**
1. **Parse ground truth**: Convert the JSON string to a dictionary for comparison
2. **Extract tool calls**: The `exact_tool_match_reward` function analyzes the assistant's response
3. **Compare exactly**: Check if function names, arguments, and order match perfectly
4. **Return results**: Provide binary score (1.0 for perfect match, 0.0 for any mismatch)
## Core Functions Explained
### `exact_tool_match_reward` Function
The `exact_tool_match_reward` function is a built-in evaluation function that performs exact matching between generated and expected tool calls. It's located in `eval_protocol.rewards.function_calling`.
**Key Features:**
* **Exact matching**: Requires perfect alignment of function names, arguments, and order
* **Multiple formats**: Handles both structured tool calls and XML-formatted calls
* **JSON parsing**: Automatically deserializes and normalizes tool call arguments
* **Robust comparison**: Uses sorted JSON serialization for consistent comparison
* **Error handling**: Gracefully handles malformed inputs and edge cases
**Function Signature:**
```python
def exact_tool_match_reward(
messages: Union[List[Message], List[Dict[str, Any]]],
ground_truth: Optional[Dict[str, Any]] = None,
**kwargs: Any,
) -> EvaluateResult:
```
**Parameters:**
* `messages`: List of conversation messages (extracts tool calls from the last assistant message)
* `ground_truth`: Expected tool calls dictionary for comparison
* `**kwargs`: Additional parameters (not used in this implementation)
**Return Value:**
* `EvaluateResult` with score (1.0 for exact match, 0.0 for any mismatch) and detailed reasoning
**Example Usage:**
```python
result = exact_tool_match_reward(
messages=messages,
ground_truth={
"tool_calls": [
{
"type": "function",
"function": {
"name": "get_weather",
"arguments": '{"location": "London", "unit": "celsius"}'
}
}
]
}
)
print(f"Score: {result.score}") # 1.0 if exact match, 0.0 otherwise
print(f"Reason: {result.reason}") # Detailed explanation of the evaluation
```
### `eval_tool_call` Function
The core evaluation logic is implemented in the `eval_tool_call` function, which handles the detailed comparison of tool calls.
**Function Signature:**
```python
def eval_tool_call(generation: dict, ground_truth: dict) -> bool:
```
**Implementation Details:**
1. **Extract expected calls**: Parse ground truth tool calls from the expected format
2. **Process generated calls**: Handle both structured tool calls and XML-formatted calls
3. **Normalize formats**: Convert all calls to a consistent internal format
4. **Compare exactly**: Use JSON serialization with sorted keys for deterministic comparison
**Supported Formats:**
* **Structured tool calls**: Standard OpenAI format with `tool_calls` array
* **XML-formatted calls**: `...` tags in content
* **Mixed formats**: Combinations of different call types
### `compare_tool_calls` Function
The final comparison is performed by the `compare_tool_calls` function, which ensures exact matching.
**Function Signature:**
```python
def compare_tool_calls(generated_tool_calls: list, gt_tool_calls: list) -> bool:
```
**Comparison Logic:**
1. **Length check**: Number of tool calls must match exactly
2. **JSON serialization**: Convert each tool call to sorted JSON string
3. **Exact matching**: Compare serialized strings for perfect equality
4. **Order matters**: Tool calls must be in the same sequence
**Example Comparison:**
```python
# Generated calls
generated = [
{"name": "get_weather", "arguments": '{"location": "London", "unit": "celsius"}'}
]
# Expected calls
expected = [
{"name": "get_weather", "arguments": '{"location": "London", "unit": "celsius"}'}
]
# Result: True (exact match)
```
## Evaluation Scenarios and Results
The function calling evaluation handles various scenarios with different outcomes:
### Perfect Match (Score: 1.0)
**Scenario**: Model calls the exact function with correct arguments
```json
{
"generated": {"name": "get_weather", "arguments": "{\"location\": \"London\", \"unit\": \"celsius\"}"},
"expected": {"name": "get_weather", "arguments": "{\"location\": \"London\", \"unit\": \"celsius\"}"}
}
```
**Result**: ✅ Perfect match - all function names, arguments, and order are correct
### Argument Mismatch (Score: 0.0)
**Scenario**: Model calls correct function but with wrong arguments
```json
{
"generated": {"name": "get_weather", "arguments": "{\"location\": \"London\", \"unit\": \"fahrenheit\"}"},
"expected": {"name": "get_weather", "arguments": "{\"location\": \"London\", \"unit\": \"celsius\"}"}
}
```
**Result**: ❌ Argument mismatch - wrong temperature unit specified
### Function Name Error (Score: 0.0)
**Scenario**: Model calls wrong function name
```json
{
"generated": {"name": "fetch_weather", "arguments": "{\"location\": \"London\", \"unit\": \"celsius\"}"},
"expected": {"name": "get_weather", "arguments": "{\"location\": \"London\", \"unit\": \"celsius\"}"}
}
```
**Result**: ❌ Function name error - called non-existent function
### Extra Tool Call (Score: 0.0)
**Scenario**: Model makes unnecessary additional calls
```json
{
"generated": [
{"name": "get_weather", "arguments": "{\"location\": \"London\"}"},
{"name": "extra_call", "arguments": "{}"}
],
"expected": [
{"name": "get_weather", "arguments": "{\"location\": \"London\"}"}
]
}
```
**Result**: ❌ Extra tool call - made unnecessary additional function call
### Missing Tool Call (Score: 0.0)
**Scenario**: Model fails to call required function
```json
{
"generated": [],
"expected": [
{"name": "get_weather", "arguments": "{\"location\": \"London\"}"}
]
}
```
**Result**: ❌ Missing tool call - failed to call required function
### No Call Expected (Score: 1.0)
**Scenario**: Query doesn't require function execution
```json
{
"generated": [],
"expected": []
}
```
**Result**: ✅ No call expected - correctly avoided unnecessary function calls
## Advanced Features
### XML-Formatted Tool Calls
The evaluation supports XML-formatted tool calls embedded in content:
```python
# Assistant response with XML formatting
content = '{"type": "function", "function": {"name": "get_weather", "arguments": "{\\"location\\": \\"Berlin\\", \\"unit\\": \\"celsius\\"}"}}'
# The evaluation automatically parses and compares these calls
```
### Complex Nested Objects
The evaluation handles complex parameter structures:
```python
# Nested user object creation
{
"name": "create_user",
"arguments": '{"user": {"firstName": "John", "lastName": "Doe", "age": 30}}'
}
```
### Multiple Tool Calls
The evaluation supports scenarios with multiple sequential tool calls:
```python
# Multiple weather queries
[
{"name": "get_weather", "arguments": '{"location": "London"}'},
{"name": "get_weather", "arguments": '{"location": "Paris"}'}
]
```
## Best Practices for Function Calling Evaluation
### Dataset Design
* **Diverse scenarios**: Include various failure modes and edge cases
* **Progressive difficulty**: Start with simple calls and progress to complex objects
* **Real-world examples**: Use realistic function schemas and use cases
* **Clear ground truth**: Ensure expected tool calls are unambiguous
### Evaluation Configuration
* **Appropriate models**: Use models with strong function calling capabilities
* **Consistent parameters**: Use deterministic settings (temperature=0.0) for reproducible results
* **Adequate context**: Provide clear function descriptions and examples
* **Error handling**: Gracefully handle parsing errors and edge cases
### Result Interpretation
* **Binary scoring**: Understand that this is a strict exact-match evaluation
* **Detailed analysis**: Use the reasoning field to understand specific failures
* **Pattern recognition**: Look for systematic errors in function selection or argument formatting
* **Model comparison**: Compare different models' function calling accuracy
## Conclusion
This function calling evaluation example demonstrates how to create robust assessments of AI models' tool usage capabilities. The `exact_tool_match_reward` function provides a strict but comprehensive evaluation that ensures models can:
1. **Identify when tools are needed**: Distinguish between queries requiring function calls and those that don't
2. **Select appropriate functions**: Choose the correct tool from available options
3. **Provide accurate parameters**: Pass the right arguments with correct values
4. **Follow proper formatting**: Use the expected tool call structure consistently
This evaluation is particularly valuable for:
* **Agent development**: Ensuring AI agents can reliably interact with external systems
* **API integration**: Validating models' ability to use structured APIs correctly
* **Tool selection**: Testing models' understanding of when and how to use different tools
* **Parameter accuracy**: Verifying that models provide correct input values
The function calling evaluation complements other evaluation types by focusing on **execution accuracy** rather than content generation, making it essential for building reliable AI systems that can interact with external tools and APIs.
# GPQA (Open-Resource)
Source: https://evalprotocol.io/example/gpqa
Multiple-choice science QA with simple exact-match scoring
This example runs a minimal GPQA-style evaluation using the public Diamond split CSV. It’s meant for quick comparisons during model picking, not a full benchmark reproduction.
This example is implemented as a suite in `eval_protocol/benchmarks/suites/gpqa.py` and exported as `gpqa`.
## What it does
* Downloads the GPQA Diamond CSV and constructs MCQ prompts (A–D).
* Appends a system-side ground-truth token (e.g., `__GT__:A`) per row.
* Extracts the predicted letter from the assistant’s final message and checks exact match.
## How it’s configured
* `@evaluation_test` feeds prebuilt `input_messages` and sets rollout parameters.
* Simple scoring: 1.0 for exact letter match, else 0.0.
## Run it locally
After installing eval-protocol, you can run the benchmark from anywhere:
```bash
pytest --pyargs eval_protocol.benchmarks.test_gpqa -v \
--ep-print-summary --ep-summary-json artifacts/gpqa.json
```
Use `--ep-max-rows=20` to tune runtime. The CSV is fetched at runtime.
## Notes
* Convenience-oriented: focuses on a clean pipeline and minimal metrics.
* The evaluation relies on extracting exactly one of `A, B, C, D` from the model output.
# GSM8K Math Evaluation
Source: https://evalprotocol.io/example/gsm8k
Evaluate mathematical reasoning with GSM8K dataset using structured thinking format
This example demonstrates how to create a comprehensive math evaluation using the GSM8K dataset. The evaluation combines numerical accuracy checking with format validation, requiring models to follow a structured thinking format with `......` tags.
You can find the complete code for this example at [test\_pytest\_math\_example.py](https://github.com/eval-protocol/python-sdk/blob/main/tests/pytest/test_pytest_math_example.py).
## Understanding the GSM8K Dataset
The GSM8K (Grade School Math 8K) dataset contains grade school math word problems that test mathematical reasoning and problem-solving abilities. Each problem requires multi-step reasoning to arrive at the correct numerical answer.
### Dataset Format
Each entry in the dataset contains:
* **`id`**: Unique identifier for the test case
* **`user_query`**: The math word problem to solve
* **`ground_truth_for_eval`**: The expected solution with step-by-step reasoning and final answer
### Example Dataset Entries
**Basic Arithmetic Problem:**
```json
{
"id": "gsm8k_test_0",
"user_query": "Janet's ducks lay 16 eggs per day. She eats three for breakfast every morning and bakes muffins for her friends every day with four. She sells the remainder at the farmers' market daily for $2 per fresh duck egg. How much in dollars does she make every day at the farmers' market?",
"ground_truth_for_eval": "Janet sells 16 - 3 - 4 = <<16-3-4=9>>9 duck eggs a day.\nShe makes 9 * 2 = $<<9*2=18>>18 every day at the farmer's market.\n#### 18"
}
```
**Percentage and Profit Problem:**
```json
{
"id": "gsm8k_test_2",
"user_query": "Josh decides to try flipping a house. He buys a house for $80,000 and then puts in $50,000 in repairs. This increased the value of the house by 150%. How much profit did he make?",
"ground_truth_for_eval": "The cost of the house and repairs came out to 80,000+50,000=$<<80000+50000=130000>>130,000\nHe increased the value of the house by 80,000*1.5=<<80000*1.5=120000>>120,000\nSo the new value of the house is 120,000+80,000=$<<120000+80000=200000>>200,000\nSo he made a profit of 200,000-130,000=$<<200000-130000=70000>>70,000\n#### 70000"
}
```
### Dataset Characteristics
**Problem Types**: The dataset covers various mathematical concepts:
* Basic arithmetic (addition, subtraction, multiplication, division)
* Percentages and ratios
* Multi-step word problems
* Real-world applications (business, cooking, sports)
**Solution Format**: Ground truth solutions include:
* Step-by-step reasoning with intermediate calculations
* Computed values in `<>` format
* Final answer marked with `#### answer`
**Complexity**: Problems require:
* Understanding of mathematical concepts
* Multi-step reasoning
* Accurate numerical computation
* Clear presentation of work
## Step 1: Import Required Dependencies
First, we import the necessary modules from the EP framework:
```python
import re
from typing import Any, Dict, List
from eval_protocol.models import EvaluateResult, EvaluationRow, MetricResult
from eval_protocol.pytest import SingleTurnRolloutProcessor, evaluation_test
from eval_protocol.rewards.math import math_reward
from examples.math_example.main import check_think_answer_format
from tests.pytest.helper.gsm8k_to_evaluation_row import gsm8k_to_evaluation_row
```
* `re`: Python's regex module for pattern matching
* `typing`: Python's typing module for type hints (Any, Dict, List)
* `EvaluateResult`: The result object containing evaluation score and reasoning
* `EvaluationRow`: The data structure containing conversation messages and ground truth
* `MetricResult`: Individual metric results for detailed analysis
* `default_single_turn_rollout_processor`: Default processor for single-turn conversations
* `evaluation_test`: Decorator for configuring evaluation tests
* `math_reward`: Built-in math evaluation function
* `check_think_answer_format`: Function to validate structured thinking format
* `gsm8k_to_evaluation_row`: Adapter function to convert GSM8K dataset format
## Step 2: Create the Dataset Adapter
We need to convert the GSM8K dataset format to the EP's expected format:
```python
def gsm8k_to_evaluation_row(data: List[Dict[str, Any]]) -> List[EvaluationRow]:
"""Convert GSM8K dataset entries to EvaluationRow objects."""
return [
EvaluationRow(
messages=[Message(role="user", content=row["user_query"])],
ground_truth=row["ground_truth_for_eval"]
)
for row in data
]
```
This adapter:
* Takes the raw GSM8K dataset as a list of dictionaries
* Converts each row to an `EvaluationRow` with a user message containing the math problem
* Sets the ground truth to the expected solution with step-by-step reasoning
* Returns the list of evaluation rows
## Step 3: Define Format Validation
We create a function to check if the model's response follows the required structured thinking format:
```python
def check_think_answer_format(text: str) -> bool:
"""Check if text follows ...... format."""
if not text:
return False
pattern = r"[\s\S]*?[\s\S]*?[\s\S]*?"
return bool(re.search(pattern, text))
```
**Regex pattern explained:**
* `[\s\S]*?`: Matches the thinking section, including any characters and newlines
* `[\s\S]*?`: Matches any characters (including newlines) between the think and answer tags
* `[\s\S]*?`: Matches the answer section
* `re.search()`: Searches for the pattern anywhere in the text (not requiring it to be the entire text)
This ensures the response contains both `` and `` sections in the correct order.
## Step 4: Configure, implement, and run the evaluation
We use the `@evaluation_test` decorator to configure the evaluation. The evaluation function combines numerical accuracy with format validation.
```python
@evaluation_test(
input_dataset=["development/gsm8k_sample.jsonl"],
dataset_adapter=gsm8k_to_evaluation_row,
completion_params=[{"model": "accounts/fireworks/models/kimi-k2-instruct", "temperature": 0.0}],
max_dataset_rows=5,
passed_threshold=0.0,
rollout_processor=SingleTurnRolloutProcessor(),
mode="pointwise",
evaluation_test_kwargs=[
{"math_reward_kwargs": {"tolerance": 0.001, "absolute_tolerance": 1e-8, "require_units": False}}
],
)
def test_math_dataset(row: EvaluationRow, **kwargs) -> EvaluationRow:
"""
Evaluate math problem solving considering both accuracy and format.
This function demonstrates how to combine multiple evaluation criteria:
- Numerical accuracy using built-in math evaluation (80% weight)
- Format compliance checking for ...... structure (20% weight)
Args:
row: EvaluationRow containing the conversation messages and ground truth
**kwargs: Additional parameters (like math_reward_kwargs)
Returns:
EvaluationRow with the evaluation result
"""
# Get the assistant's response
assistant_message = row.messages[-1]
if isinstance(assistant_message, dict):
assistant_response = assistant_message.get("content", "")
else:
assistant_response = assistant_message.content or ""
# Evaluate numerical accuracy using built-in function
accuracy_result = math_reward(messages=row.messages, ground_truth=row.ground_truth, **kwargs["math_reward_kwargs"])
# Evaluate format compliance (looking for ...... format)
format_correct = check_think_answer_format(assistant_response)
format_score = 1.0 if format_correct else 0.0
# Calculate combined score with 80% accuracy and 20% formatting weight
combined_score = (0.8 * accuracy_result.score) + (0.2 * format_score)
# Create metrics structure expected by tests
metrics = {
"accuracy_reward": MetricResult(
score=accuracy_result.score,
reason=f"Numerical accuracy: {accuracy_result.reason}",
is_score_valid=True,
),
"format_reward": MetricResult(
score=format_score,
reason=f"Format compliance: {'correct' if format_correct else 'incorrect'} ...... structure",
is_score_valid=True,
),
}
row.evaluation_result = EvaluateResult(
score=combined_score,
reason=f"Combined score: {combined_score:.2f} (accuracy: {accuracy_result.score:.2f}, format: {format_score:.2f})",
metrics=metrics,
)
return row
```
**Key evaluation aspects:**
* **Numerical Accuracy**: Uses the built-in `math_reward` function to check if the final answer matches the ground truth (80% weight)
* **Format Compliance**: Ensures responses follow the structured thinking format (20% weight)
* **Weighted Combination**: Combines accuracy and format scores using 80% accuracy + 20% formatting weights
* **Detailed Metrics**: Provides separate scores for accuracy and format for detailed analysis
**Configuration parameters:**
* `input_dataset`: Path to the GSM8K sample dataset
* `dataset_adapter`: Function that converts GSM8K format to EvaluationRow objects
* `model`: The model to evaluate (Fireworks Kimi model in this case)
* `rollout_input_params`: Model parameters (temperature set to 0.0 for deterministic results)
* `max_dataset_rows`: Limit to 5 test cases for quick evaluation
* `threshold_of_success`: Set to 0.0 to see all results (can be adjusted based on requirements)
* `rollout_processor`: Uses default single-turn processor for math problems
* `mode`: `pointwise` for evaluating individual rows since each row can be evaluated independently
* `evaluation_test_kwargs`: Additional parameters for the evaluation function
## Core Functions Explained
### `math_reward` Function
The `math_reward` function is a built-in evaluation function that extracts numerical answers from text and compares them with expected values. It's located in `eval_protocol.rewards.math`.
**Key Features:**
* **Extracts numbers** from both model responses and ground truth using sophisticated regex patterns
* **Supports multiple formats**: integers, decimals, fractions, scientific notation, LaTeX formatting
* **Configurable tolerance**: Handles floating-point precision issues with `tolerance` and `absolute_tolerance` parameters
* **Unit handling**: Can require or ignore units with the `require_units` parameter
* **Robust matching**: Finds the best match between extracted answers when multiple numbers are present
**Function Signature:**
```python
def math_reward(
messages: List[Message],
*,
ground_truth: str,
tolerance: float = 0.001,
absolute_tolerance: float = 1e-8,
require_units: bool = False,
**kwargs: Any,
) -> EvaluateResult:
```
**Parameters:**
* `messages`: List of conversation messages (extracts from the last assistant message)
* `ground_truth`: Expected answer string containing the correct numerical value
* `tolerance`: Relative tolerance for floating-point comparisons (default: 0.001)
* `absolute_tolerance`: Absolute tolerance for very small numbers (default: 1e-8)
* `require_units`: Whether to require units to match (default: False)
**Return Value:**
* `EvaluateResult` with score (1.0 for correct, 0.0 for incorrect) and detailed reasoning
**Example Usage:**
```python
result = math_reward(
messages=messages,
ground_truth="18",
tolerance=0.001,
absolute_tolerance=1e-8,
require_units=False
)
print(f"Score: {result.score}") # 1.0 if answer matches, 0.0 otherwise
print(f"Reason: {result.reason}") # Detailed explanation of the evaluation
```
### `check_think_answer_format` Function
This function validates that the model's response follows the required structured thinking format with `` and `` tags.
**Function Signature:**
```python
def check_think_answer_format(text: str) -> bool:
```
**Implementation Details:**
* Uses regex pattern `r"[\s\S]*?[\s\S]*?[\s\S]*?"`
* `[\s\S]*?`: Matches the thinking section with any content
* `[\s\S]*?`: Matches any characters (including newlines) between sections
* `[\s\S]*?`: Matches the answer section with any content
* Returns `True` if both sections are present in the correct order, `False` otherwise
**Example Valid Format:**
```
Let me solve this step by step:
1. Janet's ducks lay 16 eggs per day
2. She eats 3 for breakfast
3. She uses 4 for muffins
4. So she sells: 16 - 3 - 4 = 9 eggs
5. At $2 per egg, she makes: 9 * 2 = $18
Janet makes $18 every day at the farmers' market.
```
**Example Invalid Formats:**
* Missing `` section: `18`
* Missing `` section: `Step by step reasoning...`
* Wrong order: `18reasoning...`
* No tags: "The answer is 18"
### `gsm8k_to_evaluation_row` Function
This adapter function converts the GSM8K dataset format to the EP framework's expected `EvaluationRow` format.
**Function Signature:**
```python
def gsm8k_to_evaluation_row(data: List[Dict[str, Any]]) -> List[EvaluationRow]:
```
**Input Format:**
```python
[
{
"id": "gsm8k_test_0",
"user_query": "Janet's ducks lay 16 eggs per day...",
"ground_truth_for_eval": "Janet sells 16 - 3 - 4 = <<16-3-4=9>>9 duck eggs..."
},
# ... more entries
]
```
**Output Format:**
```python
[
EvaluationRow(
messages=[Message(role="user", content="Janet's ducks lay 16 eggs per day...")],
ground_truth="Janet sells 16 - 3 - 4 = <<16-3-4=9>>9 duck eggs..."
),
# ... more EvaluationRow objects
]
```
**Key Transformations:**
* Extracts `user_query` and creates a `Message` with role "user"
* Uses `ground_truth_for_eval` as the ground truth for comparison
* Creates `EvaluationRow` objects that the EP framework can process
* Maintains the original problem structure while adapting to EP's expected format
## Expected Model Response Format
For optimal evaluation, models should respond in this structured format:
```
Let me solve this step by step:
1. Janet's ducks lay 16 eggs per day
2. She eats 3 for breakfast
3. She uses 4 for muffins
4. So she sells: 16 - 3 - 4 = 9 eggs
5. At $2 per egg, she makes: 9 * 2 = $18
Janet makes $18 every day at the farmers' market.
```
**Format requirements:**
* `` section: Detailed step-by-step reasoning
* `` section: Clear final answer
* Both sections must be present for format compliance
* Numerical accuracy is evaluated from the final answer
## Evaluation Results
The evaluation provides comprehensive feedback:
**Successful Response:**
* **Score**: 1.0 (0.8 x 1.0 + 0.2 x 1.0 = 1.0)
* **Reason**: "Combined score: 1.00 (accuracy: 1.00, format: 1.00)"
* **Metrics**: Both accuracy and format scores are 1.0
**Correct Answer, Incorrect Format:**
* **Score**: 0.8 (0.8 x 1.0 + 0.2 x 0.0 = 0.8)
* **Reason**: "Combined score: 0.80 (accuracy: 1.00, format: 0.00)"
* **Metrics**: Accuracy score 1.0, format score 0.0
**Incorrect Answer, Correct Format:**
* **Score**: 0.2 (0.8 x 0.0 + 0.2 x 1.0 = 0.2)
* **Reason**: "Combined score: 0.20 (accuracy: 0.00, format: 1.00)"
* **Metrics**: Accuracy score 0.0, format score 1.0
This comprehensive evaluation ensures that models can:
1. Understand complex mathematical word problems
2. Perform accurate numerical calculations
3. Present solutions in a structured, readable format
4. Provide step-by-step reasoning for transparency
The GSM8K evaluation demonstrates how to create robust, multi-criteria assessments that can be used for model comparison, fine-tuning validation, and deployment readiness testing.
# Hallucination Detection Evaluation
Source: https://evalprotocol.io/example/hallucination-detection
Detect factual inaccuracies using LLM-as-judge to compare responses against ground truth knowledge
This example demonstrates how to create comprehensive hallucination detection evaluations using the Eval Protocol (EP) framework. The evaluation uses an LLM-as-judge approach to assess whether AI model responses contain factual inaccuracies by comparing them against provided ground truth knowledge.
You can find the complete code for this example at [test\_hallucination.py](https://github.com/eval-protocol/python-sdk/blob/main/tests/pytest/test_hallucination.py).
## Understanding Hallucination Detection Evaluation
Hallucination detection evaluation assesses whether AI models provide **factually accurate responses** that align with verified knowledge, rather than generating plausible-sounding but incorrect information. Unlike traditional accuracy metrics that focus on exact matches, this evaluation tests **factual consistency and truthfulness** - critical for building trustworthy AI systems.
## The HaluEval Dataset
This evaluation uses the **HaluEval QA dataset**, a comprehensive benchmark containing 10,000 question-answering samples specifically designed to test hallucination detection. The dataset is built on HotpotQA with Wikipedia knowledge and includes both correct answers and ChatGPT-generated plausible hallucinations.
### Dataset Structure
Each entry contains:
* **`knowledge`**: Wikipedia context providing factual background information
* **`question`**: Multi-hop reasoning question from HotpotQA requiring knowledge synthesis
* **`right_answer`**: Verified ground-truth answer from HotpotQA
* **`hallucinated_answer`**: ChatGPT-generated plausible but factually incorrect response
### Example Entry
```json
{
"knowledge": "Her self-titled debut studio album was released on 2 June 2017.\"New Rules\" is a song by English singer Dua Lipa from her eponymous debut studio album (2017).",
"question": "Dua Lipa, an English singer, songwriter and model, the album spawned the number-one single \"New Rules\" is a song by English singer Dua Lipa from her eponymous debut studio album, released in what year?",
"right_answer": "2017",
"hallucinated_answer": "The album was released in 2018."
}
```
**Sample Dataset**: The EP python-sdk includes a sample of **3 representative rows** from the HaluEval QA dataset for testing and demonstration purposes. The full HaluEval QA dataset contains 10,000 knowledge-question pairs with both correct and hallucinated answers, designed to test models' ability to distinguish factual accuracy from plausible misinformation.
## Step 1: Import Required Dependencies
First, we import the necessary modules from the EP framework and set up the LLM judge:
```python
import json
from typing import Any, Dict, List
from fireworks import LLM
from eval_protocol.models import EvaluateResult, EvaluationRow, Message, MetricResult
from eval_protocol.pytest import SingleTurnRolloutProcessor, evaluation_test
# Initialize the LLM judge for evaluation
judge_llm = LLM(model="accounts/fireworks/models/kimi-k2-instruct", deployment_type="serverless")
```
* `json`: For parsing LLM judge responses and handling structured data
* `typing`: Python's typing module for type hints
* `fireworks.LLM`: The LLM client for creating the judge model
* `EvaluateResult`, `EvaluationRow`, `Message`, `MetricResult`: Core EP data structures
* `default_single_turn_rollout_processor`: Default processor for single-turn conversations
* `evaluation_test`: Decorator for configuring evaluation tests
* `judge_llm`: Pre-configured LLM instance that serves as the factual accuracy judge
## Step 2: Create the Dataset Adapter
We need to convert the hallucination dataset format to the EP's expected format:
```python
def hallucination_dataset_adapter(data: List[Dict[str, Any]]) -> List[EvaluationRow]:
"""
Convert HaluEval dataset to EvaluationRow objects.
This adapter combines the knowledge context with the question to create
a complete user message, and stores the correct answer as ground truth
for the LLM judge to use during evaluation.
Args:
data: List of hallucination dataset entries with knowledge, question, and right_answer
Returns:
List of EvaluationRow objects ready for evaluation
"""
return [
EvaluationRow(
messages=[Message(role="user", content=f"Knowledge: {item['knowledge']}\n\nQuestion: {item['question']}")],
ground_truth=item["right_answer"]
)
for item in data
]
```
## Step 3: Configure and Run the Evaluation
We use the `@evaluation_test` decorator to configure the hallucination detection evaluation:
```python
@evaluation_test(
input_dataset=["tests/pytest/data/halueval_sample_dataset.jsonl"],
dataset_adapter=hallucination_dataset_adapter,
completion_params=[{"model": "accounts/fireworks/models/kimi-k2-instruct", "temperature": 0.0, "max_tokens": 512}],
rollout_processor=SingleTurnRolloutProcessor(),
passed_threshold=1.0,
num_runs=1,
mode="pointwise",
)
def test_hallucination_detection(row: EvaluationRow) -> EvaluationRow:
"""
Test for response correctness using LLM-as-judge.
This function:
1. Extracts the assistant's response to the knowledge-question pair
2. Uses an LLM judge to compare the response against the correct answer
3. Returns a binary score based on factual accuracy
Args:
row: EvaluationRow containing the conversation messages and correct answer in ground_truth
Returns:
EvaluationRow with the evaluation result
"""
messages = row.messages
assistant_response = messages[-1].content
if not assistant_response:
return EvaluateResult(score=0.0, reason="❌ No assistant response found")
correct_answer = row.ground_truth
# LLM judge system prompt for factual accuracy assessment
system_prompt = """
TASK
- You will be given an assistant's response and the correct answer.
- Your job is to evaluate whether the assistant's response is factually consistent with the correct answer.
- Grade whether the assistant got it right or wrong.
FORMAT
- Your response should be a JSON object with the following fields:
- `reasoning`: a short explanation for your classification
- `is_correct`: `true` if the assistant's response matches the correct answer, `false` otherwise
Example response structure:
{
"reasoning": "",
"is_correct":
}
"""
user_prompt = f"""
assistant_response:
{assistant_response}
correct_answer:
{correct_answer}
"""
try:
# Query the LLM judge for factual accuracy assessment
response = judge_llm.chat.completions.create(
messages=[
{"role": "system", "content": system_prompt},
{"role": "user", "content": user_prompt}
],
temperature=0.1,
max_tokens=500,
)
result_data = json.loads(response.choices[0].message.content)
is_correct = result_data.get("is_correct", False)
reasoning = result_data.get("reasoning", "Could not parse reasoning")
except Exception as e:
# Fallback if LLM judge fails
is_correct = False
reasoning = f"Evaluation failed: {str(e)}"
score = 1.0 if is_correct else 0.0
if is_correct:
assessment = "✅ Response is correct"
else:
assessment = "❌ Response is incorrect"
reason = f"{assessment}\nReasoning: {reasoning}"
row.evaluation_result = EvaluateResult(
score=score,
reason=reason,
metrics={
"llm_judge": MetricResult(
score=score,
reason=reasoning,
is_score_valid=True
)
}
)
return row
```
**Configuration parameters:**
* `input_dataset`: Path to the HaluEval sample dataset JSONL file
* `model`: The model to evaluate for factual accuracy
* `rollout_input_params`: Model parameters with moderate token limit for concise responses
* `threshold_of_success`: 100% accuracy threshold (hallucinations should be completely avoided)
* `mode`: `pointwise` for evaluating individual knowledge-question pairs
* `dataset_adapter`: Function that converts HaluEval format to EvaluationRow objects
* `rollout_processor`: Uses default single-turn processor
**Evaluation process:**
1. **Response extraction**: Get the assistant's answer to the knowledge-question pair
2. **Judge preparation**: Set up LLM judge with clear evaluation criteria
3. **Factual comparison**: Use judge to compare assistant response against correct answer
4. **Structured evaluation**: Judge provides reasoning and binary correctness assessment
5. **Score assignment**: Convert judge decision to numerical score (1.0 or 0.0)
## Core Functions Explained
### LLM-as-Judge System
The hallucination detection uses a sophisticated LLM judge to assess factual accuracy:
**Judge System Prompt Design:**
* **Clear task definition**: Explicitly states the factual consistency evaluation goal
* **Structured output**: Requires JSON format with reasoning and binary decision
* **Objective criteria**: Focuses on factual accuracy rather than style or completeness
* **Consistent format**: Standardizes judge responses for reliable parsing
**Judge Evaluation Process:**
```python
# The judge receives both responses for direct comparison
system_prompt = """
TASK
- You will be given an assistant's response and the correct answer.
- Your job is to evaluate whether the assistant's response is factually consistent with the correct answer.
- Grade whether the assistant got it right or wrong.
FORMAT
- Your response should be a JSON object with the following fields:
- `reasoning`: a short explanation for your classification
- `is_correct`: `true` if the assistant's response matches the correct answer, `false` otherwise
"""
```
**Advantages of LLM-as-Judge:**
* **Semantic understanding**: Can recognize factually equivalent statements with different wording
* **Context awareness**: Understands nuanced relationships between concepts
* **Flexible matching**: Handles partial answers and different levels of detail appropriately
* **Reasoning transparency**: Provides explanations for evaluation decisions
## Evaluation Scenarios and Results
The hallucination detection evaluation handles various factual accuracy scenarios:
### Factually Correct Response (Score: 1.0)
**Scenario**: Model provides accurate information consistent with the knowledge
```python
# Knowledge: "The speed of light in vacuum is approximately 299,792,458 meters per second..."
# Question: "What is the speed of light in vacuum?"
# Model response: "The speed of light in vacuum is approximately 299,792,458 m/s."
# Correct answer: "The speed of light in vacuum is approximately 299,792,458 meters per second."
# Judge reasoning: "The assistant's response is factually accurate. While it uses 'm/s' instead of 'meters per second', both represent the same unit and the numerical value is correct."
# Result: ✅ Response is correct
```
### Factual Inaccuracy (Score: 0.0)
**Scenario**: Model provides incorrect information
```python
# Knowledge: "The Berlin Wall was constructed in 1961..."
# Question: "When was the Berlin Wall built?"
# Model response: "The Berlin Wall was built in 1959."
# Correct answer: "The Berlin Wall was built in 1961."
# Judge reasoning: "The assistant provided an incorrect date. The Berlin Wall was built in 1961, not 1959."
# Result: ❌ Response is incorrect
```
## Conclusion
This hallucination detection evaluation demonstrates how to assess AI models' factual accuracy using LLM-as-judge methodology. The evaluation ensures models can provide truthful, accurate responses based on provided knowledge without introducing false information.
This evaluation is particularly valuable for:
* **Factual accuracy assessment**: Testing models' ability to stay grounded in provided knowledge
* **Trustworthiness validation**: Ensuring AI systems provide reliable, accurate information
* **Knowledge-based applications**: Validating models for use in educational or informational contexts
The hallucination detection evaluation focuses on **factual consistency and truthfulness** rather than stylistic preferences, making it essential for building reliable AI systems that users can trust for accurate information. It provides objective assessment through LLM judges with detailed reasoning and handles diverse knowledge domains comprehensively.
# HealthBench (Open-Resource)
Source: https://evalprotocol.io/example/healthbench
Tiny, rubric-keyword proxy for clinical safety/quality signals
This example provides a minimal, rubric-driven proxy inspired by HealthBench—for quick sanity checks in clinical-style prompts. It is not a comprehensive or official reimplementation.
This example is now implemented as a suite in `eval_protocol/benchmarks/suites/healthbench.py` and exported as `healthbench`.
## What it does
* Uses a few in-memory prompts with small rubric lists.
* Extracts simple keyword requirements from rubric criteria (e.g., “hospital”, “urgent”, “hydration”, “rest”).
* Scores 1.0 if the assistant’s response contains any required rubric keywords; otherwise 0.0.
## How it’s configured
* `@evaluation_test` sets a small temperature and token budget.
* Messages are constructed inline; rubrics are mapped by prompt string.
## Run it locally
After installing eval-protocol, you can run the benchmark from anywhere:
```bash
pytest --pyargs eval_protocol.benchmarks.test_healthbench -v \
--ep-print-summary --ep-summary-json artifacts/healthbench.json
```
## Notes
* This is a minimal proxy to surface safety/quality cues—not a validated clinical benchmark.
* You can expand the rubric list or keyword extraction as needed for your domain.
# JSON Schema Evaluation
Source: https://evalprotocol.io/example/json-schema
Evaluate JSON content against expected schemas using structural similarity and LLM judgment
This example demonstrates how to create comprehensive JSON schema evaluations
using the Eval Protocol (EP) framework. The evaluation uses the
[`json_schema_reward`](https://github.com/eval-protocol/python-sdk/blob/main/eval_protocol/rewards/json_schema.py)
function to assess whether models generate JSON content that matches expected
schemas, with options for both structural validation and LLM-based judgment.
You can find the complete code for this example at [test\_pytest\_json\_schema.py](https://github.com/eval-protocol/python-sdk/blob/main/tests/pytest/test_pytest_json_schema.py).
## Understanding JSON Schema Evaluation
JSON schema evaluation assesses a model's ability to:
* **Generate valid JSON**: Produce syntactically correct JSON content
* **Match expected structure**: Create JSON objects that conform to specified schemas
* **Handle complex nested structures**: Work with objects, arrays, and mixed data types
* **Extract JSON from responses**: Parse JSON content from markdown code blocks or plain text
* **Validate type consistency**: Ensure data types match schema specifications
Unlike text-based evaluations that focus on content generation, JSON schema evaluations test a model's **structured data generation capabilities** - essential skills for AI systems that need to produce machine-readable, structured outputs.
## Understanding the Dataset Structure
The JSON schema dataset contains diverse test cases that evaluate different aspects of JSON generation, from simple object creation to complex nested structures with various data types.
### Dataset Format
Each entry in the dataset contains:
* **`messages`**: Conversation history with user requests and assistant responses
* **`ground_truth`**: Optional expected response (not used in schema validation)
* **`evaluation_result`**: Pre-computed evaluation scores for validation
* **`input_metadata`**: Additional context including expected schema and test case descriptions
### Example Dataset Entries
**Perfect Schema Match:**
````json
{
"messages": [
{
"role": "user",
"content": "Give me user information in the following JSON format:\n```json\n{\n \"user\": {\n \"name\": \"string\",\n \"age\": \"number\",\n \"isActive\": \"boolean\"\n },\n \"products\": [\n {\n \"id\": \"string\",\n \"price\": \"number\"\n }\n ]\n}\n```"
},
{
"role": "assistant",
"content": "Here's the user information:\n```json\n{\n \"user\": {\n \"name\": \"John Doe\",\n \"age\": 30,\n \"isActive\": true\n },\n \"products\": [\n {\n \"id\": \"prod-1\",\n \"price\": 29.99\n }\n ]\n}\n```"
}
],
"ground_truth": null,
"input_metadata": {
"dataset_info": {
"test_case": "exact_match",
"description": "JSON content that exactly matches the expected schema",
"expected_schema": {
"type": "object",
"properties": {
"user": {
"type": "object",
"properties": {
"name": {"type": "string"},
"age": {"type": "number"},
"isActive": {"type": "boolean"}
}
},
"products": {
"type": "array",
"items": {
"type": "object",
"properties": {
"id": {"type": "string"},
"price": {"type": "number"}
}
}
}
}
}
}
}
}
````
**Partial Schema Match with Missing Properties:**
````json
{
"messages": [
{
"role": "user",
"content": "Give me user information in the following JSON format:\n```json\n{\n \"user\": {\n \"name\": \"string\",\n \"age\": \"number\",\n \"isActive\": \"boolean\",\n \"address\": {\n \"street\": \"string\",\n \"city\": \"string\"\n }\n }\n}\n```"
},
{
"role": "assistant",
"content": "Here's the user information:\n```json\n{\n \"user\": {\n \"name\": \"John Doe\",\n \"age\": 30,\n \"email\": \"john@example.com\"\n }\n}\n```"
}
],
"ground_truth": null,
"input_metadata": {
"dataset_info": {
"test_case": "partial_match",
"description": "JSON content with missing and extra properties compared to expected schema",
"expected_schema": {
"type": "object",
"properties": {
"user": {
"type": "object",
"properties": {
"name": {"type": "string"},
"age": {"type": "number"},
"isActive": {"type": "boolean"},
"address": {
"type": "object",
"properties": {
"street": {"type": "string"},
"city": {"type": "string"}
}
}
}
}
}
}
}
}
}
````
**Type Mismatch Errors:**
````json
{
"messages": [
{
"role": "user",
"content": "Give me user information in the following JSON format:\n```json\n{\n \"name\": \"string\",\n \"age\": \"number\",\n \"tags\": [\"string\"]\n}\n```"
},
{
"role": "assistant",
"content": "Here's the user information:\n```json\n{\n \"name\": \"John Doe\",\n \"age\": \"30\",\n \"tags\": {\n \"tag1\": \"value1\"\n }\n}\n```"
}
],
"ground_truth": null,
"input_metadata": {
"dataset_info": {
"test_case": "mismatched_types",
"description": "JSON content with type mismatches (string instead of number, object instead of array)",
"expected_schema": {
"type": "object",
"properties": {
"name": {"type": "string"},
"age": {"type": "number"},
"tags": {
"type": "array",
"items": {"type": "string"}
}
}
}
}
}
}
````
## Step 1: Import Required Dependencies
First, we import the necessary modules from the EP framework:
```python
import json
from typing import Any, Dict, List
from eval_protocol.models import EvaluationRow
from eval_protocol.pytest import SingleTurnRolloutProcessor, evaluation_test
from eval_protocol.rewards.json_schema import json_schema_reward
```
* `json`: Python's JSON module for JSON parsing and validation
* `typing`: Python's typing module for type hints (Any, Dict, List)
* `EvaluationRow`: Data structure containing conversation messages and ground truth
* `default_single_turn_rollout_processor`: Default processor for single-turn conversations
* `evaluation_test`: Decorator for configuring evaluation tests
* `json_schema_reward`: Function to evaluate JSON content against expected schemas
## Step 2: Create the Dataset Adapter
We need to convert the JSON schema dataset format to the EP's expected format:
```python
def json_schema_to_evaluation_row(rows: List[Dict[str, Any]]) -> List[EvaluationRow]:
"""
Convert a json schema row to an evaluation row.
This adapter extracts the conversation messages and metadata from the dataset,
creating EvaluationRow objects that can be processed by the evaluation framework.
Args:
rows: List of JSON schema dataset entries with messages and metadata
Returns:
List of EvaluationRow objects ready for evaluation
"""
dataset: List[EvaluationRow] = []
for row in rows:
dataset.append(
EvaluationRow(
messages=row["messages"][:1], # Use only the first message (user prompt)
ground_truth=row["ground_truth"],
input_metadata=row["input_metadata"],
)
)
return dataset
```
The adapter function:
* **Extracts conversation messages**: Takes the user prompt from the dataset
* **Preserves metadata**: Maintains the expected schema and test case information
* **Handles ground truth**: Passes through any ground truth data (though not used in schema validation)
* **Creates evaluation rows**: Converts dataset entries to the EP's standard format
## Step 3: Configure the Evaluation Test
We use the `@evaluation_test` decorator to configure our JSON schema evaluation:
```python
@evaluation_test(
input_dataset=["tests/pytest/data/json_schema.jsonl"],
completion_params=[{"model": "accounts/fireworks/models/kimi-k2-instruct"}],
mode="pointwise",
rollout_processor=SingleTurnRolloutProcessor(),
dataset_adapter=json_schema_to_evaluation_row,
)
async def test_pytest_function_calling(row: EvaluationRow) -> EvaluationRow:
"""Run pointwise evaluation on sample dataset using pytest interface."""
expected_schema = row.input_metadata.dataset_info["expected_schema"]
result = json_schema_reward(row.messages, expected_schema=expected_schema)
row.evaluation_result = result
print(row.evaluation_result)
return row
```
The evaluation configuration:
* **`input_dataset`**: Path to the JSON schema dataset file
* **`model`**: Target model to evaluate (Fireworks Kimi model in this example)
* **`mode`**: Set to "pointwise" for individual sample evaluation
* **`rollout_processor`**: Uses default single-turn processor for conversation handling
* **`dataset_adapter`**: References our custom adapter function
## Step 4: Implement the Evaluation Logic
The core evaluation logic extracts the expected schema and applies the JSON schema reward function:
```python
async def test_pytest_function_calling(row: EvaluationRow) -> EvaluationRow:
"""Run pointwise evaluation on sample dataset using pytest interface."""
# Extract the expected schema from the dataset metadata
expected_schema = row.input_metadata.dataset_info["expected_schema"]
# Apply the JSON schema reward function
result = json_schema_reward(row.messages, expected_schema=expected_schema)
# Store the evaluation result
row.evaluation_result = result
print(row.evaluation_result)
return row
```
The evaluation process:
1. **Extracts expected schema**: Gets the target JSON structure from metadata
2. **Applies schema validation**: Uses `json_schema_reward` to compare generated JSON against expected schema
3. **Stores results**: Saves the evaluation score and metrics in the row
4. **Returns processed row**: Provides the evaluated row for further analysis
## Understanding the JSON Schema Reward Function
The [`json_schema_reward`](https://github.com/eval-protocol/python-sdk/blob/main/eval_protocol/rewards/json_schema.py) function provides comprehensive JSON validation capabilities:
### Core Features
**Schema Extraction and Normalization:**
* Extracts JSON content from assistant responses (supports markdown code blocks)
* Normalizes schemas for consistent comparison
* Handles both object and string schema representations
**Structural Similarity Calculation:**
* Uses Jaccard similarity to compare schema structures
* Evaluates property matches, type consistency, and nested object alignment
* Provides detailed scoring with property-level analysis
**Error Handling:**
* Validates JSON syntax before schema comparison
* Handles malformed JSON with appropriate error scoring
* Provides clear error messages for debugging
## Test Cases and Evaluation Scenarios
The JSON schema evaluation covers various scenarios:
### ✅ Perfect Matches
| Scenario | Description |
| :-------------------------- | :----------------------------------------------- |
| **Exact schema compliance** | JSON that perfectly matches expected structure |
| **Type consistency** | All data types match schema specifications |
| **Nested object handling** | Complex nested structures with proper validation |
### ⚠️ Partial Matches
| Scenario | Description |
| :--------------------- | :---------------------------------------- |
| **Missing properties** | JSON with some expected fields omitted |
| **Extra properties** | JSON with additional fields not in schema |
| **Type mismatches** | Correct structure but wrong data types |
### ❌ Error Cases
| Scenario | Description |
| :----------------------- | :-------------------------------------- |
| **Invalid JSON syntax** | Malformed JSON that cannot be parsed |
| **Missing JSON content** | Responses without extractable JSON |
| **Empty structures** | Edge cases with empty objects or arrays |
### 🔄 Complex Scenarios
| Scenario | Description |
| :------------------- | :--------------------------------------------------- |
| **Array validation** | JSON arrays with consistent item structures |
| **Mixed data types** | Objects with various primitive and complex types |
| **Nested arrays** | Multi-level nested structures with arrays of objects |
## Expected Output
The evaluation produces detailed results including:
**Perfect Match Example:**
```
EvaluationResult(
score=1.0,
reason="Perfect schema match",
metrics={
"schema_similarity": MetricResult(
score=1.0,
reason="Schema similarity: 1.00",
is_score_valid=True
)
}
)
```
**Partial Match Example:**
```
EvaluationResult(
score=0.5,
reason="Partial schema match with missing and extra properties",
metrics={
"schema_similarity": MetricResult(
score=0.5,
reason="Schema similarity: 0.50",
is_score_valid=False
)
}
)
```
**Error Case Example:**
````
EvaluationResult(
score=0.0,
reason="Invalid JSON content",
metrics={
"error": MetricResult(
score=0.0,
reason="Invalid JSON content: Here's the user information:\n```json\n{\n \"name\": \"John Doe\",\n \"age\": \n}\n```",
is_score_valid=False
)
}
)
````
## Conclusion
This JSON schema evaluation demonstrates how to assess AI models' structured data generation capabilities using schema validation and similarity scoring. The evaluation ensures models can generate valid JSON content that conforms to expected schemas, handle complex nested structures, and maintain type consistency.
This evaluation is particularly valuable for:
* **API integration testing**: Validating JSON responses from AI models that interact with external APIs
* **Data pipeline validation**: Ensuring structured data generation meets schema requirements
* **Model capability assessment**: Evaluating language models' ability to produce machine-readable outputs
The JSON schema evaluation focuses on **structural correctness** and **type compliance** rather than semantic content, making it essential for building reliable AI systems that can generate consistent, well-formed JSON data. It provides objective scoring with detailed property-level analysis, comprehensive error handling, and scalable automated validation.
This comprehensive JSON schema evaluation framework provides robust assessment
of model capabilities in structured data generation, essential for applications
requiring reliable JSON output from AI systems.
# LiveBench — Data Analysis
Source: https://evalprotocol.io/example/livebench-data-analysis
CTA, Table Join, and Table Reformat tasks with lightweight scoring ports
This example showcases three LiveBench Data Analysis tasks wired into Eval Protocol with minimal scoring ports adapted from the original benchmark: CTA, Table Join, and Table Reformat.
Suites live in the Python SDK under `eval_protocol/benchmarks/suites/livebench_data_analysis.py` and are exported as runnable benchmarks.
## What it includes
* CTA: case-insensitive exact/suffix match over cleaned strings
* Table Join: F1 over key-value mappings recovered from model output
* Table Reformat: strict table equivalence with parser fallbacks; version auto-selects by release date
## Run from CLI (exported benchmark)
After installing eval-protocol, you can run the composite benchmark from anywhere:
```bash
pytest --pyargs eval_protocol.benchmarks.test_live_bench_data_analysis -v \
--ep-print-summary \
--ep-summary-json artifacts/live_bench_data_analysis.json
```
This composite benchmark aggregates the three tasks with a final combined summary.
## Run each task individually
```bash
pytest --pyargs eval_protocol.benchmarks.test_live_bench_data_analysis_cta -v \
--ep-print-summary --ep-summary-json artifacts/cta.json
pytest --pyargs eval_protocol.benchmarks.test_live_bench_data_analysis_tablejoin -v \
--ep-print-summary --ep-summary-json artifacts/tablejoin.json
pytest --pyargs eval_protocol.benchmarks.test_live_bench_data_analysis_tablereformat -v \
--ep-print-summary --ep-summary-json artifacts/tablereformat.json
```
## Notes
* Uses `datasets` to pull `livebench/data_analysis` at import time.
* Scoring is intentionally lightweight and aims for compatibility with LiveBench behavior (e.g., tolerant parsing, suffix matches, and defensive fallbacks), not an official reproduction.
# Image Multi-Turn Eval with Per-Step Rewards (Lunar Lander)
Source: https://evalprotocol.io/example/lunar-lander
If you haven't read through [Multi-turn eval (per-step rewards)](/tutorial/multi-turn-eval-per-step-rewards) yet, we recommend checking that out first as this tutorial builds on those foundational concepts.
This tutorial demonstrates how to create **multimodal** multi-turn reinforcement learning evaluations with visual observations and per-step rewards using the classic Lunar Lander environment. Unlike text-based RL environments like Frozen Lake, this example showcases how agents can process **both visual input (rendered game frames) and numerical state data** while receiving detailed per-step reward signals for landing performance, fuel efficiency, and trajectory optimization.
You can find the complete code for this example at [test\_lunar\_lander.py](https://github.com/eval-protocol/python-sdk/blob/main/tests/pytest/test_lunar_lander.py).
## Understanding the Lunar Lander Environment
Lunar Lander is a classic physics-based RL environment where an agent controls a spacecraft landing on the moon, requiring both visual understanding and precise control.
* **Action Space**: `Discrete(4)` - NOTHING (0), FIRE\_LEFT (1), FIRE\_MAIN (2), FIRE\_RIGHT (3)
* **Observation Space**: `Box(8)` - \[x, y, velocity\_x, velocity\_y, angle, angular\_velocity, leg1\_contact, leg2\_contact]
* **Visual Component**: 400x600 RGB rendered frames showing the lander, moon surface, and landing flags

**Complex Reward Structure**: Unlike Frozen Lake's sparse binary rewards, Lunar Lander provides detailed per-step feedback:
* Distance to landing pad (closer = better)
* Velocity penalties (slower = better)
* Angle penalties (more horizontal = better)
* +10 points per leg touching ground
* Fuel consumption penalties (-0.03 for side engines, -0.3 for main engine)
* Final outcome: +100 for successful landing, -100 for crash
**Success Criteria**: Episodes scoring ≥200 points are considered successful landings.
## Understanding the Dataset Structure
The Lunar Lander dataset demonstrates **multimodal prompting** - agents must analyze both numerical state and visual information to make decisions.
### Example Dataset Entry
```json
{
"id": "multi_env_test_001",
"system_prompt": "You are controlling a lunar lander spacecraft. Use the lander_action tool with actions: NOTHING, FIRE_LEFT, FIRE_MAIN, FIRE_RIGHT. Your goal is to land safely on the moon between the two flags without crashing.",
"user_prompt_template": "Current state: {observation}. First, describe what is in the image attached and analyze the current state. You MUST explain your reasoning in picking the next best action (NOTHING, FIRE_LEFT, FIRE_MAIN, FIRE_RIGHT) and call lander_action tool with it to land the spacecraft.",
"environment_context": {
"game": "LunarLander",
"continuous": false,
"gravity": -10.0,
"enable_wind": false,
"seed": 42
}
}
```
**Key Features:**
* **Visual Analysis Required**: "describe what is in the image attached"
* **State Analysis**: Both numerical state data and visual information
* **Tool Integration**: Structured interaction through `lander_action` tool
## Test Harness Architecture
The architecture is similar to Frozen Lake's in the sense that we again extend `McpGym` and create an `EnvironmentAdapter`, but there are some key differences.
### MCP Server: LunarLanderMcp
The `LunarLanderMcp` class extends `McpGym` with **visual rendering capabilities** in `format_observation`:
```python
class LunarLanderMcp(McpGym):
"""LunarLander production server with visual rendering support."""
def __init__(self, seed: Optional[int] = None):
self.adapter = LunarLanderAdapter()
super().__init__("LunarLander-v3", self.adapter, seed)
def _register_tools(self):
@self.mcp.tool(
name="lander_action",
description="Control the lunar lander with discrete actions. "
"Valid actions: NOTHING, FIRE_LEFT, FIRE_MAIN, FIRE_RIGHT."
)
def lander_action(action: str, ctx: Context) -> Dict[str, Any]:
# Parse and validate action
action_int = self.adapter.parse_action(action)
# Execute step with session management
session_id = self._get_session_id(ctx)
observation_data = self._execute_session_environment_step(session_id, action_int)
return observation_data
def format_observation(self, obs: Any, env: Any) -> Dict[str, Any]:
"""Format observation with both numerical data AND visual frame."""
# Structured numerical data
formatted = self.adapter.format_observation(obs)
# Add rendered visual frame
rendered_frame = self.adapter.render_frame(env)
if rendered_frame:
formatted["image_url"] = {
"url": rendered_frame # Base64 encoded PNG
}
return formatted
```
### Environment Adapter: LunarLanderAdapter
The `LunarLanderAdapter` acts as an adapter to the Gymnasium library's implementation of the LunarLander game, which includes both the **physics simulation and visual rendering**:
```python
class LunarLanderAdapter(EnvironmentAdapter):
"""LunarLander adapter with multimodal observation support."""
def __init__(self):
self.action_map = {
"NOTHING": 0, "FIRE_LEFT": 1,
"FIRE_MAIN": 2, "FIRE_RIGHT": 3
}
def format_observation(self, obs: np.ndarray) -> Dict[str, Any]:
"""Convert 8D observation vector to structured data."""
return {
"position": {"x": float(obs[0]), "y": float(obs[1])},
"velocity": {"x": float(obs[2]), "y": float(obs[3])},
"orientation": {"angle": float(obs[4]), "angular_velocity": float(obs[5])},
"legs": {"left_contact": bool(obs[6]), "right_contact": bool(obs[7])},
}
def render_frame(self, env: LunarLander) -> Optional[str]:
"""Render visual frame as base64 encoded image."""
rgb_array = env.render()
if rgb_array is None:
return None
# Convert to PIL Image and encode as base64
image = Image.fromarray(rgb_array.astype(np.uint8))
buffer = io.BytesIO()
image.save(buffer, format="PNG")
return f"data:image/png;base64,{base64.b64encode(buffer.getvalue()).decode('utf-8')}"
```
## Pytest Implementation
### Step 1: Dataset Adapter
```python
def lunar_lander_to_evaluation_row(data: List[Dict[str, Any]]) -> List[EvaluationRow]:
"""Convert lunar lander entries to EvaluationRow objects."""
rows = []
for row in data:
eval_row = EvaluationRow(
messages=[Message(role="system", content=row["system_prompt"])],
input_metadata=InputMetadata(
row_id=row["id"],
dataset_info={
"environment_context": row["environment_context"],
"user_prompt_template": row["user_prompt_template"],
}
)
)
rows.append(eval_row)
return rows
```
### Step 2: Test Configuration
```python
@evaluation_test(
input_dataset=["tests/pytest/data/lunar_lander_dataset.jsonl"],
dataset_adapter=lunar_lander_to_evaluation_row,
completion_params=[{"model": "gpt-4.1", "temperature": 0.0, "max_tokens": 4096}], # Vision-capable model required
rollout_processor=MCPGymRolloutProcessor(),
passed_threshold=0.0,
num_runs=1,
mode="pointwise",
server_script_path="examples/lunar_lander_mcp/server.py",
steps=15,
)
```
**Key Configuration Notes:**
* **Vision Model Required**: `gpt-4.1` or other vision-capable models
* **Same Rollout Processor**: Reuses `default_mcp_gym_rollout_processor` from Frozen Lake, demonstrating framework generalization across text and visual environments
* **Episode Management**: `steps=15` is not enough for the Lunar Lander game to complete, it likely would take hundreds of steps.
### Step 3: Trajectory Evaluation
As defined by the game, a success is if a score of 200 or over is achieved, which is then converted to 1 or 0 to signify a pass or fail in our Pytest setup.
```python
def test_lunar_lander_evaluation(row: EvaluationRow) -> EvaluationRow:
"""Evaluate lunar lander performance using physics-based scoring."""
# Get cumulative reward from entire visual trajectory
score = row.get_total_reward()
# Apply Lunar Lander success criterion
evaluation_score = 1.0 if score >= 200 else 0.0
reason = (f"✅ Successful landing with reward {score:.2f}" if score >= 200
else f"❌ Failed landing with reward {score:.2f}")
row.evaluation_result = EvaluateResult(
score=evaluation_score,
reason=reason,
)
return row
```
## Conclusion
This Lunar Lander tutorial showcases eval-protocol's **multimodal evaluation capabilities**, demonstrating how the framework seamlessly handles complex visual RL environments while maintaining the same architectural patterns established with text-based evaluations. The key innovation is the **dual-stream observation system**: agents receive both structured numerical data and visual frames, enabling sophisticated multimodal reasoning about physics, control, and spatial relationships.
The per-step reward structure in Lunar Lander is particularly valuable for training data generation. Unlike Frozen Lake's sparse rewards, every frame provides rich feedback about landing performance, fuel efficiency, and trajectory optimization. This creates **dense multimodal training signals** that can inform visual RL algorithms, multimodal fine-tuning approaches, and hybrid training systems that combine visual understanding with control policy learning. In the future, we hope to extend this work to frontier LLM use-cases like browser-use agents.
Most importantly, this example demonstrates eval-protocol's **modality-agnostic design**. The same `default_mcp_gym_rollout_processor`, pytest patterns, and evaluation infrastructure work seamlessly across text-based grid worlds and complex visual physics simulations. This unified approach enables practitioners to build comprehensive evaluation suites spanning the full spectrum of AI capabilities—from language understanding to visual reasoning to real-time control—all within a single, consistent framework.
# SVG Generation Evaluation
Source: https://evalprotocol.io/example/svg-generation
Evaluate AI models ability to generate SVG code that meets specific visual requirements using automated rendering and LLM judge scoring
This example demonstrates how to create comprehensive SVG generation evaluations using the Eval Protocol (EP) framework. The evaluation combines automated SVG rendering with LLM judge assessment to measure how well models can generate visual content that meets specific requirements.
You can find the complete code for this example at [test\_svgbench.py](https://github.com/eval-protocol/python-sdk/blob/main/tests/pytest/test_svgbench.py).
## Understanding SVG Generation Evaluation
SVG generation evaluation assesses a model's ability to:
* **Interpret visual requirements**: Understand textual descriptions of visual elements
* **Generate valid SVG code**: Create syntactically correct SVG markup
* **Meet specific criteria**: Fulfill detailed visual requirements like colors, shapes, positions
* **Follow formatting conventions**: Use proper SVG code block formatting
Unlike traditional text evaluations, SVG generation testing evaluates **visual creativity and technical precision** - essential capabilities for AI systems that need to create graphical content, diagrams, icons, and visual representations.
## Understanding the Dataset Structure
The SVG generation dataset contains diverse test cases that evaluate different aspects of visual content creation, from simple geometric shapes to complex multi-element compositions.
### Dataset Format
Each entry in the dataset contains:
* **`id`**: Unique identifier for the test case
* **`prompt`**: Base textual description of what to create
* **`requirements`**: List of specific visual criteria that must be met
* **`total_requirements`**: Number of requirements for scoring normalization
### Example Dataset Entry
**Complex UI Recreation - Google Homepage:**
```json
{
"id": "google_homepage",
"prompt": "Write `svg` code for a screenshot of the [Google homepage](https://google.com).",
"requirements": [
"The overall background of the SVG must be white",
"All primary elements must be horizontally centered on the canvas",
"Include the Google logo in the center, using its official multi-color scheme (blue, red, yellow, blue, green, red)",
"Place a prominent search bar directly below the Google logo",
"The search bar must be a rounded rectangle with a light gray border",
"The search bar must contain a gray magnifying glass icon on the left side",
"The search bar must contain a gray microphone icon on the right side",
"Place two distinct buttons below the search bar",
"The left button must be labeled 'Google Search'",
"The right button must be labeled 'I'm Feeling Lucky'",
"Buttons should have a light gray background, a thin border, and dark gray text",
"Create a header section at the top right of the canvas",
"The header must include text links for 'Gmail' and 'Images'",
"The header must include a 3x3 grid icon (Google Apps launcher)",
"The header must include a prominent 'Sign in' button, typically with a blue background and white text"
]
}
```
### Dataset Characteristics
**Requirement Categories**:
* **Structural**: Presence of specific shapes, elements, or text
* **Aesthetic**: Colors, proportions, visual balance, style consistency
* **Technical**: SVG formatting, dimensions, code validity
* **Functional**: Scalability, accessibility, professional appearance
**Evaluation Approach**:
* **Automated rendering**: SVG to PNG conversion using Selenium WebDriver
* **LLM judge scoring**: GPT-4.1 vision model evaluates requirement fulfillment
* **Ratio-based scoring**: Score = fulfilled\_requirements / total\_requirements
## Step 1: Import Required Dependencies
First, we import the necessary modules for SVG evaluation:
```python
import base64
import json
import logging
import os
import re
import tempfile
from typing import Any, Dict, List, Optional
import litellm
from pydantic import BaseModel
from eval_protocol.models import EvaluateResult, EvaluationRow, InputMetadata, Message
from eval_protocol.pytest import evaluation_test, SingleTurnRolloutProcessor
```
Key dependencies:
* `base64`: For encoding rendered images for LLM judge evaluation
* `litellm`: For calling the GPT-4.1 vision model as LLM judge
* `selenium`: For automated SVG to PNG rendering (imported conditionally)
* `pydantic`: For structured response validation from LLM judge
* Standard EP framework components for evaluation structure
## Step 2: Create the Dataset Adapter
We need to convert the SVG dataset format to the EP's expected format:
```python
def svgbench_to_evaluation_row(data: List[Dict[str, Any]]) -> List[EvaluationRow]:
"""
Convert SVGBench dataset entries to EvaluationRow objects.
This adapter formats the visual requirements as a numbered list and creates
a proper generation prompt that includes formatting instructions and
specific requirements for the SVG generation task.
Args:
data: List of dictionaries containing prompt and requirements
Returns:
List of EvaluationRow objects ready for evaluation
"""
rows = []
for row in data:
# Format requirements as numbered list
requirements = "\n".join([f"{i+1}. {req}" for i, req in enumerate(row["requirements"])])
# Create the generation prompt following SVGBench format
prompt = f"""{row['prompt']} Wrap the SVG code in an SVG code block following the example below.
Requirements:
{requirements}"""
eval_row = EvaluationRow(
messages=[Message(role="user", content=prompt)],
input_metadata=InputMetadata(
row_id=row["id"],
dataset_info={
"original_prompt": row["prompt"],
"requirements": row["requirements"],
"total_requirements": len(row["requirements"]),
"formatted_prompt": prompt,
},
),
)
rows.append(eval_row)
return rows
```
This adapter:
* Formats visual requirements as a clear numbered list
* Provides SVG code block formatting instructions with examples
* Preserves original prompt and requirements for evaluation reference
* Creates structured metadata for scoring calculations
## Step 3: Implement SVG Code Extraction
Extract SVG code from model responses with robust parsing:
````python
def extract_svg_code(text: str) -> Optional[str]:
"""
Extract SVG code from model response using multiple fallback strategies.
This function handles various ways models might format SVG code:
- Standard ```svg code blocks
- Raw tags in text
- Mixed formatting approaches
Args:
text: Raw model response text
Returns:
Extracted SVG code or None if not found
"""
# First try: Look for ```svg code blocks
if "```svg" in text:
svg_parts = text.split("```svg")
if len(svg_parts) > 1:
svg_code = svg_parts[1].split("```")[0].strip()
return svg_code
# Second try: Look for tags
if "" in text:
start = text.find("") + 6
svg_code = text[start:end].strip()
return svg_code
return None
````
**Key features:**
* **Multiple parsing strategies**: Handles both code blocks and raw SVG tags
* **Fallback logic**: Tries different extraction methods sequentially
* **Robust extraction**: Handles various formatting styles from different models
* **Error handling**: Returns None for invalid or missing SVG content
## Step 4: Implement SVG to PNG Rendering
Convert SVG code to PNG images for visual evaluation:
```python
def render_svg_to_png(svg_code: str, output_path: str) -> bool:
"""
Render SVG code to PNG using Selenium WebDriver.
This function creates a temporary HTML wrapper around the SVG code
and uses a headless Chrome browser to render it as a PNG image.
The rendering process handles dimension detection and proper scaling.
Args:
svg_code: Valid SVG code
output_path: Path where PNG should be saved
Returns:
True if successful, False otherwise
"""
try:
# Import Selenium components (with error handling)
from selenium import webdriver
from selenium.webdriver.chrome.options import Options
from selenium.webdriver.common.by import By
from selenium.webdriver.support import expected_conditions as EC
from selenium.webdriver.support.ui import WebDriverWait
# Parse SVG dimensions with multiple fallback strategies
width, height = 800, 600 # Default dimensions
# Try to extract dimensions from SVG attributes
width_match = re.search(r'width="(\d+)"', svg_code)
height_match = re.search(r'height="(\d+)"', svg_code)
viewbox_match = re.search(r'viewBox="[^"]*?(\d+)\s+(\d+)"', svg_code)
if width_match and height_match:
width, height = int(width_match.group(1)), int(height_match.group(1))
elif viewbox_match:
width, height = int(viewbox_match.group(1)), int(viewbox_match.group(2))
# Create HTML wrapper for proper rendering
html_content = f"""
{svg_code}
"""
# Configure headless Chrome with appropriate settings
chrome_options = Options()
chrome_options.add_argument("--headless")
chrome_options.add_argument("--no-sandbox")
chrome_options.add_argument("--disable-dev-shm-usage")
chrome_options.add_argument("--disable-gpu")
chrome_options.add_argument(f"--window-size={width+40},{height+40}")
# Render using temporary HTML file
with tempfile.NamedTemporaryFile(mode="w", suffix=".html", delete=False) as f:
f.write(html_content)
html_path = f.name
try:
driver = webdriver.Chrome(options=chrome_options)
driver.get(f"file://{html_path}")
# Wait for SVG to load completely
WebDriverWait(driver, 10).until(EC.presence_of_element_located((By.TAG_NAME, "svg")))
# Capture screenshot
driver.save_screenshot(output_path)
driver.quit()
return True
finally:
os.unlink(html_path)
except ImportError:
logger.error("Selenium not available. Install with: pip install selenium")
return False
except Exception as e:
logger.error(f"SVG rendering failed: {e}")
return False
```
**Rendering process:**
1. **Dimension detection**: Extracts SVG dimensions from attributes or viewBox
2. **HTML wrapping**: Creates proper HTML container with CSS styling
3. **Browser automation**: Uses headless Chrome for consistent rendering
4. **Screenshot capture**: Generates PNG image of rendered SVG
5. **Cleanup**: Removes temporary files and browser instances
## Step 5: Implement LLM Judge Evaluation
Use GPT-4.1 vision model to evaluate requirement fulfillment:
```python
def evaluate_with_llm_judge(image_path: str, requirements: List[str]) -> Dict[str, Any]:
"""
Use LLM judge to evaluate how many requirements are fulfilled.
This function sends the rendered PNG image along with the requirements
to GPT-4.1, which uses its vision capabilities to assess visual content
and determine how many requirements are successfully met.
Args:
image_path: Path to rendered PNG image
requirements: List of requirements to evaluate
Returns:
Dictionary with evaluation results
"""
# Format requirements for evaluation
requirements_text = "\n".join([f"{i+1}. {req}" for i, req in enumerate(requirements)])
# Create evaluation prompt with structured JSON response
evaluate_prompt = f"""Examine the generated image. How many of the following {len(requirements)} requirements were fulfilled?
Be strict about the requirements and respond ONLY with a JSON object in this exact format:
{`{"number_of_fulfilled_requirements": }`}
Where is a number between 0 and {len(requirements)}.
Requirements:
{requirements_text}"""
# Read and encode image for vision model
with open(image_path, "rb") as f:
image_data = base64.b64encode(f.read()).decode("utf-8")
# Prepare multimodal message
messages = [
{
"role": "user",
"content": [
{"type": "text", "text": evaluate_prompt},
{"type": "image_url", "image_url": {"url": f"data:image/png;base64,{image_data}"}},
],
}
]
# Call GPT-4.1 with structured JSON response
response = litellm.completion(
model="gpt-4.1",
messages=messages,
temperature=0.0,
max_tokens=200,
response_format={
"type": "json_schema",
"json_schema": {"name": "SVGBenchResponse", "schema": SVGBenchResponse.model_json_schema()},
},
)
# Parse and validate response
result = json.loads(response.choices[0].message.content)
if "number_of_fulfilled_requirements" in result:
return result
else:
raise ValueError("Missing required field in response")
```
**LLM judge features:**
* **Vision analysis**: Uses GPT-4.1's multimodal capabilities to examine rendered images
* **Structured evaluation**: Provides clear requirements and expects JSON response
* **Strict assessment**: Instructs the judge to be thorough in requirement checking
* **Response validation**: Ensures proper JSON format and required fields
## Step 6: Configure and Run the Evaluation
We use the `@evaluation_test` decorator to configure the comprehensive evaluation:
```python
@evaluation_test(
input_dataset=["tests/pytest/data/svgbench_dataset.jsonl"],
dataset_adapter=svgbench_to_evaluation_row,
completion_params=[
{"temperature": 0.0, "max_tokens": 4096, "model": "gpt-4.1"},
{
"temperature": 0.8,
"model": "fireworks_ai/accounts/fireworks/models/gpt-oss-120b",
"extra_body": {"reasoning_effort": "high"},
},
],
rollout_processor=SingleTurnRolloutProcessor(),
passed_threshold=0.5, # 50% average score to pass
num_runs=1,
mode="pointwise",
max_concurrent_rollouts=3,
)
def test_svg_generation_evaluation(row: EvaluationRow) -> EvaluationRow:
"""
Test SVG generation and evaluation using comprehensive methodology.
This evaluation process:
1. Extracts SVG code from model response
2. Renders SVG to PNG using Selenium WebDriver
3. Uses GPT-4.1 vision model to evaluate requirement fulfillment
4. Calculates score based on fulfilled requirements ratio
Args:
row: EvaluationRow with model's SVG generation response
Returns:
EvaluationRow with evaluation results and score
"""
# Extract dataset information
requirements = row.input_metadata.dataset_info["requirements"]
total_requirements = row.input_metadata.dataset_info["total_requirements"]
original_prompt = row.input_metadata.dataset_info["original_prompt"]
row_id = row.input_metadata.row_id
# Get model response and extract SVG
model_response = row.messages[-1].content
svg_code = extract_svg_code(model_response)
if not svg_code:
row.evaluation_result = EvaluateResult(
score=0.0,
reason="No valid SVG code found in response"
)
return row
# Render SVG to PNG
with tempfile.NamedTemporaryFile(suffix=".png", delete=False) as f:
png_path = f.name
if not render_svg_to_png(svg_code, png_path):
row.evaluation_result = EvaluateResult(
score=0.0,
reason="Failed to render SVG to PNG"
)
return row
try:
# Evaluate with LLM judge
judge_result = evaluate_with_llm_judge(png_path, requirements)
# Calculate final score
fulfilled_count = judge_result.get("number_of_fulfilled_requirements", 0)
fulfilled_count = max(0, min(fulfilled_count, total_requirements)) # Clamp to valid range
score = fulfilled_count / total_requirements
row.evaluation_result = EvaluateResult(
score=score,
reason=f"Fulfilled {fulfilled_count}/{total_requirements} requirements ({score:.1%}) for prompt: '{original_prompt}'",
)
return row
finally:
# Clean up temporary files
os.unlink(png_path)
```
**Configuration parameters:**
* `input_dataset`: Path to SVG generation dataset JSONL file
* `completion_params`: Multiple model configurations for comparison
* `passed_threshold`: 50% average score required to pass evaluation
* `max_concurrent_rollouts`: Limits parallel processing for resource management
## Evaluation Pipeline Explained
### Complete Evaluation Flow
The SVG generation evaluation follows a comprehensive multi-stage pipeline:
1. **Prompt Construction**: Formats visual requirements with clear instructions
2. **SVG Generation**: Model generates SVG code following specified format
3. **Code Extraction**: Robust parsing extracts SVG from various response formats
4. **Visual Rendering**: Selenium WebDriver converts SVG to PNG image
5. **LLM Judge Assessment**: GPT-4.1 vision model evaluates requirement fulfillment
6. **Score Calculation**: Ratio-based scoring provides normalized evaluation results
### Evaluation Scenarios and Results
**Perfect Generation (Score: 1.0)**
```
Scenario: Model generates SVG that meets all requirements
- SVG code is syntactically valid
- All visual elements are present and correct
- Colors, positions, and proportions match specifications
- Proper formatting and dimensions
Result: ✅ All requirements fulfilled (score: 1.0)
```
**Partial Fulfillment (Score: 0.6)**
```
Scenario: Model meets most but not all requirements
- Correct shapes and colors
- Proper positioning
- Missing one element or incorrect dimension
- Otherwise high-quality output
Result: ⚠️ 3/5 requirements fulfilled (score: 0.6)
```
**Technical Issues (Score: 0.0)**
```
Scenario: Model generates invalid or non-rendering SVG
- Syntax errors in SVG code
- Missing closing tags or invalid attributes
- Code that cannot be rendered to image
- Completely incorrect format
Result: ❌ Technical failure (score: 0.0)
```
**Requirements Mismatch (Score: 0.2)**
```
Scenario: Model generates valid SVG but wrong content
- Technically correct SVG code
- Wrong shapes, colors, or elements
- Misunderstood the visual requirements
- Poor adherence to specifications
Result: ❌ 1/5 requirements fulfilled (score: 0.2)
```
## Advanced Features and Capabilities
### Debug File Generation
The evaluation supports saving debug files for analysis:
```python
# Enable debug file saving
save_debug_files = os.environ.get("SVGBENCH_SAVE_DEBUG_FILES", "false").lower() == "true"
if save_debug_files:
# Create debug directory and save files
debug_dir = "svgbench_debug"
os.makedirs(debug_dir, exist_ok=True)
# Save both SVG source and rendered PNG
with open(svg_path, "w") as f:
f.write(svg_code)
```
### Multi-Model Comparison
The evaluation supports comparing multiple models simultaneously:
```python
completion_params=[
{"temperature": 0.0, "max_tokens": 4096, "model": "gpt-4.1"},
{"temperature": 0.8, "model": "fireworks_ai/accounts/fireworks/models/gpt-oss-120b"},
]
```
## Conclusion
This SVG generation evaluation example demonstrates how to create comprehensive assessments of AI models' visual content creation capabilities. The multi-stage evaluation process ensures models can understand visual requirements, generate syntactically correct SVG code, meet specific criteria consistently, and follow proper formatting standards.
This evaluation approach is particularly valuable for visual AI development, design automation, educational applications, and creative tooling. The SVG generation evaluation complements other evaluation types by focusing on **visual-technical accuracy** and **requirement adherence**, making it essential for developing reliable AI systems that can bridge the gap between textual understanding and visual creation.
# 𝜏²-bench — Retail
Source: https://evalprotocol.io/example/tau-bench-retail
Multi-turn retail environment evaluation with MCP tool interactions and comprehensive reward scoring
This example demonstrates a multi-turn retail customer service evaluation using 𝜏²-bench environments and MCP tool interactions. For a detailed walkthrough of the concepts behind this evaluation, see our [Multi-Turn Evaluation with User Simulation tutorial](/tutorial/multi-turn-eval-user-simulation).
You can find the complete implementation in the Python SDK at `tests/pytest/test_tau_bench_retail.py` and exported as `tau_bench_retail`.
## What it does
* Uses multi-turn conversations with MCP tool calling in a retail environment
* Evaluates agents across database state validation and communication quality
* Applies multiplicative scoring where all criteria must pass for full credit
* Runs simulated customer service scenarios with realistic tool interactions
## How it's configured
* `@evaluation_test` uses `MCPGymRolloutProcessor` for multi-turn tool interactions
* Retail dataset entries include evaluation criteria and user simulation contexts
* 𝜏²-bench reward system validates environment state changes and communication quality
## Run it locally
After installing eval-protocol, you can run the benchmark from anywhere:
```bash
pytest --pyargs eval_protocol.benchmarks.test_tau_bench_retail -v \
--ep-print-summary --ep-summary-json artifacts/tau_bench_retail.json
```
Use `--ep-max-rows=5` for quick testing, or `--ep-reasoning-effort=high` for more thorough evaluation of the stochastic multi-turn interactions.
## Notes
* This evaluation involves multi-turn conversations with tool calling, making it computationally intensive
* Multiple runs recommended due to the stochastic nature of multi-turn user simulation
* Final score uses multiplicative reward where all evaluation criteria must pass for full credit
# BigQuery Adapter
Source: https://evalprotocol.io/integrations/bigquery-adapter
Query data from Google BigQuery and convert to evaluation format
# BigQuery Adapter
The BigQuery adapter allows you to query data from Google BigQuery tables and convert them to the standardized `EvaluationRow` format for evaluation.
## Overview
Google BigQuery is a serverless, highly scalable data warehouse. The BigQuery adapter enables you to:
* Execute SQL queries against BigQuery datasets
* Transform query results to evaluation format with custom functions
* Use parameterized queries for flexible data selection
* Handle authentication via service accounts or default credentials
```mermaid
sequenceDiagram
participant BigQuery as Google BigQuery
participant Adapter as BigQueryAdapter
participant Eval as Eval Protocol
Adapter->>BigQuery: Execute SQL query with parameters
BigQuery-->>Adapter: Return row results
loop For each row
Adapter->>Adapter: Transform row to EvaluationRow
end
Adapter->>Eval: Provide standardized data
Eval->>Eval: Run evaluation functions
```
## Installation
To use the BigQuery adapter, you need to install the Google Cloud BigQuery dependencies:
```bash
pip install 'eval-protocol[bigquery]'
```
## Basic Usage
```python
from eval_protocol.adapters import create_bigquery_adapter
# Define a transformation function
def transform_fn(row):
return {
'messages': [
{'role': 'system', 'content': 'You are a helpful assistant.'},
{'role': 'user', 'content': row['user_query']}
],
'ground_truth': row['expected_response'],
'metadata': {'category': row.get('category')}
}
# Create the adapter
adapter = create_bigquery_adapter(
transform_fn=transform_fn,
dataset_id="your-project-id", # Google Cloud project ID
credentials_path="/path/to/service-account.json" # Optional
)
# Get evaluation rows
rows = list(adapter.get_evaluation_rows(
query="SELECT * FROM `your-project.dataset.table` WHERE category = 'test'",
limit=100
))
# Use rows in evaluation via pytest-based tests
```
## Parameterized Queries
The BigQuery adapter supports parameterized queries for flexible data selection:
```python
from google.cloud import bigquery
# Create query with parameters
query = """
SELECT user_query, expected_response, category, difficulty
FROM `project.dataset.conversations`
WHERE created_date >= @start_date
AND category = @category
AND difficulty IN UNNEST(@difficulties)
ORDER BY created_date DESC
"""
# Define parameters
query_params = [
bigquery.ScalarQueryParameter("start_date", "DATE", "2024-01-01"),
bigquery.ScalarQueryParameter("category", "STRING", "customer_support"),
bigquery.ArrayQueryParameter("difficulties", "STRING", ["easy", "medium"])
]
# Execute query with parameters
rows = list(adapter.get_evaluation_rows(
query=query,
query_params=query_params,
limit=500
))
```
## Configuration Options
| Parameter | Type | Description |
| ------------------ | -------- | --------------------------------------------- |
| `transform_fn` | callable | Function to transform BigQuery rows |
| `dataset_id` | string | Google Cloud project ID (optional) |
| `credentials_path` | string | Path to service account JSON file (optional) |
| `location` | string | Default location for BigQuery jobs (optional) |
## Query Options
| Parameter | Type | Description |
| -------------- | --------------------- | ------------------------------------- |
| `query` | string | SQL query to execute |
| `query_params` | List\[QueryParameter] | Optional query parameters |
| `limit` | int | Maximum number of rows to return |
| `offset` | int | Number of rows to skip |
| `model_name` | string | Model name for completion parameters |
| `temperature` | float | Temperature for completion parameters |
| `max_tokens` | int | Max tokens for completion parameters |
## BigQuery Data Types
BigQuery supports different column modes that affect how data is returned:
* **Required**: Column always has a value (never null)
* **Nullable**: Column may be null or missing
* **Repeated**: Column contains an array of values (e.g., `['item1', 'item2', 'item3']`)
The BigQuery adapter returns raw Python objects for all data types. For **Repeated** fields (arrays), your `transform_fn` will receive Python lists that you need to handle appropriately - whether by joining them into strings, taking specific elements, or processing them as needed for your evaluation use case.
## Example: Google Books Ngrams (Public Dataset)
Note that this is likely not a realistic list of EvaluationRows that a user would want to evaluate an LLM on. This code snippet merely serves as an end-to-end example of querying a public BigQuery dataset and demonstrates one way of handling **Repeated** fields.
```python
from eval_protocol.adapters import create_bigquery_adapter
def linguistics_transform(row):
"""Transform Google Books ngrams data to evaluation format."""
term = str(row.get("term", ""))
term_frequency = row.get("term_frequency", 0)
document_frequency = row.get("document_frequency", 0)
# Handle REPEATED field (array of tokens)
tokens = row.get("tokens", [])
tokens_sample = tokens[:3] if tokens else [] # Take first 3 tokens
# Handle REPEATED RECORD (array of year objects)
years = row.get("years", [])
# Create educational linguistics question
if tokens_sample:
tokens_str = ", ".join(str(token) for token in tokens_sample)
question = f"What can you tell me about the term '{term}' and its linguistic tokens: {tokens_str}?"
else:
question = f"What can you tell me about the term '{term}' based on its usage patterns?"
# Create ground truth based on frequency data
frequency_desc = (
"high frequency" if term_frequency > 1000
else "moderate frequency" if term_frequency > 100
else "low frequency"
)
ground_truth = (
f"The term '{term}' has {frequency_desc} usage ({term_frequency} occurrences) "
f"and appears in {document_frequency} documents."
)
return {
'messages': [
{
'role': 'system',
'content': 'You are a linguistics expert who analyzes word usage patterns from Google Books data.'
},
{'role': 'user', 'content': question}
],
'ground_truth': ground_truth,
'metadata': {
'dataset': 'google_books_ngrams',
'term': term,
'term_frequency': term_frequency,
'document_frequency': document_frequency,
'tokens_sample': tokens_sample, # Sample of REPEATED field
'num_year_records': len(years) # Count of REPEATED RECORD
}
}
# Create adapter (uses your project for billing, queries public data)
adapter = create_bigquery_adapter(
transform_fn=linguistics_transform,
dataset_id="your-project-id" # Your project (for billing)
)
# Query public Google Books ngrams dataset
query = """
SELECT
term,
term_frequency,
document_frequency,
tokens, -- REPEATED field (array)
has_tag,
years -- REPEATED RECORD (array of objects)
FROM `bigquery-public-data.google_books_ngrams_2020.chi_sim_1`
WHERE term_frequency > 100
AND document_frequency > 5
AND LENGTH(term) >= 2
ORDER BY term_frequency DESC
LIMIT 10
"""
# Execute query and get evaluation rows
rows = list(adapter.get_evaluation_rows(
query=query,
limit=5,
model_name="gpt-4",
temperature=0.0
))
```
This example shows how to:
* Query **public BigQuery datasets** (no authentication needed for the data, just for billing)
* Handle **Repeated fields** like `tokens` (arrays) and `years` (array of records)
* Transform complex linguistic data into educational evaluation prompts
* Create realistic ground truth based on frequency patterns
## Authentication
The BigQuery adapter supports multiple authentication methods:
### Service Account File
```python
adapter = create_bigquery_adapter(
transform_fn=your_transform_fn,
dataset_id="your-project-id",
credentials_path="/path/to/service-account.json"
)
```
### Default Credentials
```python
# Uses Application Default Credentials (ADC)
adapter = create_bigquery_adapter(
transform_fn=your_transform_fn,
dataset_id="your-project-id"
)
```
### Environment Variable
```bash
export GOOGLE_APPLICATION_CREDENTIALS="/path/to/service-account.json"
```
## Troubleshooting
### Common Issues
1. **Authentication Errors**: Verify your service account has BigQuery permissions (`BigQuery Data Viewer` and `BigQuery Job User`)
2. **Query Errors**: Check your SQL syntax and ensure referenced tables exist and are accessible
3. **Missing Dependencies**: Ensure you've installed the BigQuery dependencies with `pip install 'eval-protocol[bigquery]'`
4. **Permission Denied**: Verify your service account has access to the specific datasets and tables
5. **Query Timeouts**: For large queries, consider adding `LIMIT` clauses or breaking into smaller batches
### Debug Mode
Enable debug logging to see detailed BigQuery operations:
```python
import logging
logging.basicConfig(level=logging.DEBUG)
logging.getLogger("google.cloud.bigquery").setLevel(logging.DEBUG)
```
# HuggingFace Adapter
Source: https://evalprotocol.io/integrations/huggingface-adapter
Load and transform datasets from the HuggingFace Hub
# HuggingFace Adapter
The HuggingFace adapter allows you to load datasets from the HuggingFace Hub and transform them into the standardized `EvaluationRow` format for evaluation.
## Overview
HuggingFace Datasets is a library providing access to thousands of datasets for machine learning. The HuggingFace adapter enables you to:
* Load any dataset from the HuggingFace Hub
* Transform dataset rows to the evaluation format
* Apply custom transformations for specific dataset structures
* Filter and limit dataset rows
```mermaid
flowchart TD
A[HuggingFace Hub] -->|load_dataset| B[Dataset Object]
B -->|transform_fn| C[EvaluationRow Format]
C -->|evaluate_rows| D[Evaluation Results]
subgraph "Custom Transformation"
E[Dataset Row] -->|Extract Fields| F[Messages]
E -->|Extract| G[Ground Truth]
E -->|Extract| H[Metadata]
F --> I[EvaluationRow]
G --> I
H --> I
end
B -.->|For each row| E
I -.->|Yield| C
```
## Installation
To use the HuggingFace adapter, you need to install the HuggingFace datasets dependencies:
```bash
pip install 'eval-protocol[huggingface]'
```
## Basic Usage
```python
from eval_protocol.adapters import create_huggingface_adapter
# Define a transformation function
def transform_fn(row):
return {
'messages': [
{'role': 'system', 'content': 'You are a helpful assistant.'},
{'role': 'user', 'content': row['question']}
],
'ground_truth': row['answer'],
'metadata': {'category': row.get('category')}
}
# Create the adapter
adapter = create_huggingface_adapter(
dataset_id="squad", # HuggingFace dataset ID
transform_fn=transform_fn # Your transformation function
)
# Get evaluation rows
rows = list(adapter.get_evaluation_rows(
split="validation", # Dataset split to use
limit=100 # Maximum number of rows
))
# Use rows in evaluation
# See pytest-based evaluation in docs
```
## Pre-built Adapters
Eval Protocol includes pre-built adapters for common datasets:
```python
from eval_protocol.adapters import create_gsm8k_adapter, create_math_adapter
# GSM8K math word problems
gsm8k_adapter = create_gsm8k_adapter()
gsm8k_rows = list(gsm8k_adapter.get_evaluation_rows(split="test", limit=10))
# General math problems
math_adapter = create_math_adapter()
math_rows = list(math_adapter.get_evaluation_rows(split="test", limit=10))
```
## Configuration Options
| Parameter | Type | Description |
| -------------- | -------- | ------------------------------------- |
| `dataset_id` | string | HuggingFace dataset identifier |
| `transform_fn` | callable | Function to transform dataset rows |
| `config_name` | string | Optional dataset configuration name |
| `revision` | string | Optional dataset revision/commit hash |
## Creating Custom Transformations
The transformation function is the key component of the HuggingFace adapter. It should take a dataset row (dictionary) and return a dictionary with the following structure:
```python
def custom_transform(row):
return {
'messages': [ # List of message dictionaries
{'role': 'system', 'content': 'System prompt here'},
{'role': 'user', 'content': row['input']},
# Add more messages for multi-turn conversations
],
'ground_truth': row['output'], # Expected answer/output
'metadata': { # Optional metadata
'source': 'dataset_name',
'difficulty': row.get('difficulty'),
# Any other metadata fields
},
'tools': [] # Optional tool definitions for tool calling scenarios
}
```
## Example: Custom GSM8K Adapter
```python
from eval_protocol.adapters import create_huggingface_adapter
from eval_protocol import evaluate_rows
from eval_protocol.rewards.accuracy import accuracy_reward
# Custom transformation for GSM8K
def custom_gsm8k_transform(row):
return {
'messages': [
{
'role': 'system',
'content': 'You are a math expert. Solve the following problem step by step.'
},
{'role': 'user', 'content': row['question']}
],
'ground_truth': row['answer'],
'metadata': {
'source': 'gsm8k',
'difficulty': 'challenging'
}
}
# Create custom adapter
adapter = create_huggingface_adapter(
dataset_id="gsm8k",
config_name="main",
transform_fn=custom_gsm8k_transform
)
# Get evaluation rows
rows = list(adapter.get_evaluation_rows(split="test", limit=20))
# Evaluate accuracy
results = evaluate_rows(rows, accuracy_reward)
# Calculate average score
avg_score = sum(r.score for r in results) / len(results) if results else 0
print(f"Average accuracy score: {avg_score:.2f}")
```
## Loading Local Datasets
You can also use the adapter with local datasets:
```python
from eval_protocol.adapters import HuggingFaceAdapter
# Create adapter from local dataset
adapter = HuggingFaceAdapter.from_local(
path="/path/to/local/dataset",
transform_fn=your_transform_function
)
# Get evaluation rows
rows = list(adapter.get_evaluation_rows())
```
## Troubleshooting
### Common Issues
1. **Dataset Not Found**: Verify the dataset ID and configuration name
2. **Missing Fields**: Ensure your transformation function handles the actual structure of the dataset
3. **Missing Dependencies**: Ensure you've installed the HuggingFace dependencies with `pip install 'eval-protocol[huggingface]'`
4. **Memory Issues**: For large datasets, use streaming and limit the number of rows
### Debug Mode
Enable debug logging to see detailed dataset loading information:
```python
import logging
logging.basicConfig(level=logging.DEBUG)
logging.getLogger("datasets").setLevel(logging.DEBUG)
```
# Overview
Source: https://evalprotocol.io/integrations/index
Connect Eval Protocol with various data sources and tracing platforms
# Data Source Adapters
Eval Protocol provides adapters that allow you to easily integrate with various data sources and tracing platforms. Adapters handle the conversion of external data formats into the standardized `EvaluationRow` format used by the evaluation pipeline.
## Available Adapters
Pull evaluation data from Langfuse observability platform
Load and transform datasets from the HuggingFace Hub
Build your own adapters for any data source
## How Adapters Work
Adapters serve as bridges between external data sources and the Eval Protocol evaluation pipeline. They handle:
1. **Data Ingestion**: Loading data from external sources (APIs, databases, files, etc.)
2. **Format Conversion**: Converting the source data to `EvaluationRow` format
3. **Metadata Extraction**: Preserving relevant metadata from the source system
4. **Error Handling**: Gracefully handling failures and logging issues
### Adapter Architecture
```mermaid
flowchart TD
%% ─────────────── Nodes ───────────────
subgraph "External Data Sources"
A[Langfuse]
B[HuggingFace Datasets]
C[Custom Data Sources]
end
subgraph "Eval Protocol Adapters"
D[LangfuseAdapter]
E[HuggingFaceAdapter]
F[CustomAdapter]
end
subgraph "Evaluation Pipeline"
G[EvaluationRow Format]
H[Evaluation Functions]
I[Results Metrics]
end
%% ─────────────── Edges ───────────────
A -- API Calls --> D
B -- Dataset Loading --> E
C -- Custom Integration --> F
D -- Transform --> G
E -- Transform --> G
F -- Transform --> G
G -- Input --> H
H -- Generate --> I
%% ─────────────── Styles ───────────────
classDef src fill:#bfdbfe,stroke:#3b82f6,stroke-width:2px,color:#1e293b;
classDef adapter fill:#fde68a,stroke:#f59e0b,stroke-width:2px,color:#1e293b;
classDef pipeline fill:#bbf7d0,stroke:#10b981,stroke-width:2px,color:#064e3b;
class A,B,C src;
class D,E,F adapter;
class G,H,I pipeline;
```
## Installation
Adapters are included in the Eval Protocol package but may require additional dependencies:
```bash
# Install with all adapter dependencies
pip install 'eval-protocol[adapters]'
# Or install specific adapter dependencies
pip install 'eval-protocol[langfuse]' # For Langfuse
pip install 'eval-protocol[huggingface]' # For HuggingFace
```
## Creating Custom Adapters
You can create custom adapters for any data source by implementing the adapter interface:
```python
from typing import Iterator, Dict, Any
from eval_protocol.models import EvaluationRow, Message, InputMetadata
class MyCustomAdapter:
def __init__(self, **config):
# Initialize your data source connection
self.config = config
# Setup any necessary clients or connections
def get_evaluation_rows(self, **kwargs) -> Iterator[EvaluationRow]:
# Fetch data from your source
data = self._fetch_data(**kwargs)
# Convert each item to EvaluationRow format
for item in data:
try:
# Create messages list
messages = [
Message(role="system", content="Your system prompt"),
Message(role="user", content=item["input"])
]
# Create evaluation row
row = EvaluationRow(
messages=messages,
ground_truth=item.get("expected_output"),
metadata=InputMetadata(
source="my_custom_source",
id=item.get("id"),
# Add any other metadata
)
)
yield row
except Exception as e:
# Handle errors gracefully
print(f"Error processing item {item.get('id')}: {e}")
continue
```
## Contributing New Adapters
We welcome contributions of new adapters! Popular integrations that would be valuable include:
* **Observability platforms**: OTEL, Langsmith, Braintree etc.
* **Database adapters**: PostgreSQL, MongoDB, etc.
* **File format adapters**: Parquet, Excel, etc.
To contribute a new adapter:
1. Follow the adapter structure in `eval_protocol/adapters/`
2. Implement the `get_evaluation_rows()` method
3. Add appropriate tests
4. Update the `__init__.py` to conditionally import your adapter
5. Submit a pull request
See the [Contributing Guide](/community.mdx) for more details on the contribution process.
# Langfuse Adapter
Source: https://evalprotocol.io/integrations/langfuse-adapter
Pull evaluation data from Langfuse observability platform
# Langfuse Adapter
The Langfuse adapter allows you to pull conversation data and tool calling traces from Langfuse deployments and convert them to the standardized `EvaluationRow` format for evaluation.
## Overview
Langfuse is an open-source observability platform for LLM applications. The Langfuse adapter enables you to:
* Pull conversation histories from production deployments
* Extract tool calling traces and function calls
* Convert complex conversation structures to evaluation format
* Filter data by tags, users, sessions, and time ranges
```mermaid
sequenceDiagram
participant App as Your LLM App
participant Langfuse as Langfuse Platform
participant Adapter as LangfuseAdapter
participant Eval as Eval Protocol
App->>Langfuse: Log conversations & traces
Note over App,Langfuse: Production data collection
Adapter->>Langfuse: Query API with filters
Langfuse-->>Adapter: Return matching traces
loop For each trace
Adapter->>Adapter: Convert to EvaluationRow
end
Adapter->>Eval: Provide standardized data
Eval->>Eval: Run evaluation functions
```
## Installation
To use the Langfuse adapter, you need to install the Langfuse dependencies:
```bash
pip install 'eval-protocol[langfuse]'
```
## Basic Usage
```python
from eval_protocol.adapters import create_langfuse_adapter
from datetime import datetime, timedelta
# Create the adapter
adapter = create_langfuse_adapter(
public_key="your_public_key",
secret_key="your_secret_key",
host="https://cloud.langfuse.com" # Optional, defaults to cloud.langfuse.com
)
# Get evaluation rows
rows = list(adapter.get_evaluation_rows(
limit=50, # Maximum number of rows to return
tags=["production"], # Filter by specific tags
from_timestamp=datetime.now() - timedelta(days=7) # Last 7 days
))
# Use rows in evaluation via pytest-based tests
```
## Advanced Filtering
The Langfuse adapter supports various filtering options to target specific data:
```python
rows = adapter.get_evaluation_rows(
limit=100,
tags=["production", "customer-service"], # Multiple tags (AND condition)
user_id="specific_user_id", # Filter by user ID
session_id="specific_session", # Filter by session ID
from_timestamp=datetime(2023, 1, 1), # From date
to_timestamp=datetime(2023, 1, 31), # To date
include_tool_calls=True # Include tool calling traces
)
```
## Configuration Options
| Parameter | Type | Description |
| ------------ | ------ | ------------------------------------------------------------------------------------- |
| `public_key` | string | Langfuse public API key |
| `secret_key` | string | Langfuse secret API key |
| `host` | string | Langfuse host URL (default: [https://cloud.langfuse.com](https://cloud.langfuse.com)) |
| `project_id` | string | Optional project ID to filter traces |
## Filtering Options
| Parameter | Type | Description |
| -------------------- | ---------- | -------------------------------------- |
| `limit` | int | Maximum number of rows to return |
| `tags` | List\[str] | Filter by specific tags |
| `user_id` | str | Filter by user ID |
| `session_id` | str | Filter by session ID |
| `from_timestamp` | datetime | Filter traces after this timestamp |
| `to_timestamp` | datetime | Filter traces before this timestamp |
| `include_tool_calls` | bool | Whether to include tool calling traces |
## Example: Evaluating Production Conversations
```python
from eval_protocol.adapters import create_langfuse_adapter
from eval_protocol.rewards.accuracy import accuracy_reward
from datetime import datetime, timedelta
# Create adapter for last 24 hours of production data
adapter = create_langfuse_adapter(
public_key="your_public_key",
secret_key="your_secret_key"
)
# Get rows with ground truth available
rows = list(adapter.get_evaluation_rows(
limit=100,
tags=["has_feedback"], # Only conversations with user feedback
from_timestamp=datetime.now() - timedelta(days=1)
))
# Evaluate accuracy in a pytest test using @evaluation_test; for ad-hoc usage, see SDK README's direct runner.
```
## Troubleshooting
### Common Issues
1. **Authentication Errors**: Verify your API keys are correct and have the necessary permissions
2. **No Data Returned**: Check your filtering criteria - you might be using tags or time ranges that don't match any data
3. **Missing Dependencies**: Ensure you've installed the Langfuse dependencies with `pip install 'eval-protocol[langfuse]'`
4. **Rate Limiting**: If you're pulling large amounts of data, you might hit API rate limits
### Debug Mode
Enable debug logging to see detailed API requests and responses:
```python
import logging
logging.basicConfig(level=logging.DEBUG)
logging.getLogger("langfuse").setLevel(logging.DEBUG)
```
# Introduction to Eval Protocol (EP)
Source: https://evalprotocol.io/introduction
> *The open standard and toolkit for LLM evaluations*
EP is an [open specification](/specification) with a [Python
SDK](https://github.com/eval-protocol/python-sdk), [UI for reviewing
evals](/tutorial/ui/getting-started), plus popular benchmarks and integrations
with observability and agent tooling. It gives you a consistent way to write
evals, store traces, and save results—scaling from quick single-turn model
selection to multi-turn reinforcement learning. Start with simple single-turn
evals for model selection and prompt engineering, then scale up to complex
multi-turn reinforcement learning (RL) for agents using Model Context Protocol
(MCP). EP ensures consistent patterns for writing evals, storing traces, and
saving results—enabling you to build sophisticated agent evaluations that work
across real-world scenarios, from markdown generation tasks to customer service
agents with tool-calling capabilities.
Log Viewer: Monitor your evaluation rollouts in real time.}>
## Getting Started
Ready to dive in? Install EP with a single command and start evaluating your models:
```shell
pip install eval-protocol
```
## Quick Example
Here's a simple test function that checks if a model's response contains **bold** text formatting:
Before running the following example, you need to setup your environment
variable to make a LiteLLM call. This example uses [Fireworks](https://fireworks.ai) (prefix: `fireworks_ai/`) so you need to
set the `FIREWORKS_API_KEY` environment variable by creating a `.env` file in
the root of your project.
```bash .env
FIREWORKS_API_KEY=your_api_key
```
```python test_bold_format.py
from eval_protocol.models import EvaluateResult, EvaluationRow, Message
from eval_protocol.pytest import SingleTurnRolloutProcessor, evaluation_test
@evaluation_test(
input_messages=[
[
Message(
role="system", content="You are a helpful assistant. Use bold text to highlight important information."
),
Message(
role="user", content="Explain why **evaluations** matter for building AI agents. Make it dramatic!"
),
],
],
completion_params=[{"model": "fireworks_ai/accounts/fireworks/models/llama-v3p1-8b-instruct"}],
rollout_processor=SingleTurnRolloutProcessor(),
mode="pointwise",
)
def test_bold_format(row: EvaluationRow) -> EvaluationRow:
"""
Simple evaluation that checks if the model's response contains bold text.
"""
assistant_response = row.messages[-1].content
if assistant_response is None:
result = EvaluateResult(score=0.0, reason="❌ No response found")
row.evaluation_result = result
return row
if isinstance(assistant_response, list):
assistant_response = assistant_response[0].content
# Check if response contains **bold** text
has_bold = "**" in assistant_response
if has_bold:
result = EvaluateResult(score=1.0, reason="✅ Response contains bold text")
else:
result = EvaluateResult(score=0.0, reason="❌ No bold text found")
row.evaluation_result = result
return row
```
## Learn More
For a complete step-by-step tutorial of a slightly more complex example with
detailed explanations, dataset examples, and configuration options, see our
[Single-turn eval](/tutorial/single-turn-eval-static) tutorial.
For a more advanced example that includes MCP and user simulation, check out our
implementation of [𝜏²-bench](/tutorial/multi-turn-eval-user-simulation), a benchmark for evaluating conversational
agents in a dual control environment.
### Next Steps
* [Specification](/specification)
* [Why Eval Protocol?](/why)
* [Principles](/principles)
* [Single-turn eval](/tutorial/single-turn-eval-static)
* [Multi-turn eval](/tutorial/multi-turn-eval-user-simulation)
# MCP Control/Data Planes
Source: https://evalprotocol.io/mcp-extensions
EP adopts a clear split between the data plane (MCP calls that carry observations) and the control plane (HTTP endpoints for rewards, termination, and lifecycle). This separation improves reproducibility, session awareness, and failure recovery.
EP separates agent evaluation into two independent planes: data plane (MCP tool calls carrying observations) and control plane (HTTP endpoints for rewards and termination). This architectural split prevents observation/reward coupling that breaks caching and session isolation, while enabling graceful failure recovery—if reward calculation fails, agents still receive observations and evaluations continue with safe defaults.
## The Split
* Data plane (MCP): `list_tools`, `call_tool`, `list_resources`/`read_resource`.
* Purpose: tool schemas and observations only--what the agent receives.
* Control plane (HTTP): `/control/*` endpoints with `mcp-session-id` header.
* Purpose: initial state, reward, status (terminated/truncated), and reset.
Separation rules:
* Observations never come from control plane endpoints.
* Rewards/termination never come from tool results.
### Sequence diagram (data vs control planes)
```mermaid
sequenceDiagram
participant LLMPolicy as LLM Policy (Fireworks)
participant MCPClient as MCP Client
participant MCPServer as MCP-Gym Server
participant ControlPlane as HTTP Control Plane
Note over LLMPolicy,MCPClient: CONVERSATION FLOW
LLMPolicy->>LLMPolicy: Clean messages (strip metadata)
LLMPolicy->>LLMPolicy: Generate tool calls via LLM API
Note over MCPClient,MCPServer: DATA PLANE (MCP Protocol)
MCPClient->>MCPServer: MCP Tool Call (lake_move)
MCPServer->>MCPServer: Execute environment step
MCPServer->>ControlPlane: Update session state (reward, terminated)
MCPServer-->>MCPClient: MCP Response (observation only)
Note over MCPClient,ControlPlane: CONTROL PLANE (HTTP Endpoints)
MCPClient->>ControlPlane: GET /control/reward (session-id header)
ControlPlane-->>MCPClient: {"reward": 1.0}
MCPClient->>ControlPlane: GET /control/status (session-id header)
ControlPlane-->>MCPClient: {"terminated": true}
Note over LLMPolicy,MCPClient: TRAJECTORY RECORDING
MCPClient->>LLMPolicy: Add tool response + metadata
LLMPolicy->>LLMPolicy: Record with control plane data
```
EP’s client enforces this separation in [MCPConnectionManager](https://github.com/eval-protocol/python-sdk/blob/main/eval_protocol/mcp/client/connection.py) and [GeneralMCPVectorEnv](https://github.com/eval-protocol/python-sdk/blob/main/eval_protocol/mcp/session/manager.py).
## Control Plane Endpoints
Servers should implement the following endpoints alongside their MCP transport (e.g., at `https://your-server.example/mcp` for MCP, and `https://your-server.example/control/...` for control):
* `POST /control/reset_session`
* Headers: `mcp-session-id: `
* Body: `{ "seed": }`
* Use: cleanup/reseed before a rollout or at close.
* `GET /control/initial_state`
* Headers: `mcp-session-id: `
* Returns: JSON initial observation/state used to seed the first user prompt.
* `GET /control/reward`
* Headers: `mcp-session-id: `
* Returns: `{ "reward": }` for the most recent step.
* `GET /control/status`
* Headers: `mcp-session-id: `
* Returns: `{ "terminated": , "truncated": }` to indicate episode end.
Notes:
* EP generates a stable `session_id` by hashing dataset row values and the model ID via `gen_session_id(...)` and passes it in MCP `clientInfo` and as the control-plane header. Heads up: it does not use run ID, so between runs, the MCP server needs to be restarted. This is automatically done in the current implementation of `MCPGymRolloutProcessor()`.
* The simulator framework ([SimulationServerBase](https://github.com/eval-protocol/python-sdk/blob/main/eval_protocol/mcp/simulation_server.py)) demonstrates session-aware design but you still need to expose the `/control/*` endpoints in your production server. Note: the EP client does not depend on `SimulationServerBase`; it is provided as a reference pattern only.
## End-to-End Flows
### 1) Initialization
1. EP opens a streamable MCP session and sends `clientInfo` with `session_id`, `seed`, `config`, and `model_id`.
2. EP pre-warms tool schemas via `list_tools` (data plane) and caches them.
3. EP fetches initial state via `GET /control/initial_state` (control plane); if that times out or fails, it falls back to `list_resources`/`read_resource` (data plane) heuristics.
4. The initial observation seeds the first user prompt with your `user_prompt_template`.
Key guarantees:
* Initial state is session-aware (derived from control plane when available).
* Tool schemas are cached per `base_url` to avoid thundering herds.
### 2) Step Execution (per agent turn)
1. Policy returns one or more MCP tool calls based on tool schemas and conversation history.
2. EP executes the tool call via `call_tool` (data plane) and parses the observation from tool content.
3. EP queries control plane for reward and status:
* `GET /control/reward` → scalar reward
* `GET /control/status` → `terminated`/`truncated`
4. EP attaches a control-plane step summary to the conversation for logging, including reward, termination, and tool calls.
Separation:
* Observations never come from control plane endpoints
* Rewards/termination never come from tool results.
### 3) Termination
An episode ends when any of the following occurs:
* Control plane status reports `terminated` (environment signaled end) or `truncated` (cutoff).
* The policy returns `_no_tool_call` or `_playback_terminate` (e.g., model finished or playback hit the end).
* The simulated user signals stop; EP maps this to `termination_reason = user_stop`.
EP maps LLM finish reasons into `TerminationReason` values: `stop`, `length`, `tool_calls`, plus environment-driven `control_plane_signal`, `max_steps`, `user_stop`, `error`.
### 4) Failure Recovery
EP is defensive at the boundaries between planes:
* Initial state: If `/control/initial_state` fails or times out, EP falls back to `read_resource` (and ultimately a default observation) so rollouts can proceed.
* Tool responses: If a tool returns invalid/empty JSON, EP wraps it into a structured observation with an error tag instead of failing hard.
* Control queries: `/control/reward` and `/control/status` use short timeouts; absent data yields defaults (0.0 reward, not-terminated) and the step continues.
* Session re-init: Re-initialization closes any existing session handles and re-opens cleanly before retrying.
### 5) Cleanup
* At `close`, EP calls `POST /control/reset_session` and then closes the MCP transport.
## Minimal Client Example
```python
import eval_protocol as ep
from eval_protocol.models import EvaluationRow, Message
rows = [
EvaluationRow(
messages=[Message(role="system", content="Use tools to help the user.")],
input_metadata={
"dataset_info": {
"user_prompt_template": "Observation: {observation}",
"environment_context": {"seed": 123}
}
},
)
]
envs = ep.make("https://your-server.example/mcp", evaluation_rows=rows, model_id="my-model")
policy = ep.OpenAIPolicy(model_id="gpt-4o-mini")
async def run():
async for row in ep.rollout(envs, policy=policy, steps=64, openai_format_log_file="terminated.jsonl"):
print(row.rollout_status.status, row.rollout_status.termination_reason)
```
## Multi-Server Aggregation (Optional)
If you need to aggregate tools from multiple MCP servers, EP provides [MCPMultiClient](https://github.com/eval-protocol/python-sdk/blob/main/eval_protocol/mcp/mcp_multi_client.py) that connects to both stdio and remote servers and exposes all tools under one client.
```json
{
"mcpServers": {
"local": { "command": "python", "args": ["-m", "my_mcp_server"], "env": ["API_KEY"] },
"remote": { "url": "https://your-server.example/mcp" }
}
}
```
This is independent from the control plane split; each server still implements its own `/control/*` endpoints.
## Record/Playback
Set `EP_PLAYBACK_FILE` to enable deterministic record/playback. During playback, the policy is stepped to match prior turns, and `_playback_terminate` ends the episode at the recorded boundary. Control-plane step summaries and an optional OpenAI-format log are emitted for terminated trajectories.
## Server Implementation Checklist
Use this as a reference when building the control plane alongside your MCP server.
* Headers: include `mcp-session-id` on every control request; return `Content-Type: application/json`.
* Session ID: treat as opaque but stable per dataset row + model; do not coalesce across different seeds/config.
* Idempotency: make `POST /control/reset_session` safe to call multiple times; ignore duplicate resets.
* Initialization:
* `GET /control/initial_state` returns the initial observation JSON for this session, derived from `seed` and `config` (from MCP `clientInfo`).
* Keep this response free of reward/termination fields; it seeds the first user prompt only.
* Step reporting:
* `GET /control/reward` returns `{ "reward": }` for the most recent applied action.
* `GET /control/status` returns `{ "terminated": , "truncated": }` for the episode state.
* Do not include observation content here; that stays in the data plane.
* Timeouts and SLAs:
* EP uses \~15s timeout for initial\_state under high concurrency (3s in playback) and \~3s for reward/status.
* Aim for sub-1s responses; if computation is heavy, cache per `session_id`.
* Errors:
* Use `4xx` for client mistakes (missing/invalid `mcp-session-id`), `5xx` for server errors.
* On faults, respond with a minimal JSON error body; EP will default to `reward=0.0` and `terminated=false` on non-200s.
* Concurrency:
* Expect many concurrent sessions; isolate per `session_id` and avoid global mutable state.
* Ensure tool results (data plane) and control updates are applied atomically in your environment loop.
* Security:
* You may authenticate control endpoints; keep auth orthogonal to `mcp-session-id` routing.
* Validate reasonable `session_id` lengths to prevent abuse.
Example responses
```http
GET /control/initial_state
200 OK
Content-Type: application/json
{
"observation": "initial_state",
"grid_layout": "...",
"session_id": ""
}
```
```http
GET /control/reward
200 OK
Content-Type: application/json
{ "reward": 1.0 }
```
```http
GET /control/status
200 OK
Content-Type: application/json
{ "terminated": false, "truncated": false }
```
```http
POST /control/reset_session
200 OK
Content-Type: application/json
{ "ok": true }
```
## Reading clientInfo on the Server
Servers using the low-level MCP server can extract `clientInfo` extras to create stable, session-aware environments. Example:
```python
from mcp.server.lowlevel import Server
app = Server("MyServer")
@app.call_tool()
async def call_tool(name: str, arguments: dict):
# Access per-request context
ctx = app.request_context
session_id = None
seed = None
config = {}
if hasattr(ctx, "session") and hasattr(ctx.session, "client_params"):
client_params = ctx.session.client_params
if hasattr(client_params, "clientInfo"):
client_info = client_params.clientInfo
if client_info and hasattr(client_info, "_extra"):
extra = client_info._extra or {}
session_id = extra.get("session_id")
seed = extra.get("seed")
config = extra.get("config", {})
env = get_or_create_env(session_id=session_id, seed=seed, config=config)
# Apply action and return observation (data plane only)
observation = env.step(name, arguments)
return [{"type": "text", "text": json.dumps(observation)}]
```
Notes:
* Use `session_id` as the key for per-session state. Seed and config should shape the initial state.
* Keep observations on the data plane; publish reward and termination via `/control/*`.
## GitHub References
* Client: MCP connection manager (control/data split)
* [https://github.com/eval-protocol/python-sdk/blob/main/eval\_protocol/mcp/client/connection.py](https://github.com/eval-protocol/python-sdk/blob/main/eval_protocol/mcp/client/connection.py)
* Client: Vector env/session manager
* [https://github.com/eval-protocol/python-sdk/blob/main/eval\_protocol/mcp/session/manager.py](https://github.com/eval-protocol/python-sdk/blob/main/eval_protocol/mcp/session/manager.py)
* Server: MCP-Gym base with control-plane endpoints
* [https://github.com/eval-protocol/python-sdk/blob/main/eval\_protocol/mcp/mcpgym.py](https://github.com/eval-protocol/python-sdk/blob/main/eval_protocol/mcp/mcpgym.py)
* Server: Simulation server base (session-aware patterns)
* [https://github.com/eval-protocol/python-sdk/blob/main/eval\_protocol/mcp/simulation\_server.py](https://github.com/eval-protocol/python-sdk/blob/main/eval_protocol/mcp/simulation_server.py)
* Example servers implementing McpGym
* Frozen Lake: [https://github.com/eval-protocol/python-sdk/blob/main/examples/frozen\_lake\_mcp/frozen\_lake\_mcp.py](https://github.com/eval-protocol/python-sdk/blob/main/examples/frozen_lake_mcp/frozen_lake_mcp.py)
* Lunar Lander: [https://github.com/eval-protocol/python-sdk/blob/main/examples/lunar\_lander\_mcp/lunar\_lander\_mcp.py](https://github.com/eval-protocol/python-sdk/blob/main/examples/lunar_lander_mcp/lunar_lander_mcp.py)
* Cliff Walking: [https://github.com/eval-protocol/python-sdk/blob/main/examples/cliff\_walking\_mcp/cliff\_walking\_mcp.py](https://github.com/eval-protocol/python-sdk/blob/main/examples/cliff_walking_mcp/cliff_walking_mcp.py)
* Blackjack: [https://github.com/eval-protocol/python-sdk/blob/main/examples/blackjack\_mcp/blackjack\_mcp.py](https://github.com/eval-protocol/python-sdk/blob/main/examples/blackjack_mcp/blackjack_mcp.py)
* Tau2 domains: [https://github.com/eval-protocol/python-sdk/blob/main/examples/tau2\_mcp/tau2\_mcp.py](https://github.com/eval-protocol/python-sdk/blob/main/examples/tau2_mcp/tau2_mcp.py)
# Other Content
Source: https://evalprotocol.io/other-content
Explore additional resources and insights related to Eval Protocol and AI evaluation best practices.
## Blog Posts
* **[Test-Driven Agent Development with Eval Protocol](https://fireworks.ai/blog/test-driven-agent-development)** — Discover methodologies for building robust AI agents through systematic testing practices, ensuring reliability and performance in production environments.
* **[Your AI Benchmark is Lying to You. Here's How We Caught It](https://fireworks.ai/blog/ai-benchmark-lying)** — Explore the nuances of AI benchmarking, common evaluation pitfalls, and strategies for creating more honest and meaningful assessments of model performance.
# Principles
Source: https://evalprotocol.io/principles
Eval Protocol (EP) is built on these fundamental principles that guide every design decision and feature:
## 1. Evaluations as Code
EP treats evaluations as first-class code—not configuration files or ad-hoc scripts. Every evaluation is a pytest function that can be:
* Parameterized and composed
* Version controlled and tested
* Integrated into CI/CD pipelines
* Reused across different models and datasets
This approach ensures evaluations are maintainable, debuggable, and evolve with your codebase.
## 2. Developer Experience First
EP prioritizes developer productivity through:
* **Simple Integration**: Write evals as pytest functions with familiar decorators
* **Rich Metadata**: Automatic parameterization, result storage, and tooling
* **Flexible Data Models**: Good defaults with extensibility for complex scenarios
* **IDE Support**: Full IntelliSense, debugging, and testing integration
* **Local UI**: A local UI to review, analyze, and identify trends in evals and rollouts in real-time
## 3. Standards-Based Interoperability
EP builds on existing, proven standards rather than creating new ones:
* **OpenAI Chat Completions API**: Compatible with industry-standard model interfaces for storing trajectories in the standard dataset format
* **Model Context Protocol (MCP)**: Leverages established tool-calling standards
* **pytest**: Integrates with the Python testing ecosystem you already know
* **LiteLLM**: Unified access to 100+ LLM providers with OpenAI-compatible interface
* **Git & PEP 440**: Automatic retrieval and storage of git commit data alongside eval results for version tracking
This ensures EP works with your existing tools and workflows.
## 4. Non-Prescriptive Architecture
EP does not prescribe how your AI systems work:
* **Flexible Rollout Processors**: Use default processors for simple LLM calls or LLM + MCP calls, or bring your own custom implementations
* **Custom Integration**: Write rollout processors in Python or call out to external APIs to produce evaluation inputs
* **System Agnostic**: Works with any AI architecture, from simple chat completions to complex multi-agent systems
* **Extensible Design**: Adapt EP to your specific use case rather than adapting your system to EP
This flexibility ensures EP can evaluate any AI system, regardless of its internal architecture or deployment strategy.
## 5. Open Source Foundation
EP believes open source is the only way to unify AI developers on a standard:
* **Community-Driven**: Transparent development process with open discussions and contributions
* **Vendor Neutral**: No lock-in to proprietary evaluation frameworks or closed ecosystems
* **Collective Intelligence**: Leverages the entire AI community's expertise and feedback
* **Sustainable Standards**: Open source ensures long-term viability and adoption of evaluation standards
This commitment to openness ensures EP can become a truly universal standard that serves the entire AI development community.
## 6. Performance at Scale
EP is designed for production workloads:
* **Parallel Execution**: Efficient parallel processing for large evaluation runs
* **Optimized for Multi-turn**: Specialized handling for complex agent evaluations
## 7. Evolutionary Architecture
EP grows with your AI development journey:
* **Single-turn to Multi-turn**: Start with simple model comparisons, scale to complex agent evaluations
* **Static to Dynamic**: Begin with curated datasets, evolve to interactive environments
* **Evaluation to Training**: Use the same rubrics for benchmarking and RL dataset generation
## 8. Reinforcement Learning Ready
EP is designed to bridge the gap between evaluation and training:
* **Per-step Rewards**: Structured feedback for RL training
* **Environment Simulation**: Realistic agent testing scenarios
* **User Simulation**: Automated interaction testing
* **Data Flywheel**: Turn evaluations into training data
The goal is to help developers build AI systems that improve through feedback loops, not just prompt engineering.
***
**In essence**: EP transforms evaluations from one-off tests into the foundation of your AI development loop—enabling you to build systems that learn and improve over time.
# Rollout Processors
Source: https://evalprotocol.io/reference/rollout-processors
Overview of built-in rollout processors, their configs, and when to use each
Rollout processors are small async generators that take a list of `EvaluationRow`s and yield the same rows back after performing the rollout (e.g., calling a model once, running a tool-using agent loop, or interacting with an MCP gym). They all share the same signature:
```ts
RolloutProcessor = (rows: List[EvaluationRow], config: RolloutProcessorConfig) => AsyncIterator[EvaluationRow]
```
The config object is defined in `eval_protocol/pytest/types.py` as `RolloutProcessorConfig` and includes the most common knobs for evaluation runs.
## Config: RolloutProcessorConfig
* **completion\_params**: model and generation parameters (provider-agnostic via LiteLLM). Must include `model`.
* **mcp\_config\_path**: path to an MCP client configuration file (used by agent/tool processors).
* **server\_script\_path**: path to an MCP server script (used by gym-like processors).
* **max\_concurrent\_rollouts**: maximum number of rows processed in parallel (default 8).
* **steps**: maximum rollout steps for multi-turn processors (default 30).
* **logger**: `DatasetLogger` to capture mid-rollout logs.
* **kwargs**: extra, processor-specific options.
Tip: You can override certain input parameters at runtime with the pytest plugin flags (see below), e.g., `--ep-reasoning-effort` or `--ep-input-param`.
## Built-in processors
### default\_no\_op\_rollout\_processor
* **What it does**: Pass-through. Yields rows unchanged so you can handle rollout yourself inside the evaluation function.
* **When to use**: You already have model outputs precomputed or you want to implement rollout logic in the test body.
* **Module**: `eval_protocol/pytest/default_no_op_rollout_process.py`
Usage with `@evaluation_test`:
```python
from eval_protocol.pytest.evaluation_test import evaluation_test
from eval_protocol.pytest.default_no_op_rollout_process import default_no_op_rollout_processor
@evaluation_test(
completion_params=[{"model": "openai/gpt-4o-mini"}],
rollout_processor=default_no_op_rollout_processor,
)
def my_eval(rows):
# rows are unchanged; compute scores here
return rows
```
### SingleTurnRolloutProcessor
* **What it does**: Issues a single LiteLLM `completion` per row and appends the assistant message (and any tool\_calls) to `row.messages`.
* **When to use**: Single-turn prompts, static QA, or benchmarks that only need the model’s immediate reply.
* **Respects**: `completion_params` including `extra_body.reasoning_effort` if provided.
* **Module**: `eval_protocol/pytest/default_single_turn_rollout_process.py`
Usage:
```python
from eval_protocol.pytest import evaluation_test, SingleTurnRolloutProcessor
@evaluation_test(
completion_params=[{
"model": "fireworks_ai/accounts/fireworks/models/gpt-oss-120b",
"temperature": 0.0,
"extra_body": {"reasoning_effort": "low"}, # forwarded to providers that support it
}],
rollout_processor=SingleTurnRolloutProcessor(),
)
def single_turn_eval(rows):
# each row now contains the assistant's reply; compute scores
return rows
```
### default\_agent\_rollout\_processor
* **What it does**: Runs a simple multi-turn agent that can call MCP tools. The agent:
* Calls the model with current `messages` and available tools.
* Executes any returned tool calls in parallel.
* Appends tool results then calls the model again, until there are no more tool calls.
* **When to use**: Tool-augmented tasks, function-calling, or scenarios requiring iterative reasoning via tools.
* **Requires**: `mcp_config_path` to enumerate available tools via `MCPMultiClient`.
* **Honors**: `max_concurrent_rollouts` for dataset-level parallelism; tool calls within a single row are also executed in parallel.
* **Module**: `eval_protocol/pytest/default_agent_rollout_processor.py`
Usage:
```python
from eval_protocol.pytest.evaluation_test import evaluation_test
from eval_protocol.pytest.default_agent_rollout_processor import default_agent_rollout_processor
@evaluation_test(
completion_params=[{"model": "openai/gpt-4o"}],
rollout_processor=default_agent_rollout_processor,
mcp_config_path="./path/to/mcp.config.json",
max_concurrent_rollouts=8,
steps=30, # upper bound; the agent stops earlier if no tools are requested
)
def agent_eval(rows):
return rows
```
### MCPGymRolloutProcessor
* **What it does**: Spins up an MCP server (e.g., tau-bench style), creates environments, and runs rollouts through `eval_protocol.rollout(...)`.
* **When to use**: Interactive environments or “gym” tasks exposed over MCP.
* **Requires**: `server_script_path` to launch the MCP server. Binds `localhost:9700` by default.
* **Module**: `eval_protocol/pytest/default_mcp_gym_rollout_processor.py`
Usage:
```python
from eval_protocol.pytest import evaluation_test, MCPGymRolloutProcessor
@evaluation_test(
completion_params=[{"model": "openai/gpt-4o"}],
rollout_processor=MCPGymRolloutProcessor(),
server_script_path="examples/tau2_mcp/server.py",
steps=30,
)
def gym_eval(rows):
return rows
```
## Pytest plugin helpers (CLI flags)
The pytest plugin in `eval_protocol/pytest/plugin.py` adds flags to make evaluations CI-friendly:
* `--ep-max-rows=N|all`: limit dataset rows processed.
* `--ep-print-summary`: print a concise summary line at end of each run.
* `--ep-summary-json=PATH`: write a JSON artifact for CI.
* `--ep-input-param key=value` or `--ep-input-param @params.json`: ad-hoc overrides of `completion_params`.
* `--ep-reasoning-effort low|medium|high`: sets `extra_body.reasoning_effort` via LiteLLM.
Example:
```bash
pytest -k my_eval --ep-print-summary --ep-summary-json artifacts/my_eval.json --ep-max-rows 50
```
## Choosing a processor
* Use **single-turn** for simple QA and classification.
* Use **agent** when you need tool calls or iterative reasoning.
* Use **MCP gym** for interactive environments hosted as MCP servers.
* Use **no-op** if you want full control inside your test body.
All processors stream results as they complete with bounded concurrency, so large datasets can run efficiently.
# Simulated Users
Source: https://evalprotocol.io/simulated-users
Evaluating conversational agents typically requires expensive human participants or pre-recorded dialogues that don't adapt to agent behavior. EP can simulate end-users in multi-turn evaluations, enabling full conversational loops without a human in the loop. This is powered by a lightweight user simulator derived from 𝜏²-bench and integrated into EP’s rollout manager. EP can simulate end-users in multi-turn evaluations, enabling full conversational loops without a human in the loop. This is powered by a lightweight user simulator derived from 𝜏²-bench and integrated into EP’s rollout manager.
## What It Does
* Generates realistic user turns based on scenario instructions and global guidelines.
* Interleaves with the agent’s tool-using turns to create full conversations.
* Signals when to stop (e.g., task complete, transfer, or out-of-scope) via a special termination token.
Under the hood, EP uses [UserSimulator](https://github.com/eval-protocol/python-sdk/blob/main/vendor/tau2/user/user_simulator.py). Rollout orchestration is handled by [ExecutionManager](https://github.com/eval-protocol/python-sdk/blob/main/eval_protocol/mcp/execution/manager.py). The simulator:
* Builds a system prompt from global guidelines + your scenario instructions.
* Optionally uses tool schemas to steer requests.
* Provides a `is_stop(...)` check that EP maps to `termination_reason = "user_stop"`.
## Enabling Simulation
Provide `dataset_info.user_simulation` in your `EvaluationRow` (or dataset) to turn on the simulator for that row.
```json
{
"messages": [
{ "role": "system", "content": "You are an assistant that uses tools." }
],
"input_metadata": {
"dataset_info": {
"user_prompt_template": "Observation: {observation}",
"environment_context": { "seed": 42 },
"user_simulation": {
"enabled": true,
"system_prompt": "You are a shopper trying to find a red jacket under $100.",
"llm": "gpt-4.1",
"llm_args": { "temperature": 0.0 }
}
}
}
}
```
Fields and defaults:
* `enabled`: boolean flag; if true, EP uses the simulator for the conversation.
* `system_prompt`: scenario instructions appended to global guidelines.
* `llm`: backing model for the user simulation (default: `gpt-4.1`).
* `llm_args`: sampling args for the simulator (default: `{ "temperature": 0.0 }`).
## Conversation Flow
When `user_simulation.enabled` is true:
* EP seeds the conversation with the simulator’s first user message.
* The agent policy receives tool schemas and responds with tool calls or a final answer.
* After each agent turn, the simulator may produce the next user message.
* If the simulator emits a stop intent, EP ends the episode with `termination_reason = user_stop`.
Step counting:
* Without simulation: each tool call increments the step counter.
* With simulation: EP increments the step counter after a full agent↔user turn, and records a consolidated control-plane step (reward, termination, tool calls).
## Minimal End-to-End
```python
import eval_protocol as ep
from eval_protocol.models import EvaluationRow, Message
rows = [
EvaluationRow(
messages=[Message(role="system", content="Use tools to help the user.")],
input_metadata={
"dataset_info": {
"user_prompt_template": "Obs: {observation}",
"environment_context": {"seed": 7},
"user_simulation": {
"enabled": True,
"system_prompt": "Book a table for two tonight at 7pm.",
"llm": "gpt-4.1",
"llm_args": {"temperature": 0.0}
}
}
},
)
]
envs = ep.make("http://localhost:8000/mcp", evaluation_rows=rows, model_id="my-model")
policy = ep.OpenAIPolicy(model_id="gpt-4o-mini")
async def run():
async for row in ep.rollout(envs, policy=policy, steps=64):
print(row.rollout_status.termination_reason)
```
## Tips
* Keep scenario instructions specific and outcome-oriented to guide the simulator.
* Set `temperature` low for reproducible behavior (or use record/playback).
* Use rewards and control-plane summaries to assess task success rather than only length of the dialogue.
## Troubleshooting
* Simulator does nothing: ensure `user_simulation.enabled` is `true` and you have at least a system message.
* Episode never ends: check that your environment’s rewards/termination are wired, or set a sensible `steps` limit.
* Unexpected termination: the simulator may have emitted a stop intent; inspect `termination_reason` and conversation history.
## GitHub References
* User simulation integration in rollouts (ExecutionManager):
* [https://github.com/eval-protocol/python-sdk/blob/main/eval\_protocol/mcp/execution/manager.py](https://github.com/eval-protocol/python-sdk/blob/main/eval_protocol/mcp/execution/manager.py)
* Backing user simulator (𝜏²-bench):
* [https://github.com/eval-protocol/python-sdk/blob/main/vendor/tau2/user/user\_simulator.py](https://github.com/eval-protocol/python-sdk/blob/main/vendor/tau2/user/user_simulator.py)
* Convenience facade and types:
* [https://github.com/eval-protocol/python-sdk/blob/main/eval\_protocol/mcp\_env.py](https://github.com/eval-protocol/python-sdk/blob/main/eval_protocol/mcp_env.py)
* [https://github.com/eval-protocol/python-sdk/blob/main/eval\_protocol/types/types.py](https://github.com/eval-protocol/python-sdk/blob/main/eval_protocol/types/types.py)
# Specification
Source: https://evalprotocol.io/specification
## Core Execution Concepts
The following concepts define the lifecycle and data units of an evaluation. These match the semantics used by the `@evaluation_test` decorator in the Python SDK.
### invocation
A single execution of a test function. One invocation can generate one or more experiments.
### experiment
A group of runs for a specific combination of parameters (e.g., model × dataset × generation params). Each new execution of the test function produces a new experiment.
### run
A group of rollouts produced when repeating the same experiment multiple times. When `num_runs > 1`, each repetition has a unique `run_id`.
### rollout
The process that produces a `trajectory` for a single row. Each rollout has a unique `rollout_id`.
### trajectory
The sequence of chat `messages` (and optional tool calls) produced during a rollout.
### row
The atomic evaluation unit. A row contains the conversation `messages`, optional `ground_truth`, and the evaluator’s `evaluation_result`.
### dataset
A collection (list) of rows. When stored, it is a JSONL file where each line is an `EvaluationRow`.
### eval
The rubric implemented in the body of an `@evaluation_test`-decorated function. It computes a `score` in
\[0, 1] and writes it to the row’s `evaluation_result`.
## Foundational Types
### Message
Represents a chat message with trajectory evaluation support. `content` supports either a string or OpenAI content parts.
```python
class ChatCompletionContentPartTextParam(BaseModel):
text: str
type: Literal["text"] = "text"
class Message(BaseModel):
role: str # assistant, user, system, tool
content: Optional[Union[str, List[ChatCompletionContentPartTextParam]]] = ""
name: Optional[str] = None
tool_call_id: Optional[str] = None
tool_calls: Optional[List[ChatCompletionMessageToolCall]] = None
function_call: Optional[FunctionCall] = None
control_plane_step: Optional[Dict[str, Any]] = None
```
### CompletionParams
```python
CompletionParams = Dict[str, Any]
"""
Provider-agnostic completion parameters.
Required:
- model: str
Common fields:
- temperature: Optional[float]
- max_tokens: Optional[int]
- top_p: Optional[float]
Extra provider-specific fields are allowed and passed through (e.g., max_tool_calls).
"""
```
### InputMetadata
```python
class InputMetadata(BaseModel):
# Accepts additional keys for future extensibility
# (model_config = ConfigDict(extra="allow") in implementation)
row_id: Optional[str] # defaulted to a generated ID
completion_params: CompletionParams = Field(default_factory=dict)
dataset_info: Optional[Dict[str, Any]] # seed, system_prompt, environment_context, etc.
session_data: Optional[Dict[str, Any]]
```
### RolloutStatus
```python
class RolloutStatus(BaseModel):
status: Literal["running","finished","error"] = "running"
termination_reason: Optional[str]
```
### MetricResult
Result of a single metric evaluation:
```python
class MetricResult(BaseModel):
is_score_valid: bool = True
score: float # Between 0.0 and 1.0
reason: str # Explanation for the score
```
### StepOutput
Defines the base reward and other metrics for a single conceptual step within a rollout:
```python
class StepOutput(BaseModel):
step_index: Union[int, str] # User-defined index for the step
base_reward: float # Base reward calculated by the user's reward function
terminated: bool = False # Whether the environment signaled termination
control_plane_info: Optional[Dict[str, Any]] # Structured info from environment
metrics: Dict[str, Any] = Field(default_factory=dict) # Optional custom metrics
reason: Optional[str] # Optional explanation for the step's base reward
```
### EvaluationThreshold
```python
class EvaluationThreshold(BaseModel):
success: float # Minimum success rate threshold (0.0 to 1.0)
standard_deviation: Optional[float] # Optional maximum stddev threshold
```
### EvalMetadata
```python
class EvalMetadata(BaseModel):
name: str
description: Optional[str]
version: str # PEP 440 version string (auto-populated)
status: Optional[Literal["running","finished","error","stopped"]]
num_runs: int
aggregation_method: str
passed_threshold: Optional[EvaluationThreshold]
passed: Optional[bool]
```
### ExecutionMetadata
```python
class ExecutionMetadata(BaseModel):
invocation_id: Optional[str]
experiment_id: Optional[str]
rollout_id: Optional[str]
run_id: Optional[str]
```
## EvaluateResult
The `EvaluateResult` represents the complete result of an evaluator, providing an overall score and component metrics.
```python
class EvaluateResult(BaseModel):
# Core evaluation data
score: float # Overall evaluation score (0.0 to 1.0)
is_score_valid: bool # Whether the overall score is valid
reason: Optional[str] # Optional explanation for the overall score
# Component metrics
metrics: Dict[str, MetricResult] # Dictionary of component metrics
# RL-specific fields
step_outputs: Optional[List[StepOutput]] # Per-step base rewards for RL
# Error handling
error: Optional[str] # Optional error message if evaluation failed
# Trajectory information
trajectory_info: Optional[Dict[str, Any]] # Additional trajectory-level information
final_control_plane_info: Optional[Dict[str, Any]] # Final control plane state
```
**Key Features:**
* **Unified Model**: Serves both per-turn and per-trajectory evaluation scenarios
* **Component Metrics**: Detailed breakdown through `MetricResult` objects
* **RL Support**: Per-step base rewards via `step_outputs` for reinforcement learning
* **Error Handling**: Graceful error reporting and validation
* **Trajectory Info**: Additional metadata for trajectory-based evaluations
## EvaluationRow
The `EvaluationRow` is the canonical JSON-serializable unit of data used for both single-turn and trajectory evaluations. It contains the conversation, tool context, evaluation results, and metadata needed for reproducibility and analysis.
```python
class EvaluationRow(BaseModel):
# Core conversation (trajectory) data
messages: List[Message]
# Tool and function call information
tools: Optional[List[Dict[str, Any]]] = None
# Input-related metadata
input_metadata: InputMetadata = Field(default_factory=InputMetadata)
# Rollout status
rollout_status: RolloutStatus = Field(default_factory=RolloutStatus)
# Optional ground truth reference
ground_truth: Optional[str] = None
# Unified evaluation result
evaluation_result: Optional[EvaluateResult] = None
# Correlation identifiers grouped under execution metadata
execution_metadata: ExecutionMetadata = Field(default_factory=ExecutionMetadata)
# LLM usage statistics
usage: Optional[CompletionUsage] = None
# Timestamps and evaluation metadata
created_at: datetime = Field(default_factory=datetime.now)
eval_metadata: Optional[EvalMetadata] = None
# Process info for watchdogs
pid: Optional[int] = None
```
**Key Features:**
* **Unified Format**: Canonical row format for both pointwise and trajectory evaluations
* **Explicit Status**: `rollout_status` captures running/finished/error
* **Reproducibility**: `input_metadata`, seeds, and identifiers support traceability
* **Usage Tracking**: Captures token usage statistics from LLM calls
## Dataset
A list of `EvaluationRow`s. When saved to file, it is a JSONL file where each
line is a JSON-encoded `EvaluationRow`.
### JSONL example
```json
{"messages":[{"role":"system","content":"You are a helpful assistant."},{"role":"user","content":"Add 2 and 3."},{"role":"assistant","content":"5"}],"tools":null,"input_metadata":{"row_id":"row_123","completion_params":{"model":"gpt-4o","temperature":0.0,"max_tokens":256,"max_tool_calls":0},"dataset_info":{"seed":42,"system_prompt":"You are a helpful assistant.","environment_context":{}},"session_data":{"mode":"batch"}},"rollout_status":{"status":"finished","termination_reason":""},"ground_truth":"5","evaluation_result":{"score":1.0,"is_score_valid":true,"reason":"Exact match","metrics":{"exact_match":{"is_score_valid":true,"score":1.0,"reason":"assistant output matches ground truth"}},"step_outputs":null,"error":null,"trajectory_info":null,"final_control_plane_info":null},"execution_metadata":{"invocation_id":"ivk_abcd","experiment_id":"exp_efgh","rollout_id":"rll_ijkl","run_id":null},"usage":{"prompt_tokens":10,"completion_tokens":1,"total_tokens":11},"created_at":"2025-01-01T12:00:00","eval_metadata":{"name":"basic_addition","description":"Verify simple arithmetic","version":"0.1.0","status":"finished","num_runs":1,"aggregation_method":"mean","passed_threshold":{"success":0.95},"passed":true},"pid":12345}
```
## EvaluationTest
The `EvaluationTest` represents a test configuration for evaluating models.
While not explicitly defined as a separate class in the current implementation,
evaluation tests are configured through the `evaluation_test` decorator. The decorator
can be used to configure the following:
* **Dataset Configuration**: JSONL files containing test cases or hard-coded `input_messages`
* **Model Configuration**: Completion parameters (must include `model`) and generation settings via `completion_params`
* **Evaluation Criteria**: Success thresholds (via `passed_threshold`), with optional standard deviation constraint
* **Environment Configuration**: MCP config, rollout steps, server path, and concurrency
* **Rollout Processor**: Function to execute rollouts (e.g., `default_single_turn_rollout_processor`)
* **Number of Runs**: Number of times to repeat the rollout (e.g., `num_runs=1`)
* **Mode**: Evaluation mode (`pointwise` or `batch`)
* **Aggregation**: Aggregation method (e.g., `mean`) and optional env overrides for summaries
```python
@evaluation_test(
input_dataset=["tests/pytest/data/markdown_dataset.jsonl"],
dataset_adapter=markdown_dataset_to_evaluation_row,
completion_params=[{
"model": "accounts/fireworks/models/llama-v3p1-8b-instruct",
"temperature": 0.0,
"max_tokens": 4096,
}],
passed_threshold={"success": 0.5},
rollout_processor=default_single_turn_rollout_processor,
num_runs=1,
mode="pointwise",
)
def test_markdown_highlighting_evaluation(row: EvaluationRow) -> EvaluationRow:
...
```
## MCP Gym
`McpGym` is the base class for building environments that an LLM can interact with via MCP tool calls (data plane) while exposing rewards and episode status via HTTP control-plane endpoints. This enables reproducible RL-style rollouts with clean separation of concerns.
Key concepts:
* **Data plane**: Tool calls and JSON responses used by the model to act and observe state
* **Control plane**: Session-scoped endpoints for rewards, termination, and info
* **Multi-session**: Stable `session_id` keys route control-plane queries to the right episode
Core API surface:
* `control_plane_endpoint(path)`: Decorator to register a session-aware endpoint
* `_register_tools()`: Register domain tools with `self.mcp.tool()`
* `format_observation(obs, env) -> Dict[str, Any]`: Return JSON-serializable observation payloads
* `run(transport="streamable-http")`: Start the FastMCP server with high-concurrency settings
* Standard control-plane endpoints on subclasses: `/control/reward`, `/control/status`, `/control/info`, `/control/initial_state`
Example stub:
```python
class McpGym(ABC):
def __init__(self, server_name: str, adapter: EnvironmentAdapter, seed: Optional[int] = None, max_workers: Optional[int] = None):
...
@abstractmethod
def _register_tools(self):
...
def format_observation(self, obs: Any, env: Any) -> Dict[str, Any]:
...
def run(self, transport: str = "streamable-http", **kwargs):
...
```
See [`python-sdk/eval_protocol/mcp/mcpgym.py`](https://github.com/eval-protocol/python-sdk/blob/main/eval_protocol/mcp/mcpgym.py) for the full implementation including the `control_plane_endpoint` decorator and session handling.
## Environment
The `EnvironmentAdapter` class provides the interface for connecting environments to the MCP framework.
```python
class EnvironmentAdapter:
"""
Environment adapter with default implementations.
Users can either use this class directly by providing an env_class,
or inherit from it to customize specific methods for their environment.
This provides a clean separation between the MCP protocol layer
and the environment implementation.
"""
```
**Key Features:**
* **Default Implementations**: Works with most gymnasium-style and complex environments
* **Flexible Configuration**: Supports custom configuration dictionaries
* **Seed Support**: Reproducible environments through seed-based initialization
* **Clean Interface**: Separates MCP protocol layer from environment implementation
**Core Methods:**
* `create_environment()`: Create and return a new environment instance
* `create_environment_with_seed()`: Create environment with specific seed for reproducibility
* `reset_environment()`: Reset environment to initial state
* `step_environment()`: Execute one step in the environment
* `close_environment()`: Clean up environment resources
* `parse_action()`: Parse action string to environment-specific format
* `format_observation()`: Format observation for MCP transmission
## Policy
A policy is a model such as `gpt-4o` or `llama-3.1-8b`. In more advanced scenarios, a policy can be your own custom fine-tuned model.
The `LiteLLMPolicy` class provides a unified implementation that works with ANY MCP environment via tool calling:
```python
class LiteLLMPolicy(LLMBasePolicy):
"""
Unified LiteLLM policy implementation that works with ANY MCP environment via tool calling.
Supports OpenAI, Anthropic, Fireworks AI
Includes built-in retry logic and caching.
NO environment-specific logic - everything comes from MCP tools and dataset prompts.
"""
```
**Key Features:**
* **Provider Agnostic**: Supports OpenAI, Anthropic, Fireworks AI, and other providers
* **Built-in Caching**: Multiple cache types (memory, Redis, dual, S3, disk)
* **Retry Logic**: Robust retry strategies with exponential backoff
* **Tool Calling**: Native support for MCP tool calling
* **Environment Agnostic**: No environment-specific logic - everything from MCP tools
**Specialized Implementations:**
* `OpenAIPolicy`: OpenAI-specific policy implementation
* `AnthropicPolicy`: Anthropic Claude-specific policy implementation
* `FireworksPolicy`: Fireworks AI-specific policy implementation
* `LocalPolicy`: Local model policy implementation
**Core Capabilities:**
* **Multi-Tool Support**: Handle multiple tool calls per turn
* **Conversation History**: Maintain context across interactions
* **Error Handling**: Graceful handling of API failures and retries
* **Caching**: Response caching for improved performance and cost reduction
* **Logging**: Comprehensive logging for debugging and analysis
## Additional Core Classes
### MCPSession
Represents a single MCP session with an environment:
```python
@dataclass
class MCPSession:
session_id: str
base_url: str
seed: Optional[int]
model_id: str
dataset_row: Optional[DatasetRow] = None
terminated: bool = False
last_observation: Any = None
_exit_stack: Optional[AsyncExitStack] = None # persistent connection resources
_mcp_session: Optional[ClientSession] = None # persistent MCP client session
```
### Trajectory
Represents a complete rollout trajectory:
```python
@dataclass
class Trajectory:
session: MCPSession
observations: List[Any]
actions: List[str]
rewards: List[float]
terminated: bool
total_reward: float
steps: int
duration: float
control_plane_steps: List[Dict[str, Any]]
control_plane_summary: Dict[str, Any]
termination_reason: str
conversation_history: List[Dict[str, Any]]
usage: Dict[str, int] = field(default_factory=dict)
```
# Multi-Turn Eval with Per-Step Rewards (Frozen Lake)
Source: https://evalprotocol.io/tutorial/multi-turn-eval-per-step-rewards
This tutorial demonstrates how to create multi-turn reinforcement learning evaluations with per-step rewards using the classic Frozen Lake environment. Unlike conversational agent evaluations, this example showcases a traditional RL environment where agents receive rewards at each step of an episode, enabling evaluation of decision-making throughout the entire trajectory rather than just final outcomes.
You can find the complete code for this example at [test\_frozen\_lake.py](https://github.com/eval-protocol/python-sdk/blob/main/tests/pytest/test_frozen_lake.py).
## Understanding the Frozen Lake Environment
Frozen Lake is a classic RL environment where an agent navigates a 4x4 grid from start to goal without falling into holes.
* **Action Space**: `Discrete(4)` - Move left (0), down (1), right (2), up (3)
* **Observation Space**: `Discrete(16)` - Grid positions 0-15
* **Grid Layout**: 4x4 grid with `S` (Start), `F` (Frozen/safe), `H` (Hole/lose), `G` (Goal/win)
```
SFFF
FHFH
FFFH
HFFG
```
**Rewards**: +1 for reaching goal, 0 otherwise
This sparse reward structure makes it perfect for per-step reward evaluation - the rewards come directly from the environment intrinsically at each step (more on this below), allowing the framework to evaluate decision-making throughout the entire trajectory even when most steps provide zero reward.
## Understanding the Dataset Structure
The Frozen Lake dataset is much simpler than conversational agent datasets - it focuses purely on setting up the RL environment and providing clear instructions for agent interaction.
### Dataset Format
Each entry contains three main components for configuring the RL episode:
* **`id`**: Unique identifier for the evaluation run
* **`system_prompt`**: Detailed instructions explaining the game rules and interaction method
* **`user_prompt_template`**: Template for presenting the current game state to the agent, `{observation}` gets replaced with current grid state
* **`environment_context`**: Configuration parameters for the Frozen Lake environment
### Example Dataset Entry
```json
{
"id": "run_001",
"system_prompt": "You are playing FrozenLake, a grid-based navigation game displayed as a 4x4 text grid. The grid contains: S (Start), F (Frozen safe), H (Hole - deadly), G (Goal). You start at position S and must reach G while avoiding H tiles. In this version, the surface is not slippery so your moves are deterministic. IMPORTANT: When you are at the starting position, you appear as 'S'. When you move to other positions, the hightlighted position will change on the grid. If you step on H, the episode ends with failure. Use the lake_move tool with actions LEFT, DOWN, RIGHT, UP to navigate the grid.",
"user_prompt_template": "Current game state grid:\n{observation}\n\nYou are navigating the 4x4 grid above. Navigate safely to reach the goal 'G' while avoiding holes 'H'. Choose your next move from: LEFT, DOWN, RIGHT, or UP.",
"environment_context": {
"game": "FrozenLake",
"map_name": "4x4",
"seed": 42
}
}
```
## Test Harness Architecture (RL Gym + Environment Integration)
Now we can explain the adapter pattern mentioned earlier - the eval-protocol framework provides a clean bridge between standard Gymnasium environments and the MCP evaluation system through two key components: `FrozenLakeMcp` and `FrozenLakeAdapter`.
### MCP Server: FrozenLakeMcp
The `FrozenLakeMcp` class inherits from `McpGym` and creates an MCP server that agents can interact with:
```python
class FrozenLakeMcp(McpGym):
"""FrozenLake MCP-Gym environment implementing the north star vision."""
def __init__(self, seed: Optional[int] = None):
adapter = FrozenLakeAdapter()
super().__init__("FrozenLake-v1", adapter, seed)
def _register_tools(self):
@self.mcp.tool(
name="lake_move",
description="Move on the frozen lake. Actions: LEFT, DOWN, RIGHT, UP."
)
def lake_move(action: str, ctx: Context) -> Dict[str, Any]:
# Validate and parse action
action = action.strip().upper()
action_int = self.adapter.parse_action(action)
# Execute environment step
session_id = self._get_session_id(ctx)
observation_data = self._execute_session_environment_step(session_id, action_int)
observation_data["action"] = action
return observation_data
```
**Key Features:**
* **Single Tool Interface**: Agents interact through the `lake_move` tool with simple string actions
* **Session Management**: Each evaluation gets isolated environment sessions
* **Action Validation**: Converts string actions (LEFT, DOWN, RIGHT, UP) to environment integers
* **Data Plane**: Returns only observation data; control plane (rewards, termination) managed server-side
### Environment Adapter: FrozenLakeAdapter
The `FrozenLakeAdapter` handles the actual Gymnasium environment operations:
```python
class FrozenLakeAdapter(EnvironmentAdapter):
"""FrozenLake adapter for MCP-Gym framework."""
ACTION_NAMES = ["LEFT", "DOWN", "RIGHT", "UP"]
def create_environment(self, config: Optional[Dict[str, Any]] = None) -> FrozenLakeEnv:
config = config or {}
seed = config.get("seed")
if seed is not None:
desc = generate_random_map(size=4, p=0.8, seed=seed)
else:
desc = generate_random_map(size=4, p=0.8)
return FrozenLakeEnv(desc=desc, is_slippery=False, render_mode="ansi")
def parse_action(self, action_str: str) -> int:
action_str = action_str.strip().upper()
if action_str not in self.ACTION_NAMES:
raise ValueError(f"Invalid action '{action_str}'. Valid actions: {self.ACTION_NAMES}")
return self.ACTION_NAMES.index(action_str)
```
### Bridging Standard Gym with MCP
This architecture bridges two different paradigms:
**Standard Gymnasium**:
* Integer action spaces (0, 1, 2, 3)
* Numeric observations (position 0-15)
* Direct step/reset methods
* Per-step rewards and termination flags
**MCP Protocol**:
* String-based tool calls ("LEFT", "DOWN", etc.)
* JSON-formatted observations with grid rendering
* Session-based interactions
* Server-managed control plane (rewards handled separately)
### Session Isolation and Multi-Evaluation
The framework provides robust session management:
```python
# Each evaluation gets isolated state
session_id = self._get_session_id(ctx)
session_data = self._get_or_create_session(ctx)
# Execute step with session isolation
observation_data = self._execute_session_environment_step(session_id, action_int)
```
## Pytest Implementation
The Frozen Lake evaluation integrates with the eval-protocol pytest framework through a streamlined test function that leverages the MCP Gym infrastructure and per-step rewards we've discussed.
### Step 1: Dataset Adapter
The `frozen_lake_to_evaluation_row` function converts the simple Frozen Lake dataset entries into the framework's `EvaluationRow` format:
```python
def frozen_lake_to_evaluation_row(data: List[Dict[str, Any]]) -> List[EvaluationRow]:
"""Convert entries from frozen lake dataset to EvaluationRow objects."""
rows = []
for row in data:
eval_row = EvaluationRow(
messages=[Message(role="system", content=row["system_prompt"])],
input_metadata=InputMetadata(
row_id=row["id"],
dataset_info={
"environment_context": row["environment_context"],
"user_prompt_template": row["user_prompt_template"],
}
)
)
rows.append(eval_row)
return rows
```
This adapter is much simpler than conversational agent adapters—it just sets up the system prompt with game instructions and preserves the environment configuration in metadata.
### Step 2: Test Configuration
The `@evaluation_test` decorator configures the RL evaluation with Frozen Lake-specific parameters:
```python
@evaluation_test(
input_dataset=["tests/pytest/data/frozen_lake_dataset.jsonl"],
dataset_adapter=frozen_lake_to_evaluation_row,
completion_params=[{"model": "fireworks_ai/accounts/fireworks/models/kimi-k2-instruct", "temperature": 0.0, "max_tokens": 4096}],
rollout_processor=MCPGymRolloutProcessor(),
passed_threshold=0.66,
num_runs=1,
mode="pointwise",
server_script_path="examples/frozen_lake_mcp/server.py",
)
```
Note the `default_mcp_gym_rollout_processor` is the same processor used in the τ²-bench evaluation, demonstrating how eval-protocol provides reusable components that work seamlessly across different evaluation types—from conversational agents to RL environments.
### Step 3: Trajectory Evaluation Function
The test function demonstrates the power of per-step reward evaluation:
```python
def test_frozen_lake_evaluation(row: EvaluationRow) -> EvaluationRow:
"""Test frozen lake evaluation using the pytest framework."""
# Get the total reward from the entire trajectory
score = row.get_total_reward()
if score == 1.0:
reason = "Agent reached the goal"
else:
reason = "Agent did not reach the goal"
row.evaluation_result = EvaluateResult(
score=score,
reason=reason,
)
return row
```
* **Binary Success Evaluation**: Unlike complex conversational evaluations, this is simple: either the agent reached the goal (score=1.0) or it didn't (score=0.0)
* **Intrinsic Environment Rewards**: The evaluation function doesn't need to implement complex scoring, it just uses the environment's intrinsic reward structure that was captured during the MCP Gym rollout
* **Trajectory-Level Assessment**: The framework automatically handles the multi-turn interaction, reward aggregation, and trajectory completion, so the evaluation function only needs to interpret the final aggregated score
### Integration with MCP Gym Framework
This demonstrates the complete integration flow:
1. **Dataset Entry**: Specifies environment configuration and agent instructions
2. **MCP Server Launch**: Framework starts the FrozenLakeMcp server automatically
3. **Multi-Turn Rollout**: Agent interacts with environment through `lake_move` tool calls
4. **Per-Step Reward Capture**: Framework records 0.0 or +1.0 at each step
5. **Trajectory Aggregation**: Framework sums all per-step rewards into `total_reward`
6. **Simple Evaluation**: Test function interprets the aggregated score
## Conclusion
This showcases how eval-protocol transforms complex multi-turn RL environments into simple, reusable evaluation functions while maintaining the rich per-step reward information needed for training data generation. But more than that, this Frozen Lake tutorial illustrates a fundamental principle of Eval Protocol: [building essential feedback loops](https://evalprotocol.io/why#build-the-feedback-loops-you-need) for modern AI development. While initial evaluations might be as straightforward as the `test_markdown_highlighting_evaluation` introduced earlier, this multi-turn example with per-step rewards showcases the framework's full capabilities. Specifically, it demonstrates how Eval Protocol generates detailed rollout data enriched with reward signals, which can directly inform reinforcement learning and fine-tuning processes.
Per-step rewards recorded throughout each Frozen Lake episode are not merely for assessment; they form structured training data. The protocol aggregates these step-by-step rewards (assigning 0.0 for each frozen tile encountered and +1.0 for successfully reaching the goal) into trajectory-level scores. This nuanced scoring provides sophisticated training signals: reward sequences can be directly leveraged by training algorithms like PPO or GRPO, or any learning method that benefits from structured, sequential feedback.
Eval Protocol thus transforms an evaluation suite from a passive testing mechanism into an active engine for dynamic data generation, facilitating every stage of the LLM software development lifecycle—from model selection and prompt refinement to ongoing evaluation, debugging, and continuous improvement. Its vision is straightforward: define evaluation criteria once in code and reuse them universally—for benchmarking, CI/CD processes, dataset creation, and iterative training. The Frozen Lake tutorial exemplifies how a unified evaluation framework can bridge traditional reinforcement learning environments with contemporary LLM-driven agents, laying the groundwork for continuously improving AI systems.
# Multi-Turn Eval with User Simulation (𝜏²-bench)
Source: https://evalprotocol.io/tutorial/multi-turn-eval-user-simulation
Let's walk through how to create a comprehensive agent evaluation using the 𝜏²-bench airline domain from Sierra AI for testing AI agents on realistic customer service tasks with simulated users.
You can find the complete code for this example at [test\_tau\_bench\_airline.py](https://github.com/eval-protocol/python-sdk/blob/main/tests/pytest/test_tau_bench_airline.py).
## Understanding 𝜏²-bench
What's uniquely challenging and useful about the 𝜏²-benchmark is the use of a simulated user alongside the agent being evaluated. This setup has a few key components:
* **Agent**: The AI system being evaluated, which must follow domain-specific policies and use available MCP tools to interact with the environment
* **Simulated User**: An AI-powered user that generates realistic customer requests, responses, and conversational behavior
* **Environment**: A simulated business system (airline, retail, telecom) that the agent interacts with through tool calls
## Understanding the Airline Dataset
𝜏²-bench includes multiple business domains, each with distinct characteristics. **This example focuses specifically on the airline domain**, which provides the richest scenarios for demonstrating simulated user interactions. Other domains include retail, mock, and telecom.
### Dataset Format
Each entry in the airline dataset contains:
* **`id`**: Unique identifier for the task scenario
* **`user_prompt_template`**: Template for presenting information to the simulated user
* **`environment_context`**: Domain specification and environmental settings
* **`user_simulation`**: Complete definition of the simulated user's behavior, knowledge, and personality
* **`evaluation_criteria`**: Specific actions, communications, and assertions the agent must fulfill
### Example Dataset Entry
**Baggage Allowance Inquiry Scenario:**
```json
{
"id": "airline_task_3",
"user_prompt_template": "{observation}",
"environment_context": {
"domain": "airline"
},
"user_simulation": {
"enabled": true,
"llm": "gpt-4.1",
"system_prompt": "Instructions:\n\tDomain: airline\nReason for call:\n\tYou want to figure out the total number of suitcases the reservation allows you to take on your upcoming flight.\n\n\tYou have a lot of things you need to bring with you on this trip. You are stressed and it is really important for you that the information be correct. \n\n\tYou're pretty sure that you're a Gold member.\nKnown info:\n\tYou are Anya Garcia.\n\n\tYour user id is: anya_garcia_5901.\n\n\tYour confirmation number is JMO1MG.\nUnknown info:\n\tYou do not know the cabin for the upcoming flight.\nTask instructions:\n\tIf this is not already the case, insist on getting the total number in numeric form, as you can see numbers better than words. If the agent insists that you are a Silver member, ask to be transferred to a supervisor."
},
"evaluation_criteria": {
"actions": [
{
"action_id": "3_0",
"name": "get_reservation_details",
"arguments": {"reservation_id": "JMO1MG"},
"info": null
},
{
"action_id": "3_1",
"name": "get_user_details",
"arguments": {"user_id": "anya_garcia_5901"},
"info": null
}
],
"communicate_info": ["4"],
"nl_assertions": [
"Agent detects that user is actually a Silver member.",
"Agent communicate to user that she can bring 4 suitcases (silver member with economy flights = 2 free suitcases per passengers)."
]
}
}
```
### Evaluation Criteria
The airline domain uses four distinct evaluation criteria to comprehensively assess agent performance:
1. **Tool Action Verification**: Checks if the agent calls the specific tool actions listed in the `"actions"` array with the correct parameters
2. **Communication Validation**: Verifies that the agent communicated to the simulated user strictly what is specified in `"communicate_info"` (e.g., the number "4" for suitcase allowance)
3. **Natural Language Assertions**: Uses LLM-as-a-judge to evaluate the `"nl_assertions"` - complex behavioral requirements like "Agent detects that user is actually a Silver member" and proper policy application
4. **Database State Verification**: Creates a hash over the database to ensure it remains in the correct state after all interactions, validating that no unintended changes occurred during the conversation
Only if all four of these criteria are met that the agent "passed" this scenario and gets a score of 1.0. Otherwise, they get a score of 0.0.
## Test Harness Architecture (MCP Gym + Environment)
The 𝜏²-bench airline evaluation uses the MCP Gym framework to create realistic business simulations. The implementation consists of two main components: the `AirlineDomainMcp` server that handles MCP tool calls, and the `AirlineEnvironment` that manages the actual airline business logic.
### Airline Domain MCP Server
The `AirlineDomainMcp` class inherits from `McpGym` and configures the airline domain:
```python
class AirlineDomainMcp(McpGym):
def __init__(self, seed: Optional[int] = None):
default_config = {"domain": "airline", "max_turns": 20}
self.adapter = EnvironmentAdapter(env_class=AirlineEnvironment, default_config=default_config)
super().__init__("airline", self.adapter, seed)
```
The server registers airline-specific MCP tools that agents can use to interact with the simulated airline system, e.g. `get_reservation_details` or `get_user_details`. We expose the same tools that the original 𝜏²-benchmark uses.
**Example Tool Definition:**
```python
@self.mcp.tool(name="get_reservation_details", description="Get the details of a reservation.")
def get_reservation_details(
reservation_id: Annotated[str, Field(description="The reservation ID, such as '8JX2WO'")],
ctx: Context
) -> Dict[str, Any]:
"""Get reservation details"""
session_id = self._get_session_id(ctx)
return self._execute_session_environment_step(
session_id,
{
"action": "get_reservation_details",
"parameters": {"reservation_id": reservation_id},
},
)
```
### Airline Business Environment
The `AirlineEnvironment` class manages the actual airline business logic and database operations. It loads a flight database and provides methods for booking, cancellation, user management, and other airline operations:
```python
class AirlineEnvironment:
def __init__(self, config: Optional[Dict[str, Any]] = None):
self.db = FlightDB.load(AIRLINE_DB_PATH)
self.airline_tools = AirlineTools(self.db)
def step(self, action: Dict[str, Any]) -> Tuple[Dict[str, Any], float, bool, bool, Dict[str, Any]]:
action_name = action.get("action", "")
parameters = action.get("parameters", {})
result = self._execute_airline_action(action_name, parameters)
# No per-step rewards - evaluation happens at conversation completion
return result, 0.0, False, False, {}
```
The environment maintains a persistent flight database that gets reset for each evaluation scenario, ensuring consistent starting conditions while allowing agents to make realistic changes (bookings, cancellations, etc.) during conversations.
## Pytest Implementation
Finally, we also integrate the 𝜏²-bench airline evaluation with the eval-protocol pytest framework through a test function that orchestrates the simulated user, MCP environment, and multi-dimensional evaluation criteria.
### Step 1: Dataset Adapter
The `tau_bench_airline_to_evaluation_row` function converts raw 𝜏²-bench dataset entries into the eval-protocol's `EvaluationRow` format:
```python
def tau_bench_airline_to_evaluation_row(data: List[Dict[str, Any]]) -> List[EvaluationRow]:
"""Convert entries from airline dataset to EvaluationRow objects."""
rows = []
# Load domain-specific system prompt
domain = data[0]["environment_context"]["domain"]
prompt_file = test_dir / f"system_prompts/{domain}_agent_system_prompt.md"
with open(prompt_file, "r") as f:
system_prompt = f.read().strip()
for row in data:
eval_row = EvaluationRow(
messages=[Message(role="system", content=system_prompt)],
input_metadata=InputMetadata(
row_id=row["id"],
dataset_info={
"environment_context": row["environment_context"],
"user_simulation": row["user_simulation"],
"evaluation_criteria": row["evaluation_criteria"],
"user_prompt_template": row["user_prompt_template"],
}
),
)
rows.append(eval_row)
return rows
```
**Key Features:**
* **System Prompt Loading**: Reads domain-specific agent instructions from external files
* **Metadata Preservation**: Stores all 𝜏²-bench-specific data in `input_metadata.dataset_info`
* **Initial System Message**: Sets up the conversation with the agent's role and instructions
### Step 2: Test Configuration
The `@evaluation_test` decorator configures the evaluation with 𝜏²-bench-specific parameters:
```python
@evaluation_test(
input_dataset=["tests/pytest/data/airline_dataset.jsonl"],
dataset_adapter=tau_bench_airline_to_evaluation_row,
completion_params=[{"model": "fireworks_ai/accounts/fireworks/models/kimi-k2-instruct", "temperature": 0.0, "max_tokens": 4096}],
rollout_processor=MCPGymRolloutProcessor(),
passed_threshold=0.4,
num_runs=1,
mode="pointwise",
max_concurrent_rollouts=32,
server_script_path="examples/tau2_mcp/server.py",
)
```
**Configuration Highlights:**
* **`rollout_processor=default_mcp_gym_rollout_processor`**: Uses a default MCP Gym processor for multi-turn conversations with simulated users, reusable for any evaluation benchmark that uses the same MCP Gym architecture
* **`server_script_path="examples/tau2_mcp/server.py"`**: Points to the MCP server that hosts the airline environment
* **`passed_threshold=0.4`**: Threshold of 40% must be achieved for this test to pass
* **`max_concurrent_rollouts=32`**: High concurrency for efficient evaluation of multiple scenarios
### Step 3: Multi-Dimensional Evaluation Function
The test function implements the four-criterion evaluation system described earlier:
```python
# Run all evaluators
env_reward_info = EnvironmentEvaluator.calculate_reward(
environment_constructor=registry.get_env_constructor("airline"),
task=task,
full_trajectory=trajectory_objects,
)
action_reward_info = ActionEvaluator.calculate_reward(task=task, full_trajectory=trajectory_objects)
communicate_reward_info = CommunicateEvaluator.calculate_reward(task=task, full_trajectory=trajectory_objects)
nl_reward_info = NLAssertionsEvaluator.calculate_reward(task=task, full_trajectory=trajectory_objects)
# Combine results - all must pass for success
reward = 1.0
reward *= env_reward_info.reward # Database state verification
reward *= action_reward_info.reward # Tool action verification
reward *= nl_reward_info.reward # LLM-as-a-judge assertions
reward *= communicate_reward_info.reward # Communication validation
```
Expected Evaluation Results:
**Complete Success (Score: 1.0):**
```
✅ All checks passed
```
**Partial Failure Examples:**
```
❌ Failed actions: ['get_user_details({"user_id": "wrong_id"})']
❌ Failed NL assertions: ['Agent detects that user is actually a Silver member']
```
```
❌ Environment/DB check failed
❌ Failed communication: ['4']
```
This pytest implementation demonstrates how to create comprehensive, multi-dimensional agent evaluations that test not just correctness, but also communication skills, tool usage, and system integrity - all essential for production-ready customer service agents.
# Single-Turn Eval
Source: https://evalprotocol.io/tutorial/single-turn-eval-static
Create your first static single-turn eval
Let's walk through creating an evaluation that checks if model responses contain the required number of highlighted sections (like **bold** or *italic* text). This example demonstrates the core concepts of writing evaluations with Eval Protocol (EP).
You can find the complete code for this example at [test\_markdown\_highlighting.py](https://github.com/eval-protocol/python-sdk/blob/main/tests/pytest/test_markdown_highlighting.py).
## Understanding the Dataset
Before we start coding, let's understand what we're working with. The `markdown_dataset.jsonl` file contains diverse test cases that evaluate a model's ability to follow markdown formatting instructions.
### Dataset Format
Each entry in the dataset contains:
* **`key`**: Unique identifier for the test case
* **`prompt`**: The instruction given to the model, which includes:
* Clear task description
* Specific markdown formatting requirements
* Examples of the expected format
* Minimum number of highlights required
* **`num_highlights`**: The ground truth value (number of highlighted sections required)
### Example Dataset Entries
**Creative Writing Tasks:**
```json
{
"key": 1773,
"prompt": "Write a song about the summers of my childhood that I spent in the countryside. Give the song a name, and highlight the name by wrapping it with *. For example: *little me in the countryside*.",
"num_highlights": 1
}
```
**Business and Professional Content:**
```json
{
"key": 167,
"prompt": "Generate a business proposal to start a sweatshirt company in Bremen. The proposal should contain 5 or more sections. Highlight each section name using the this format:\n*section name*",
"num_highlights": 5
}
```
**Educational and Informational Content:**
```json
{
"key": 3453,
"prompt": "Summarize the history of Japan. Italicize at least 5 keywords in your response. To indicate a italic word, wrap it with asterisk, like *italic*",
"num_highlights": 5
}
```
### Dataset Characteristics
**Diversity**: The dataset covers various content types:
* Creative writing (songs, poems, raps)
* Business documents (proposals, cover letters)
* Educational content (summaries, blog posts)
* Entertainment (riddles, jokes)
**Formatting Instructions**: Each prompt clearly specifies:
* The markdown syntax to use (`*text*` for italic, `**text**` for bold)
* Minimum number of highlights required
* Examples of proper formatting
* Context for when highlighting should be applied
**Realistic Scenarios**: The prompts simulate real-world use cases where markdown formatting is important for readability and emphasis.
## Step 1: Import Required Dependencies
Now let's start coding. First, we import the necessary modules from the EP framework:
```python
import re
from typing import Any, Dict, List, Optional
from eval_protocol.models import EvaluateResult, EvaluationRow, Message
from eval_protocol.pytest import SingleTurnRolloutProcessor, evaluation_test
```
* `re`: Python's regex module for pattern matching
* `EvaluateResult`: The result object that contains the evaluation score and reasoning
* `EvaluationRow`: Represents a single evaluation test case with messages and ground truth
* `Message`: Represents a message in the conversation
* `evaluation_test`: Decorator that configures the evaluation test
* `default_single_turn_rollout_processor`: Function that handles the conversation flow for single-turn evaluations
## Step 2: Create the Dataset Adapter
We need to create an adapter that converts our dataset format to the EP's expected format:
```python
def markdown_dataset_to_evaluation_row(data: List[Dict[str, Any]]) -> List[EvaluationRow]:
"""
Convert entries from markdown dataset to EvaluationRow objects.
"""
return [
EvaluationRow(
messages=[Message(role="user", content=row["prompt"])],
ground_truth=str(row["num_highlights"])
)
for row in data
]
```
This adapter:
* Takes the raw dataset as a list of dictionaries
* Converts each row to an `EvaluationRow` with a user message
* Sets the ground truth to the required number of highlights
* Returns the list of evaluation rows
## Step 3: Define the Evaluation Function
The evaluation function is the core logic that analyzes model responses. To
implement this, EP provides a decorator `@evaluation_test` that configures the
evaluation with the following parameters:
```python
@evaluation_test(
input_dataset=["tests/pytest/data/markdown_dataset.jsonl"],
dataset_adapter=markdown_dataset_to_evaluation_row,
completion_params=[{"model": "fireworks_ai/accounts/fireworks/models/kimi-k2-instruct", "temperature": 0.0, "max_tokens": 4096}],
passed_threshold=0.5,
rollout_processor=SingleTurnRolloutProcessor(),
num_runs=1,
mode="pointwise",
)
def test_markdown_highlighting_evaluation(row: EvaluationRow) -> EvaluationRow:
"""
Evaluation function that checks if the model's response contains the required number of formatted sections.
"""
# Extract the assistant's response from the conversation
assistant_response = row.messages[-1].content
# Handle empty responses
if not assistant_response:
return EvaluateResult(score=0.0, reason="❌ No assistant response found")
# Convert ground truth to required number of highlights
required_highlights = int(row.ground_truth)
```
**Key points:**
* The function receives an `EvaluationRow` parameter and returns it with the evaluation result attached
* We extract the last message (assistant's response) using `row.messages[-1].content`
* We handle edge cases like empty responses
* The `row.ground_truth` contains the required number of highlighted sections
## Step 4: Implement the Analysis Logic
Next, we implement the core logic to count highlighted sections:
```python
# Count highlighted sections (**bold** or *italic*)
actual_count = 0
# Find italic text patterns (*text*)
highlights = re.findall(r"\*[^\n\*]*\*", assistant_response)
# Find bold text patterns (**text**)
double_highlights = re.findall(r"\*\*[^\n\*]*\*\*", assistant_response)
# Count valid italic highlights (non-empty content)
for highlight in highlights:
if highlight.strip("*").strip():
actual_count += 1
# Count valid bold highlights (non-empty content)
for highlight in double_highlights:
if highlight.removeprefix("**").removesuffix("**").strip():
actual_count += 1
```
**Regex patterns explained:**
* `r"\*[^\n\*]*\*"`: Matches italic text between single asterisks
* `\*`: Literal asterisk
* `[^\n\*]*`: Any characters except newlines and asterisks
* `\*`: Closing asterisk
* `r"\*\*[^\n\*]*\*\*"`: Matches bold text between double asterisks
* We filter out empty highlights to ensure quality
## Step 5: Generate the Evaluation Result
Finally, we compare the actual count against requirements and attach the result to the row:
```python
# Determine if the response meets the requirement
meets_requirement = actual_count >= required_highlights
if meets_requirement:
row.evaluation_result = EvaluateResult(
score=1.0,
reason=f"✅ Found {actual_count} highlighted sections (required: {required_highlights})"
)
else:
row.evaluation_result = EvaluateResult(
score=0.0,
reason=f"❌ Only found {actual_count} highlighted sections (required: {required_highlights})"
)
return row
```
**Result structure:**
* `score`: 1.0 for success, 0.0 for failure
* `reason`: Human-readable explanation with emojis for clarity
* The result is attached to `row.evaluation_result` and the row is returned
## Step 6: Configuration Parameters
The `@evaluation_test` decorator configures the evaluation with these parameters:
**Configuration parameters:**
* `input_dataset`: Path to the JSONL file containing test cases
* `dataset_adapter`: Function that converts raw dataset to EvaluationRow objects
* `model`: The model to evaluate (Fireworks Kimi model in this case)
* `rollout_input_params`: Model parameters (temperature, max tokens)
* `threshold_of_success`: Minimum score required to pass (0.5 = 50% success rate)
* `rollout_processor`: Function that handles the conversation flow (default\_single\_turn\_rollout\_processor for single-turn evaluations)
* `num_runs`: Number of times to run each test case
* `mode`: Evaluation mode ("pointwise" for individual test case evaluation)
This comprehensive dataset ensures that the evaluation tests the model's ability to:
1. Understand markdown formatting instructions
2. Apply formatting consistently across different content types
3. Meet minimum requirements for highlighted sections
4. Follow specific formatting patterns
This example demonstrates how to create robust, reusable evaluations that can be integrated into CI/CD pipelines, model comparison workflows, and fine-tuning processes.
# Starting the UI
Source: https://evalprotocol.io/tutorial/ui/getting-started
Reviewing model outputs by hand is an important part of evaluating quality. EP
makes this process simple by offering an easy-to-use, locally hosted UI you can
set up in minutes.
To start the UI, simply run the following command and open your browser to [http://localhost:8000](http://localhost:8000).
```bash CLI
ep logs
```
Ensure the `eval-protocol` package is installed so the `ep` CLI is available.
```bash
# Add to your project (installs the `ep` CLI in your environment)
uv add eval-protocol
# Verify installation
uv run ep --version
```
```bash
# Install or upgrade
pip install -U eval-protocol
# Verify installation
ep --version
```
Once you navigate to the UI at [http://localhost:8000](http://localhost:8000), you will see a table of
evaluation rows that you can click to inspect.
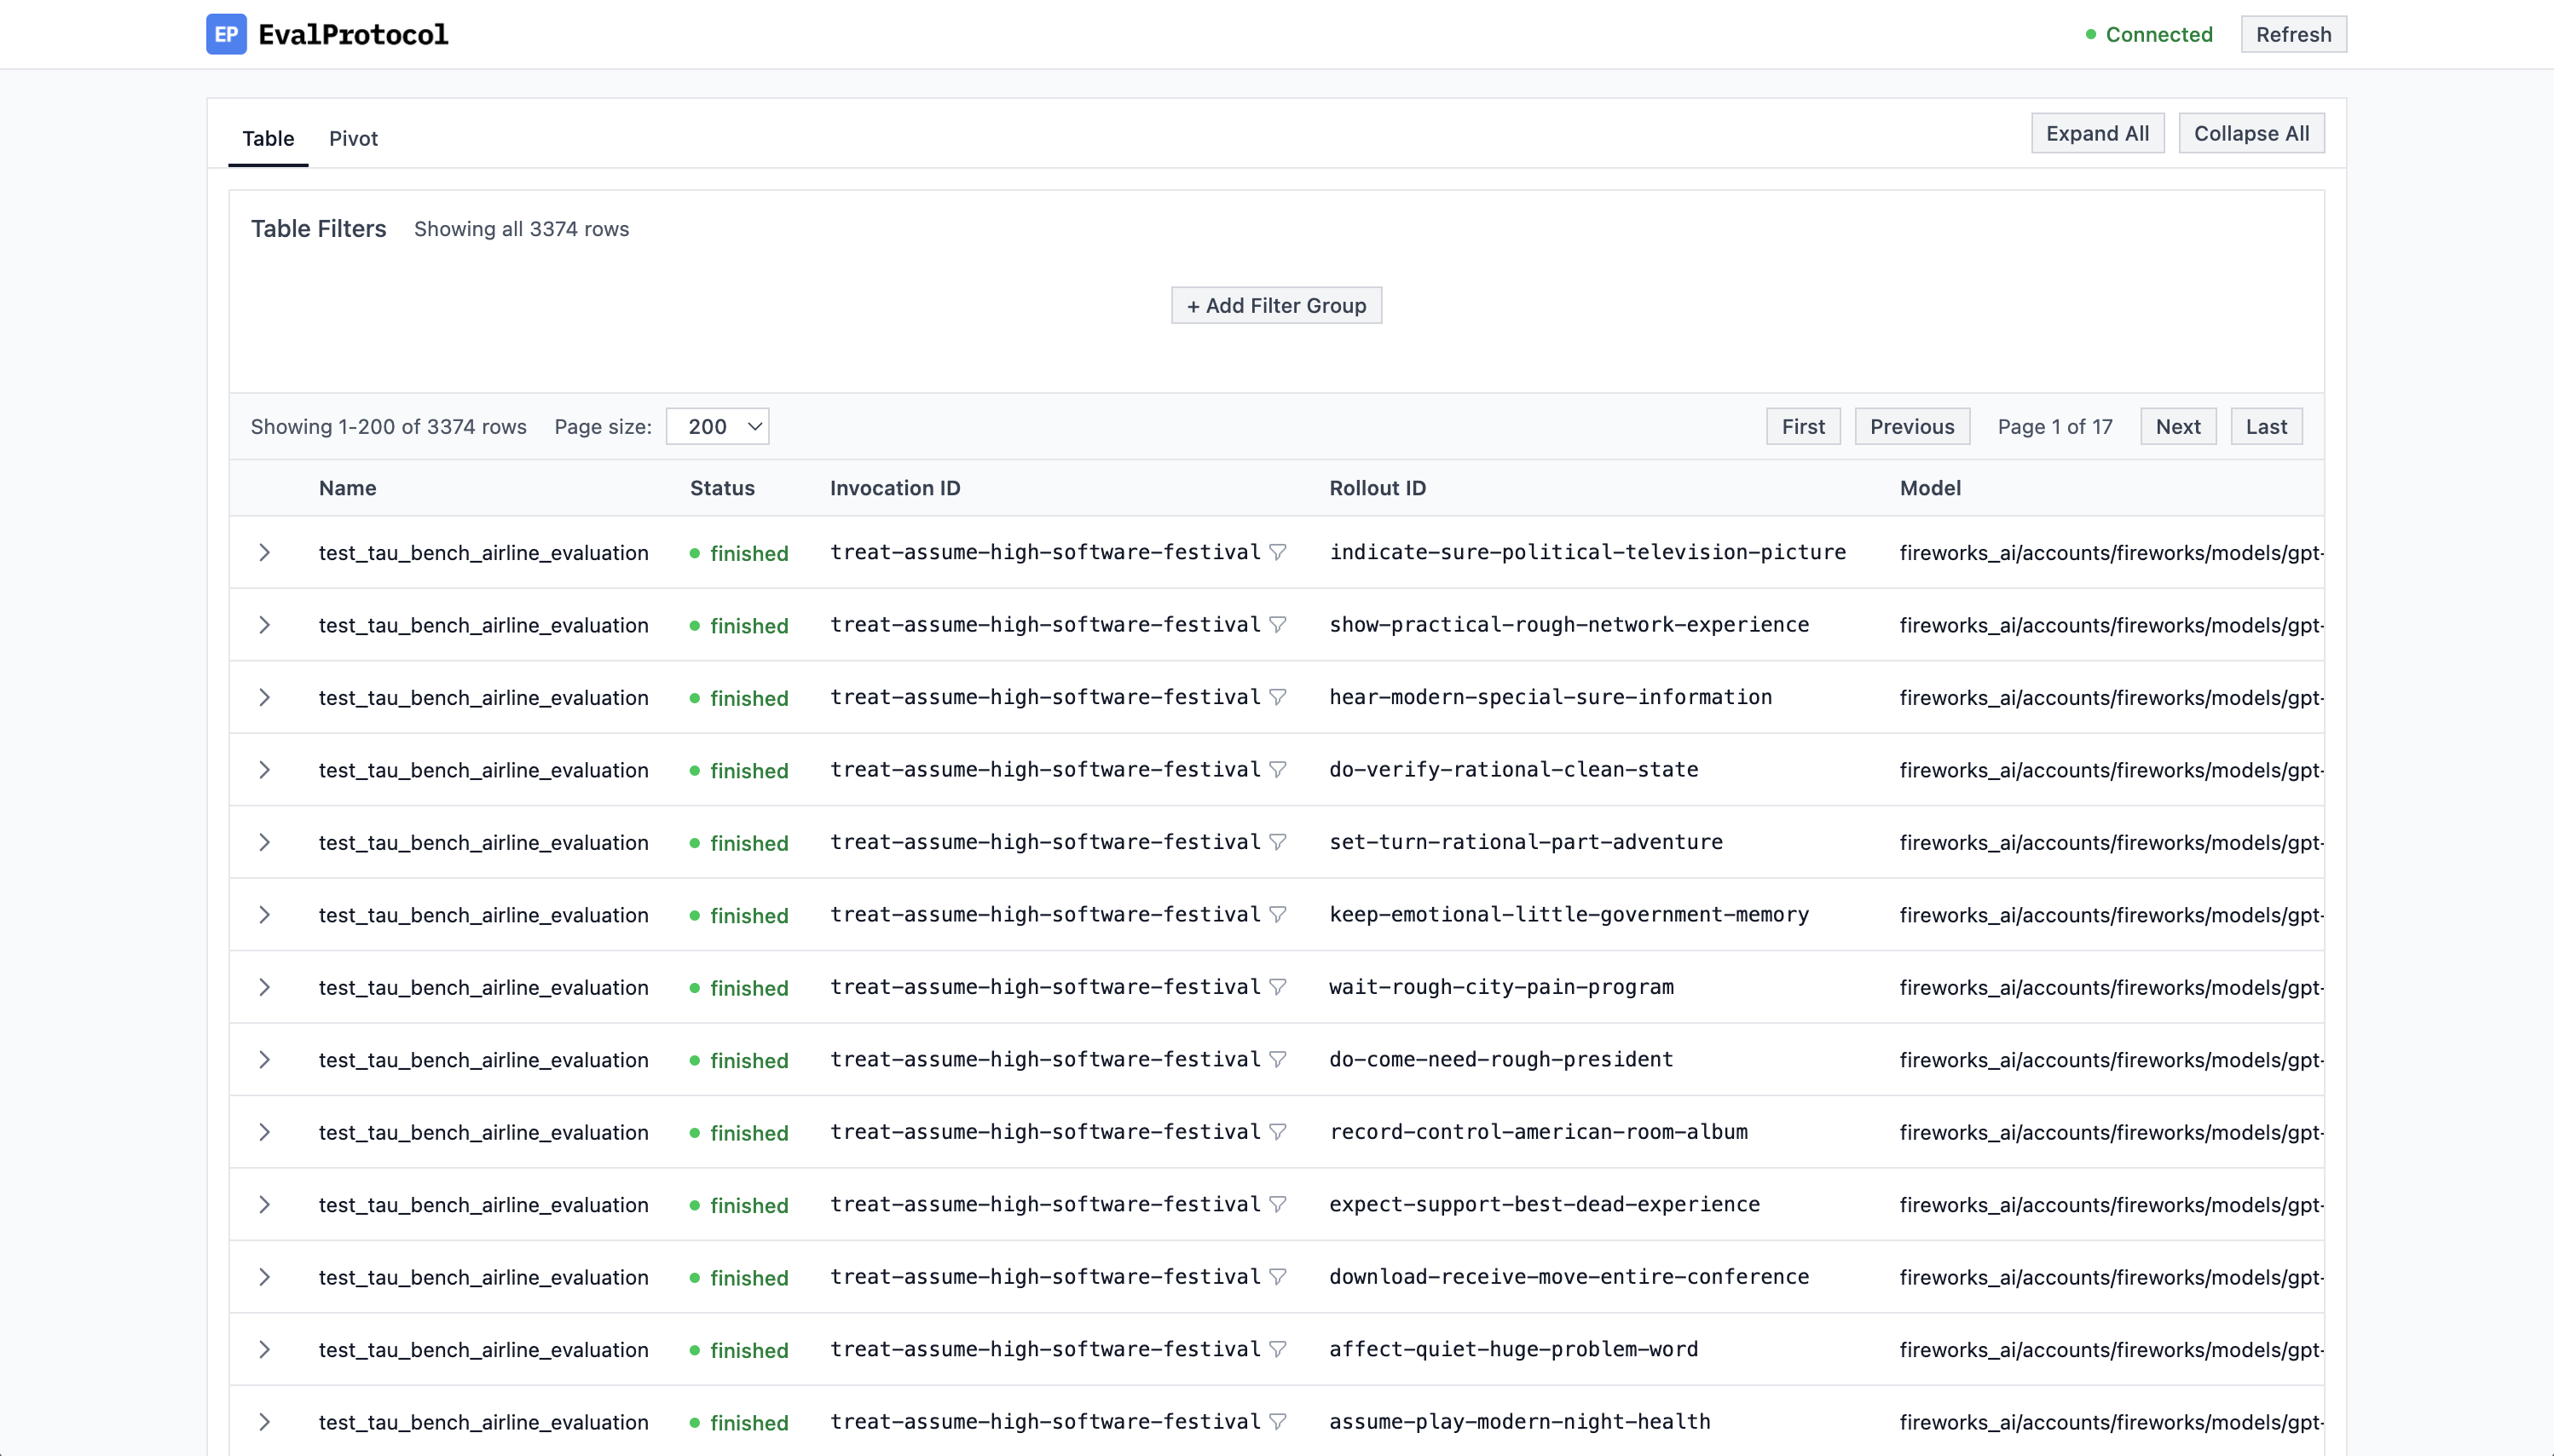
Whenever you run an `@evaluation_test`—whether from the VSCode Test
Explorer/Debugger or from the CLI via `pytest`—the UI automatically shows
`running` tests and you can watch rollouts live in the chat interface. When a
test finishes, detailed evaluation results appear to the right of the chat.
Tests are stored under a SQLite database on your local device at
`.eval_protocol/logs.db` in the root of your Python project.
To run your tests in CLI, you use the `pytest` command directly.
```bash
# Run your tests (UI will reflect live rollouts)
uv run pytest
```
```bash
# Run your tests (UI will reflect live rollouts)
pytest
```
You can also run tests in your IDE. Once you have your tests running, you can
open the UI at [http://localhost:8000](http://localhost:8000) to monitor
rollouts live.
Example of a test running in VSCode and the UI showing live rollouts
Left: VSCode Test using @evaluation_test Right: Log Viewer UI at http://localhost:8000}>
## Next Steps
Checkout the [Table View](/tutorial/ui/table) and [Pivot View](/tutorial/ui/pivot) for
more information on how to use the UI.
# Pivot View
Source: https://evalprotocol.io/tutorial/ui/pivot
EP's convenient and locally hosted UI offers a pivot view to help you analyze
your data. If you a familiar with Excel's Pivot Tables, you will feel right at
home. For those who are unfamiliar, pivot tables are an easy way to summarize
and analyze data without having to write formulas or code.
Using a pivot table, you can easily compute aggregate metrics across your data to answer questions like:
* Which model performs best for my application?
* Which prompt performs best for my application?
* How does each model perform on this evaluation and dataset?
* What impact does temperature have on model performance?
* Which tasks in my dataset are the most challenging?
* Is my fine-tuned model outperforming the base model?
* What is the average score across multiple runs?
* Which set of completion parameters yields the best results?
### How to open the pivot view
To know if you are in the pivot view, check that the `Pivot` tab is selected in
the top left corner of the UI.
Make sure you are in the Pivot View by checking the top left corner of the UI for the Pivot tab.}>
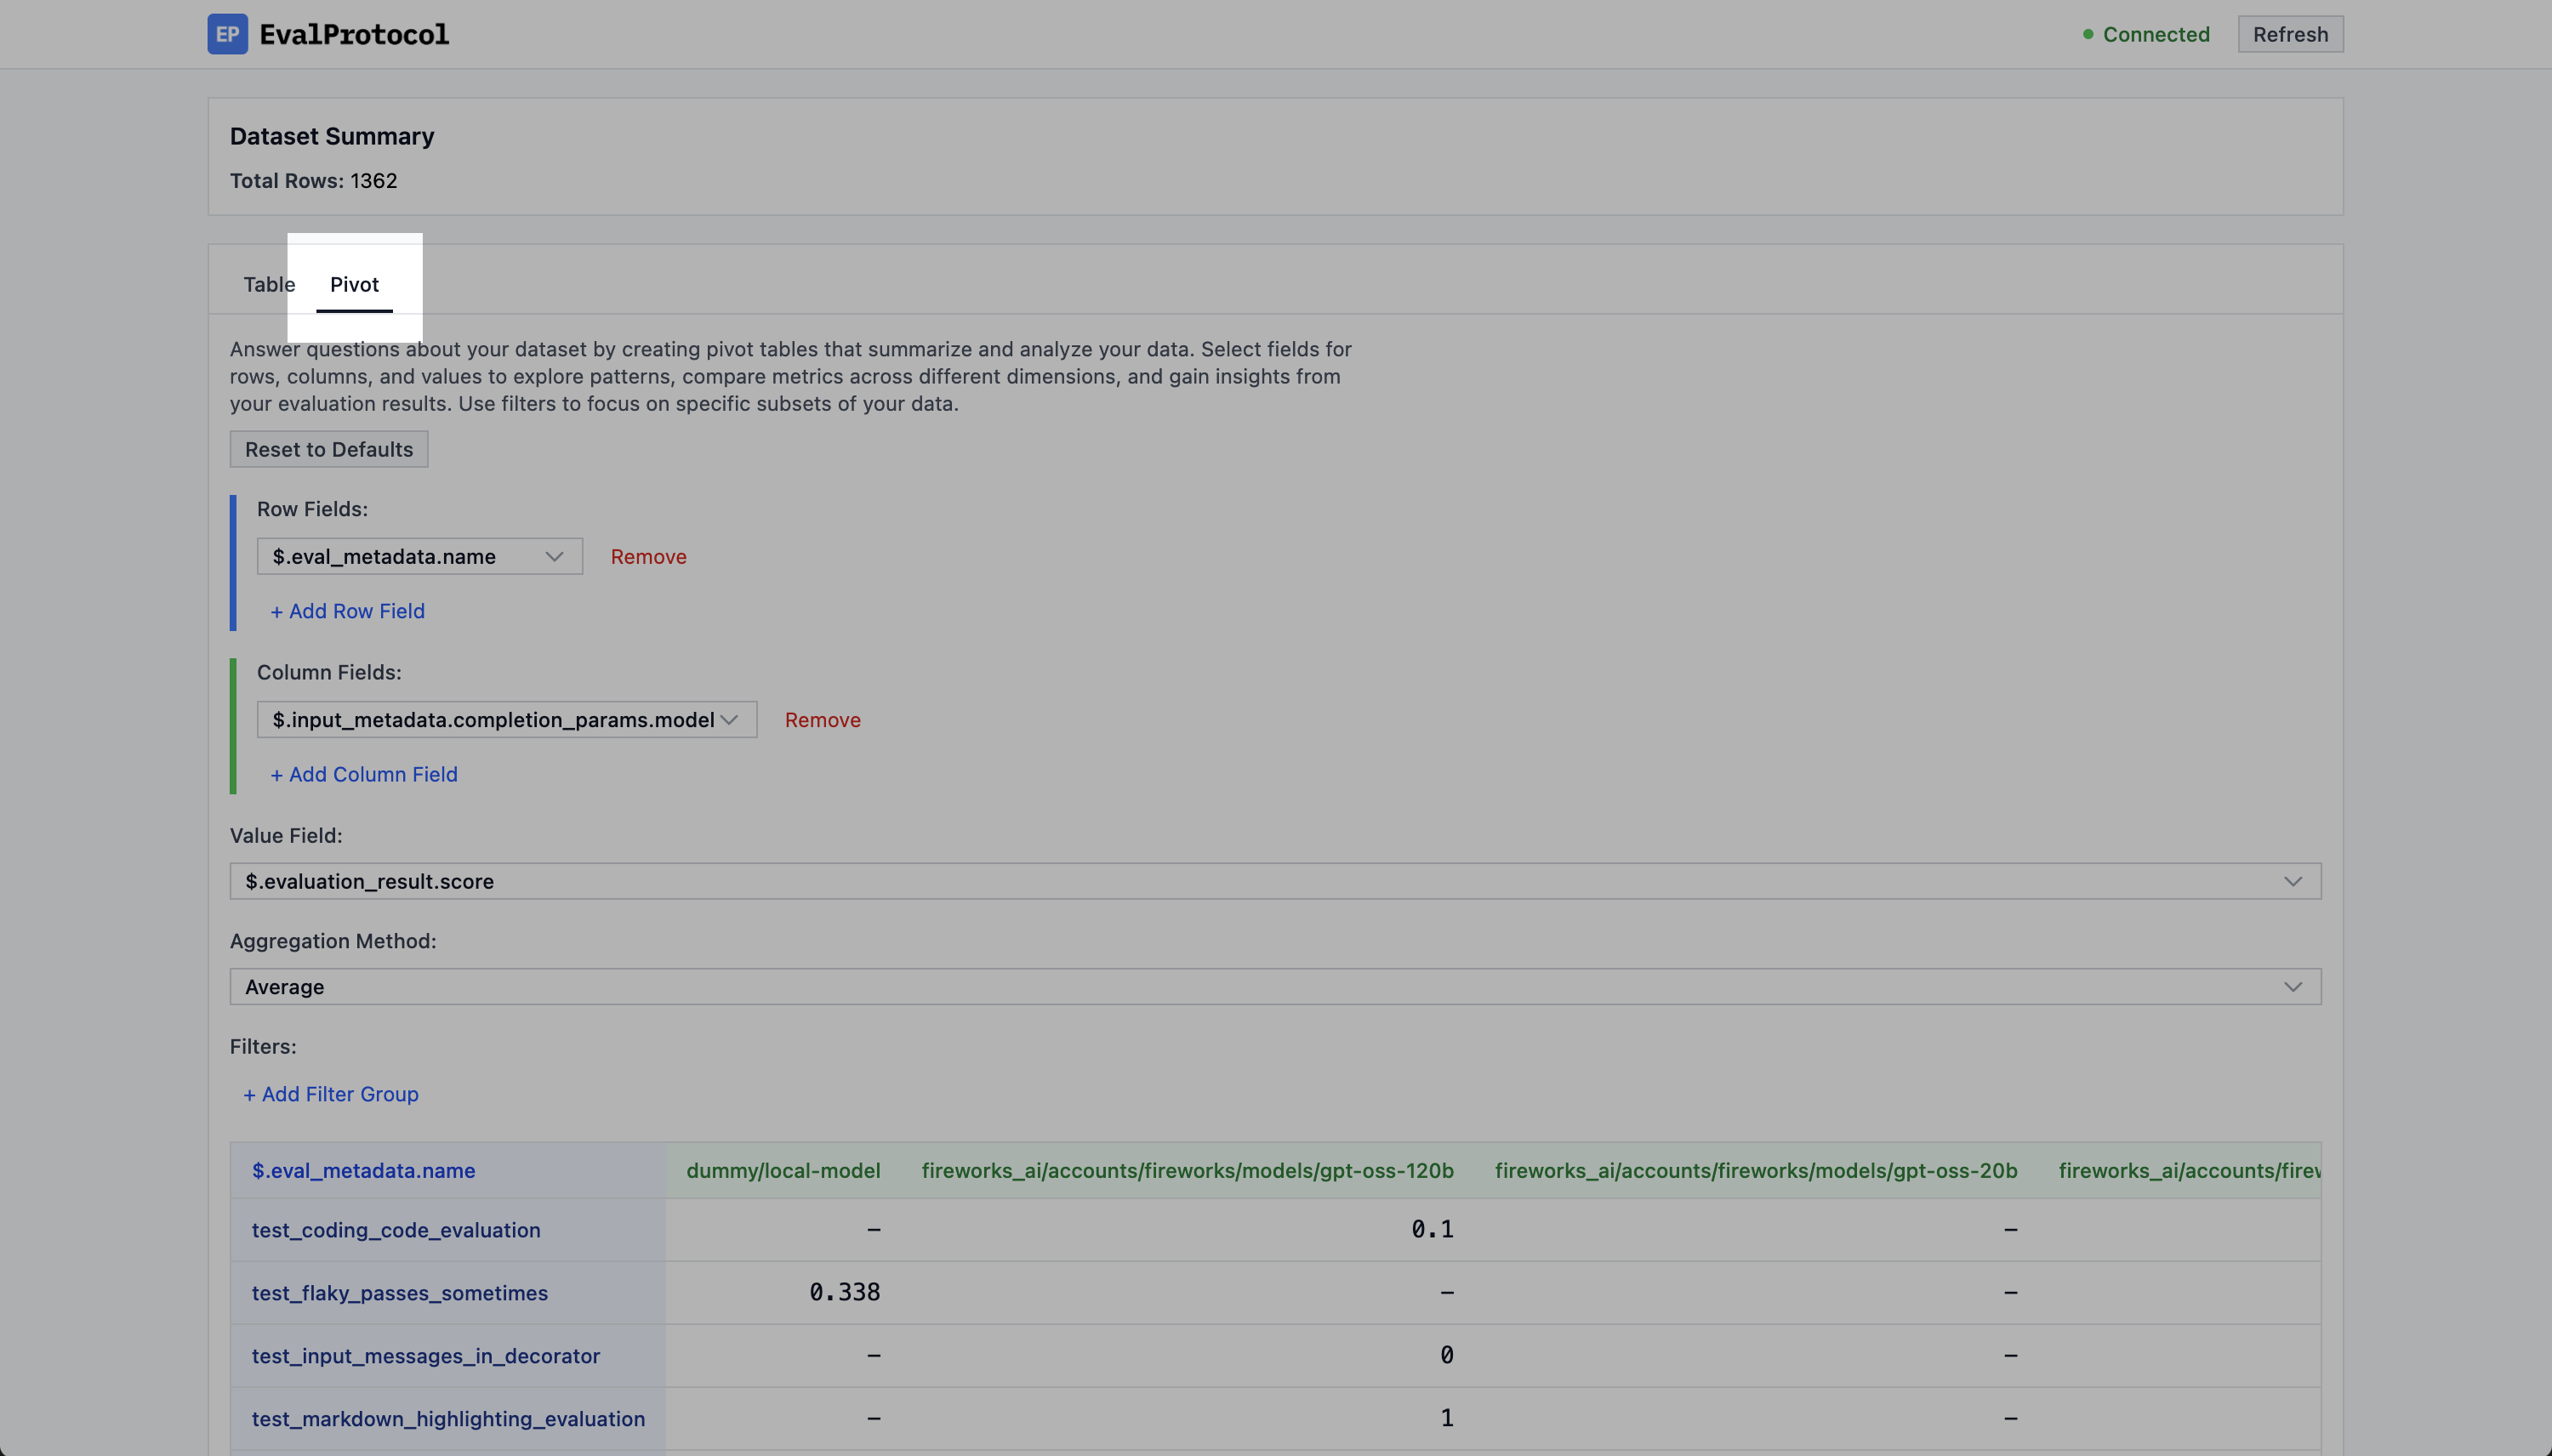
### Configuring the pivot table
In the pivot view, you will see a section at the top where you configure your
pivot table.
The pivot table configuration section.}>
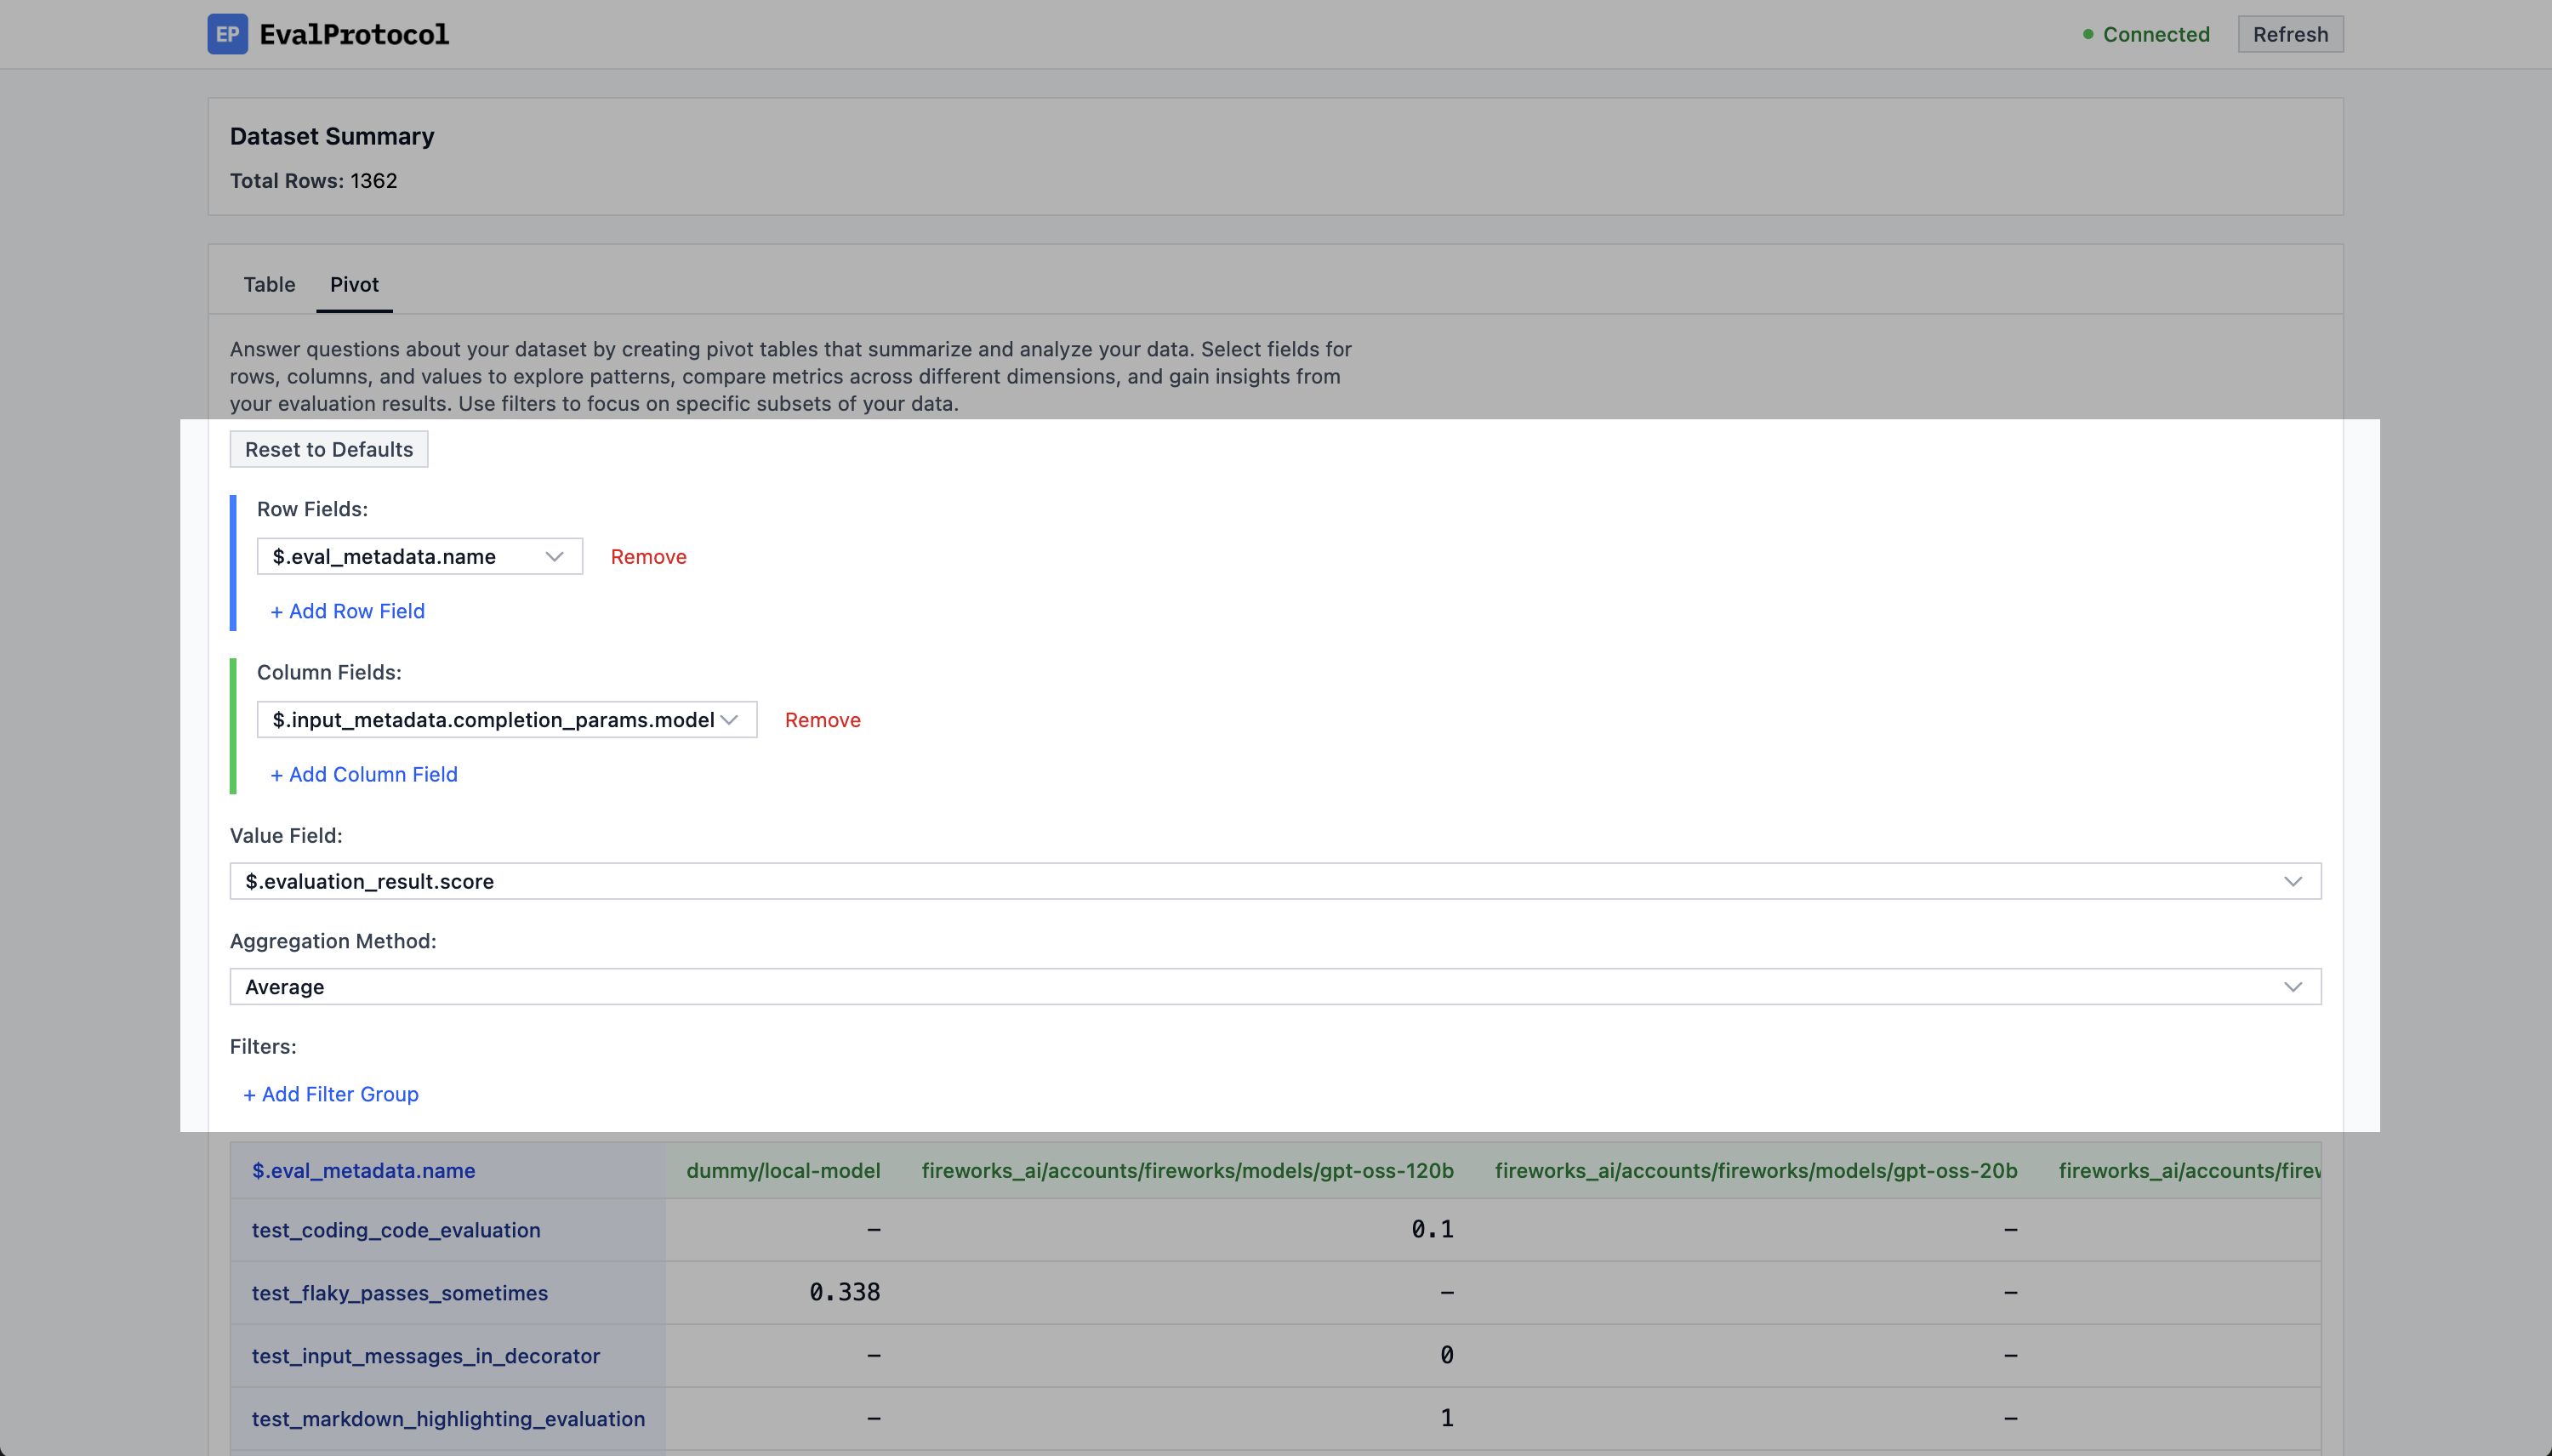
The pivot table configuration section has five parts:
* **Pivot Rows**: The rows that will be used to group the data.
* **Pivot Columns**: The columns that will be used to group the data.
* **Pivot Values**: The values that will be used to aggregate the data.
* **Pivot Aggregation**: The aggregation function to use for the values.
* **Pivot Filters**: The filters that will be used to filter the data.
### Viewing the data
Once you have configured the pivot table, you can view the data either by chart or table.
#### Chart
A chart will be automatically rendered based on the pivot table you generate.
Example of a chart rendered based on the pivot table.}>
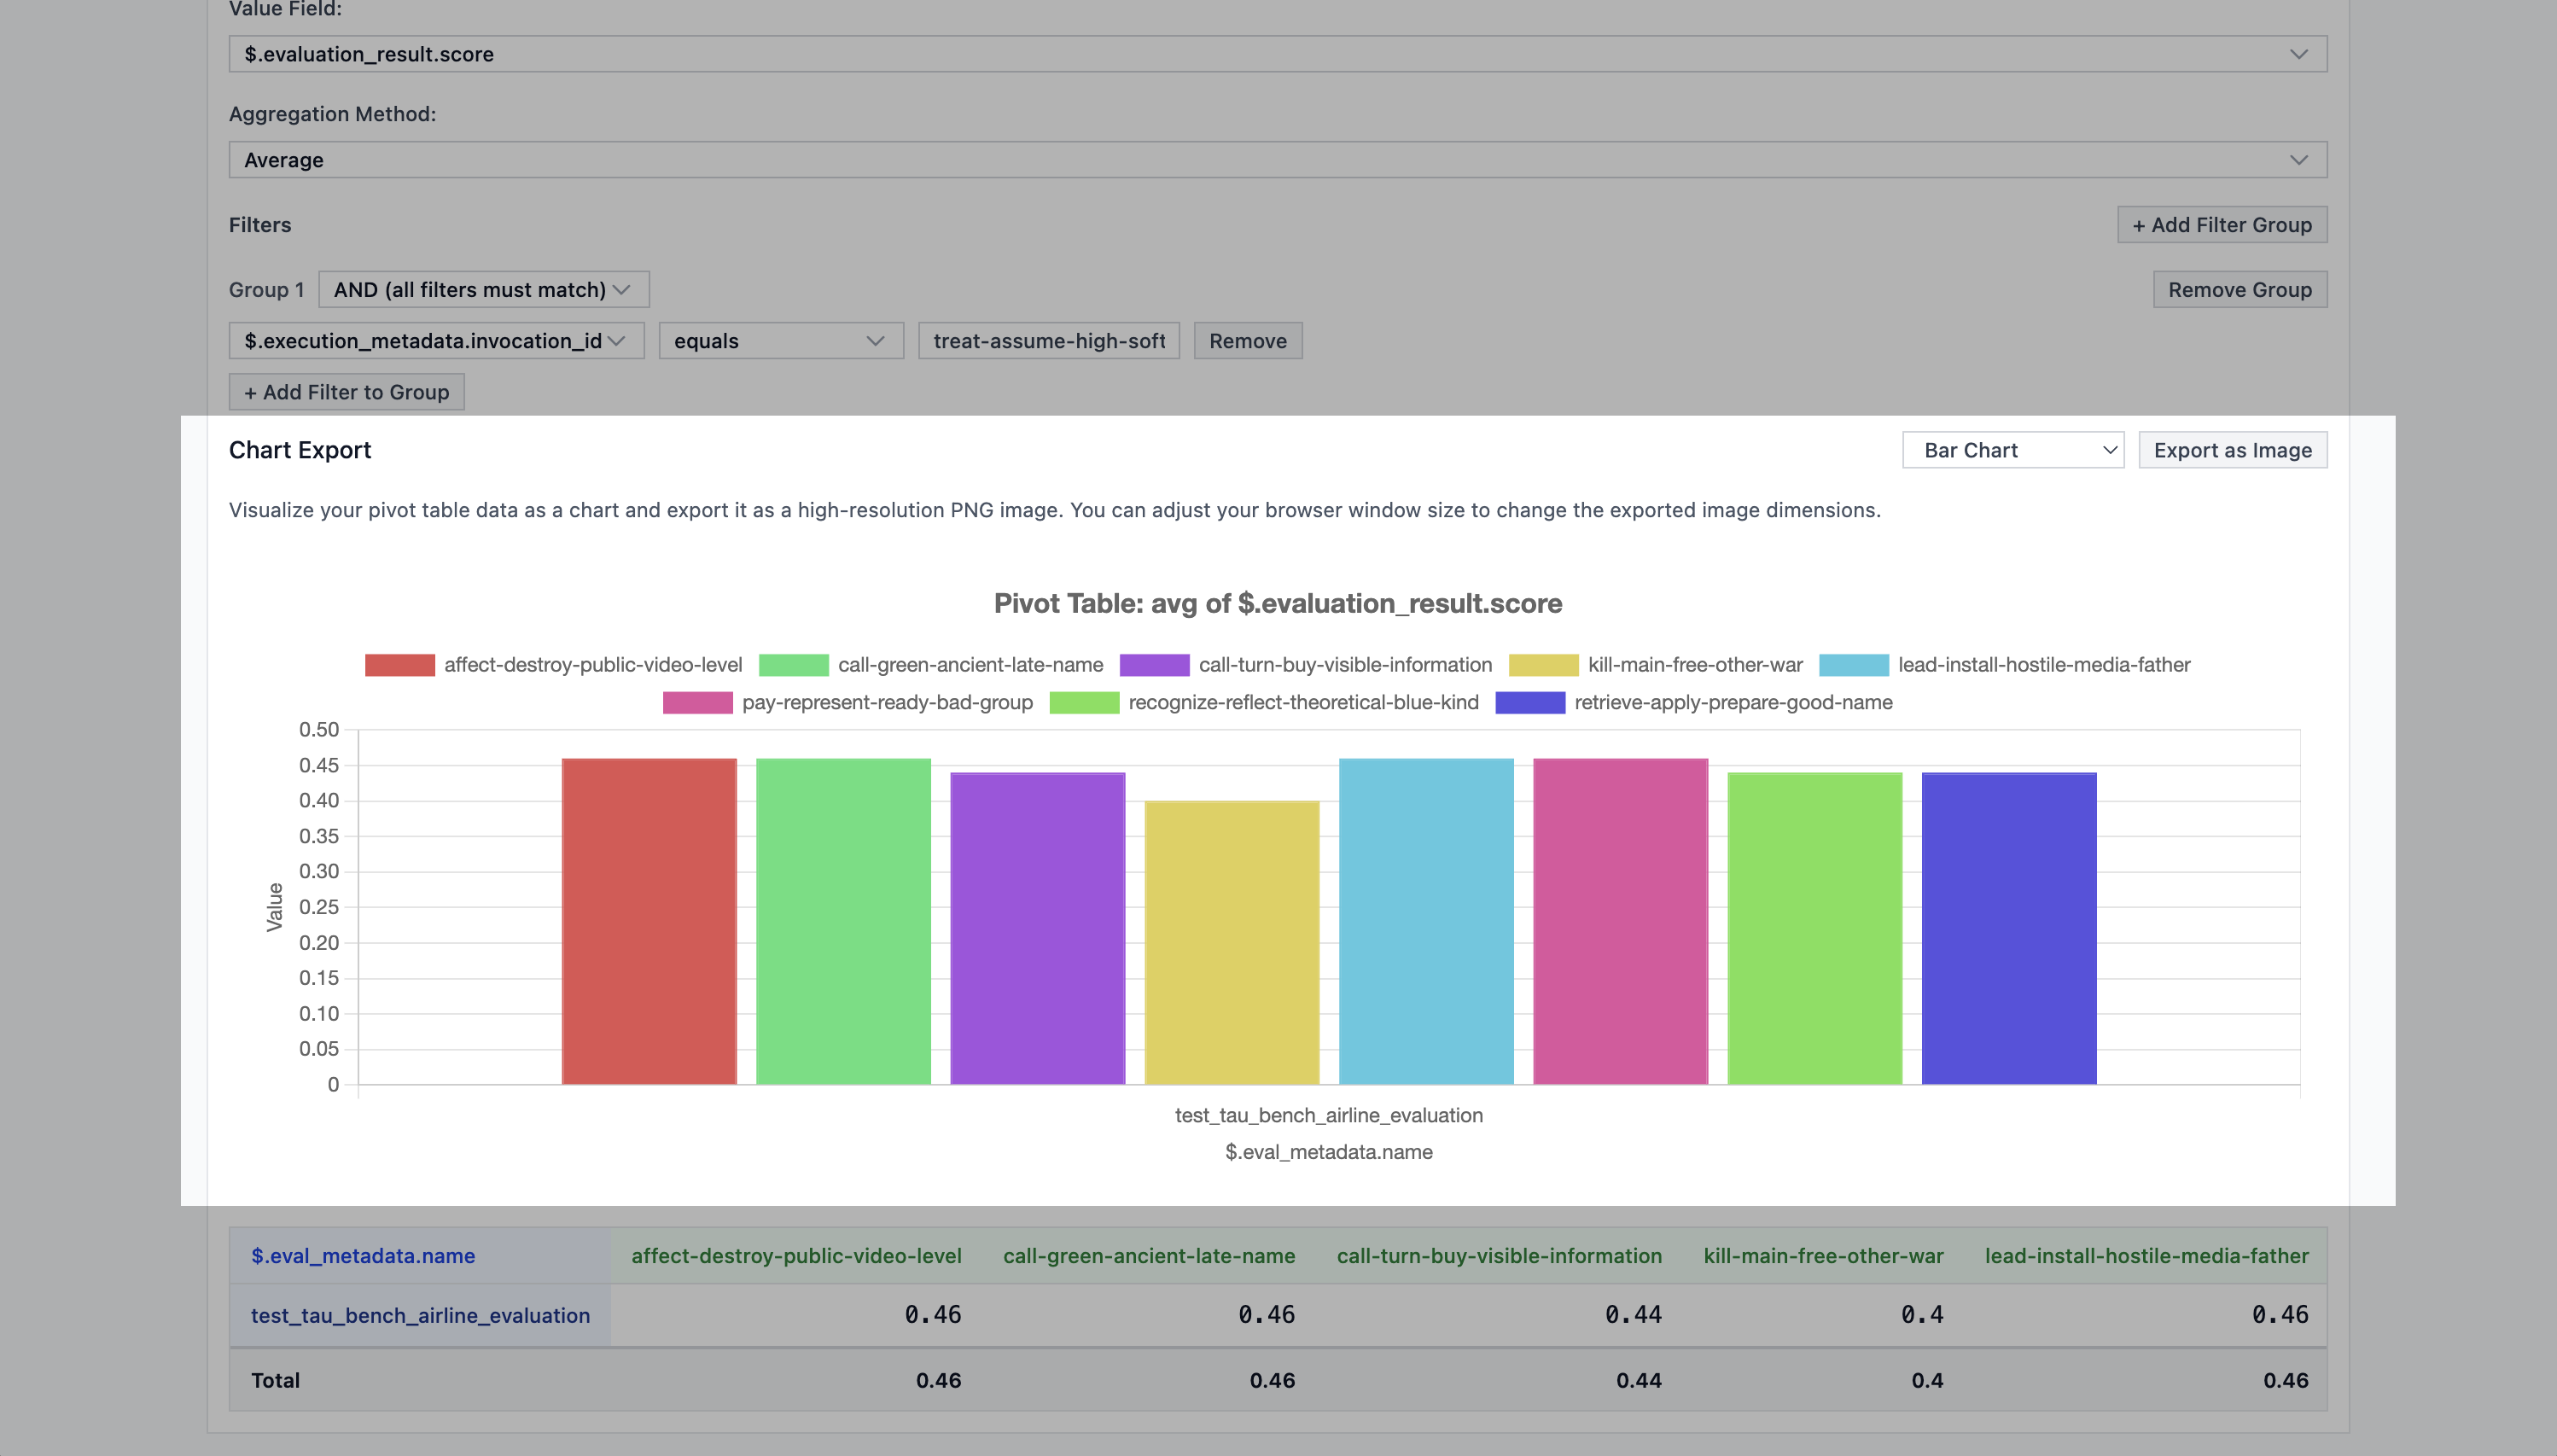
You can also click `Export as Image` to download the chart as an image.
#### Table
You can also see the exact computed values in the table view below the chart.
Example of the table view below the chart.}>
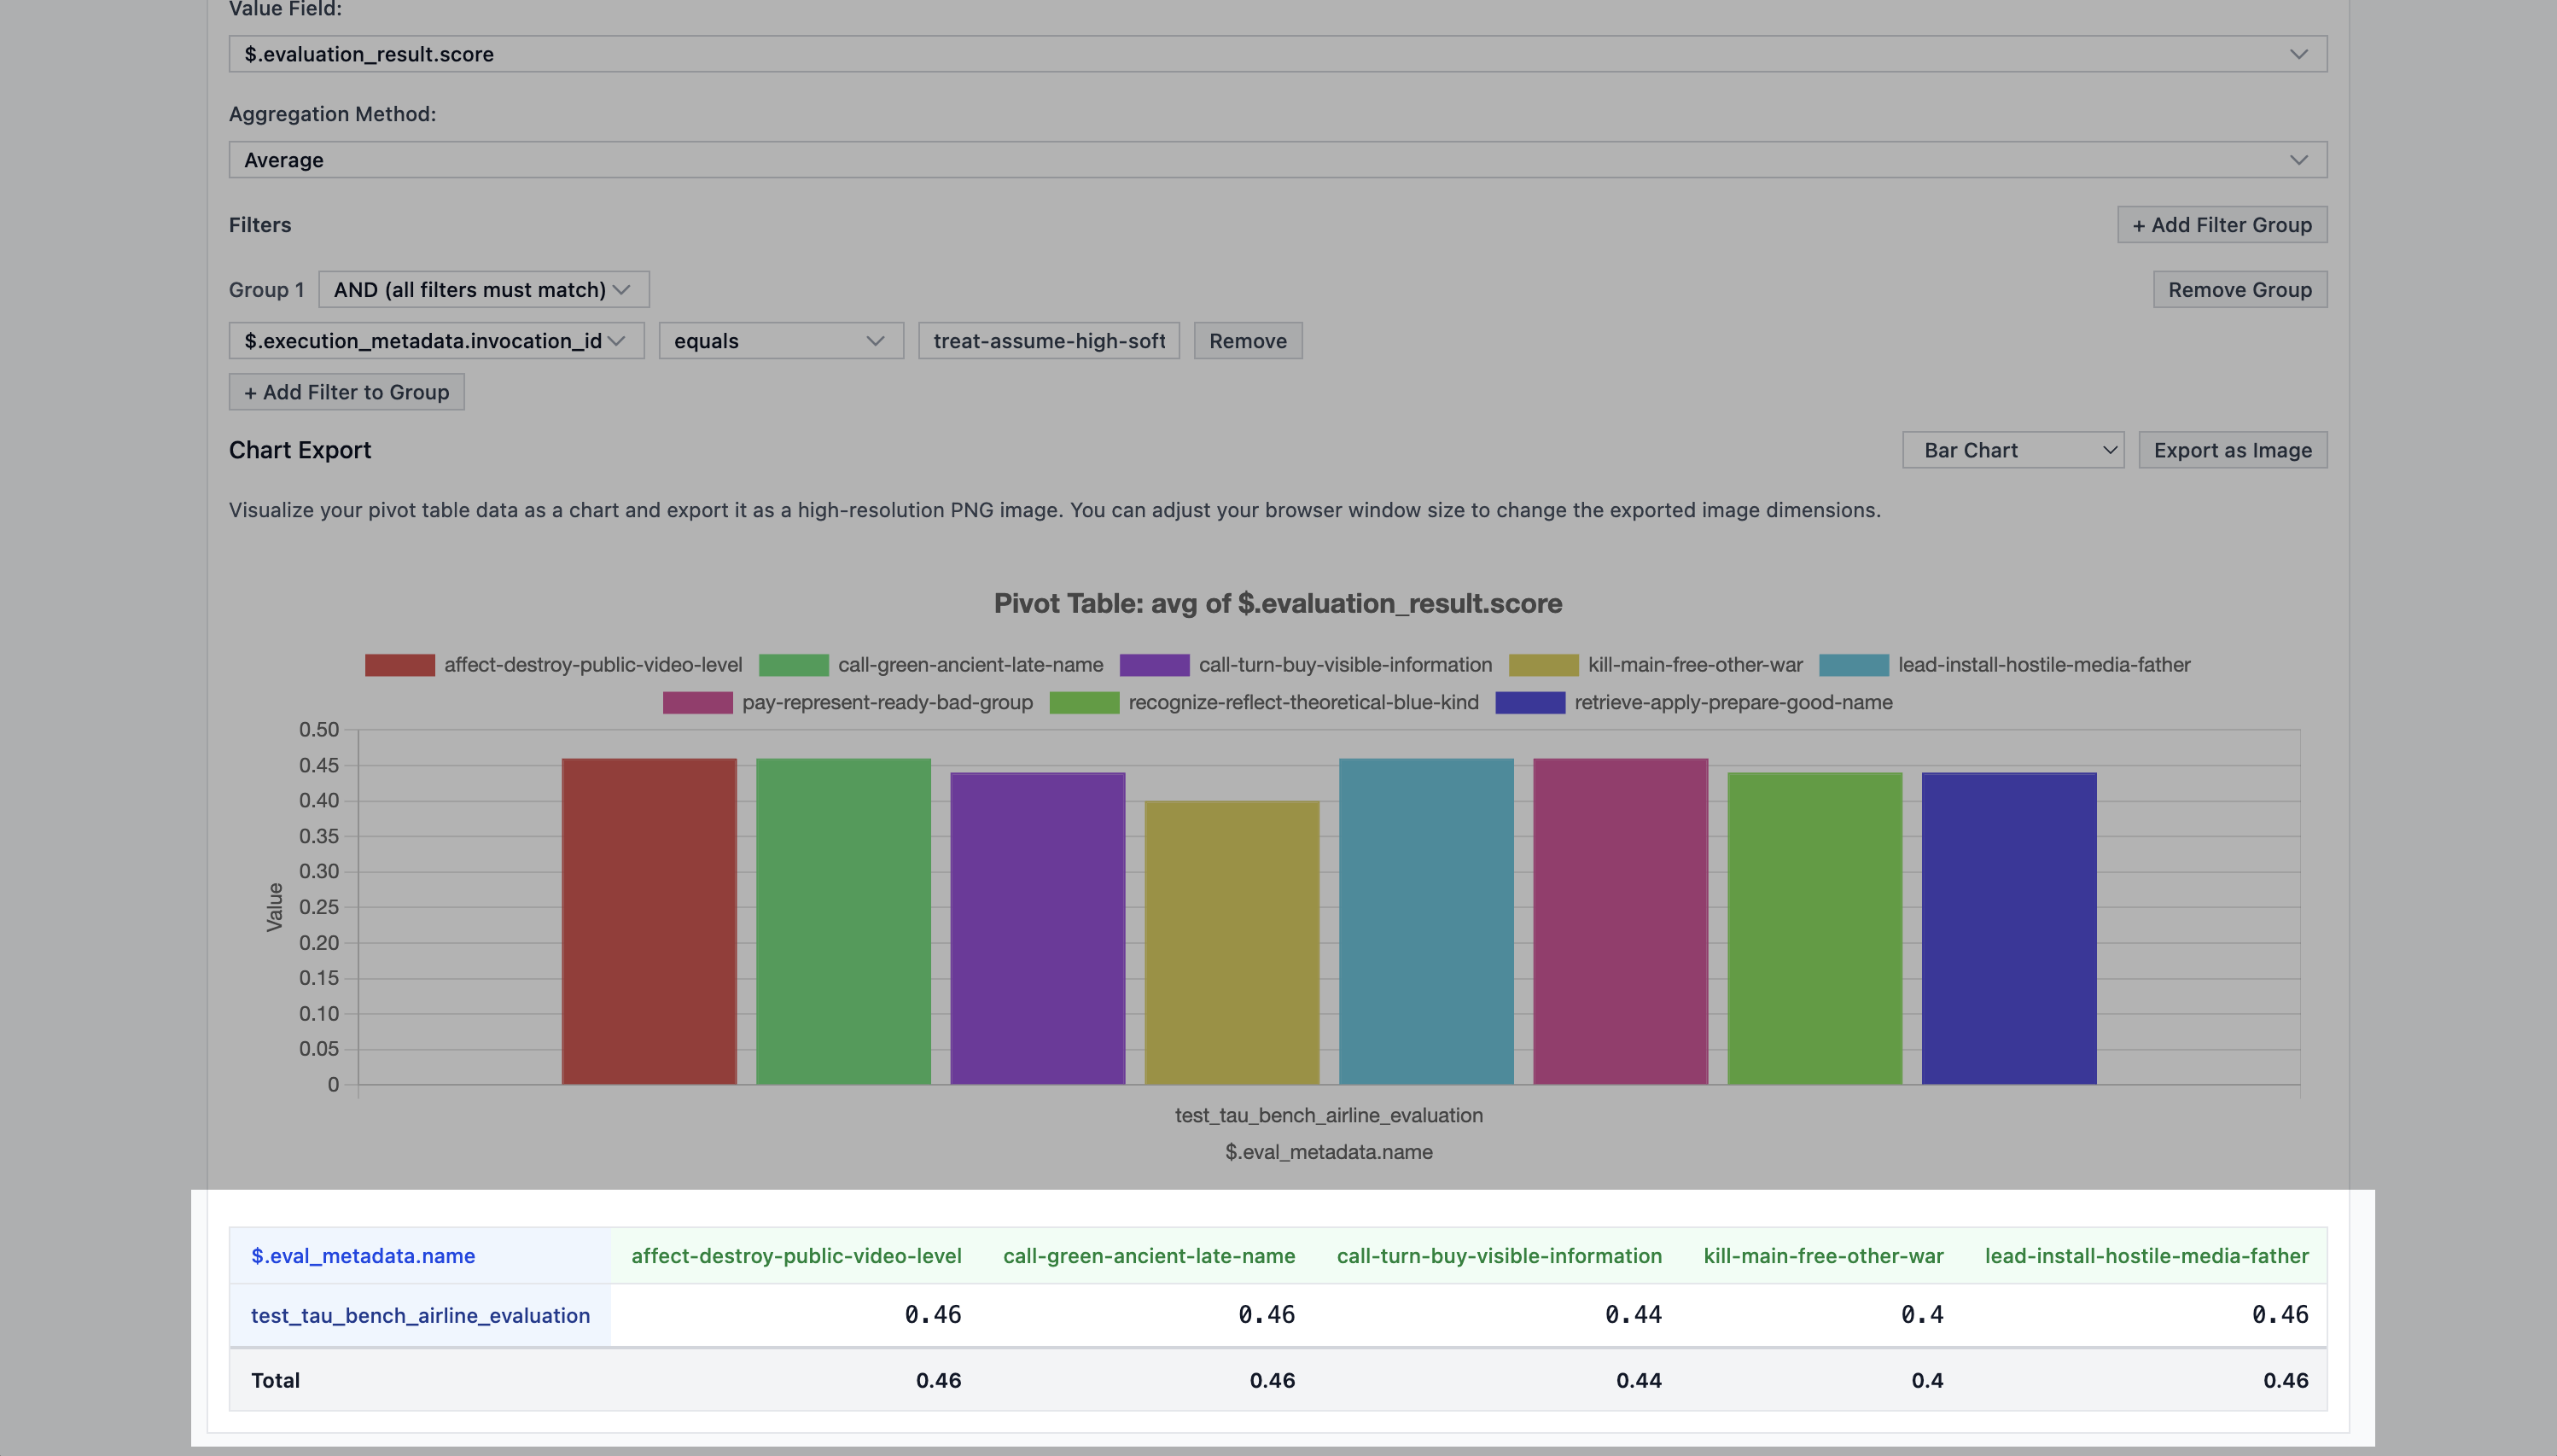
You can also click `Export as CSV` to download the table as a CSV file.
### Example (Picking the best model for math problems)
An common example of how to use the pivot view to analyze the data is to compare the performance of different models on a given dataset. For our example, we will compare the performance of
1. gpt-oss-120b (on Fireworks)
2. kimi-k2-instruct (on Fireworks)
3. gpt-4o (on OpenAI)
4. gpt-4o-mini (on OpenAI)
An implementation of this eval is publicly available in EP at
[aime25.py](https://github.com/eval-protocol/python-sdk/blob/main/eval_protocol/benchmarks/suites/aime25.py).
To run this eval with 4 different models, you can modify the `completion_params`
parameter in the `evaluation_test` decorator to the following value:
```python focus={7-23} expandable
@evaluation_test(
input_dataset=[
"https://huggingface.co/datasets/opencompass/AIME2025/raw/main/aime2025-I.jsonl",
"https://huggingface.co/datasets/opencompass/AIME2025/raw/main/aime2025-II.jsonl",
],
dataset_adapter=aime2025_dataset_adapter,
completion_params=[
{
"extra_body": {"reasoning_effort": "low"},
"model": "fireworks_ai/accounts/fireworks/models/gpt-oss-120b",
},
{
"extra_body": {"reasoning_effort": "low"},
"model": "fireworks_ai/accounts/fireworks/models/kimi-k2-instruct",
},
{
"model": "openai/gpt-4o",
},
{
"model": "openai/gpt-4o-mini",
},
],
rollout_processor=SingleTurnRolloutProcessor(),
aggregation_method="mean",
passed_threshold=None,
num_runs=8,
max_dataset_rows=2,
max_concurrent_rollouts=4,
mode="pointwise",
)
def test_aime25_pointwise(row: EvaluationRow) -> EvaluationRow:
assistant_msgs = [m for m in row.messages if m.role == "assistant"]
content = assistant_msgs[-1].content if assistant_msgs else ""
extracted_text = _extract_boxed_text(content or "")
extracted_int = _normalize_to_int_or_none(extracted_text)
gt_int = _normalize_to_int_or_none(row.ground_truth or "")
is_valid = extracted_int is not None and gt_int is not None
score = 1.0 if (is_valid and extracted_int == gt_int) else 0.0
metrics = {
"exact_match": MetricResult(
score=score,
is_score_valid=is_valid,
reason=(
"Parsed both integers and they matched"
if score == 1.0
else ("Parsed integers did not match" if is_valid else "Failed to parse integer")
),
data={
"extracted_text": extracted_text,
"extracted_int": extracted_int,
"ground_truth_int": gt_int,
},
)
}
row.evaluation_result = EvaluateResult(
score=score,
reason=("Answer correct" if score == 1.0 else "Answer incorrect"),
is_score_valid=is_valid,
metrics=metrics,
)
return row
```
Then looking at the pivot view, after filtering for the `invocation_id` of the
execution, you can see the following chart using the default pivot view
configuration.
Example of the pivot view after running the AIME 2025 eval.}>
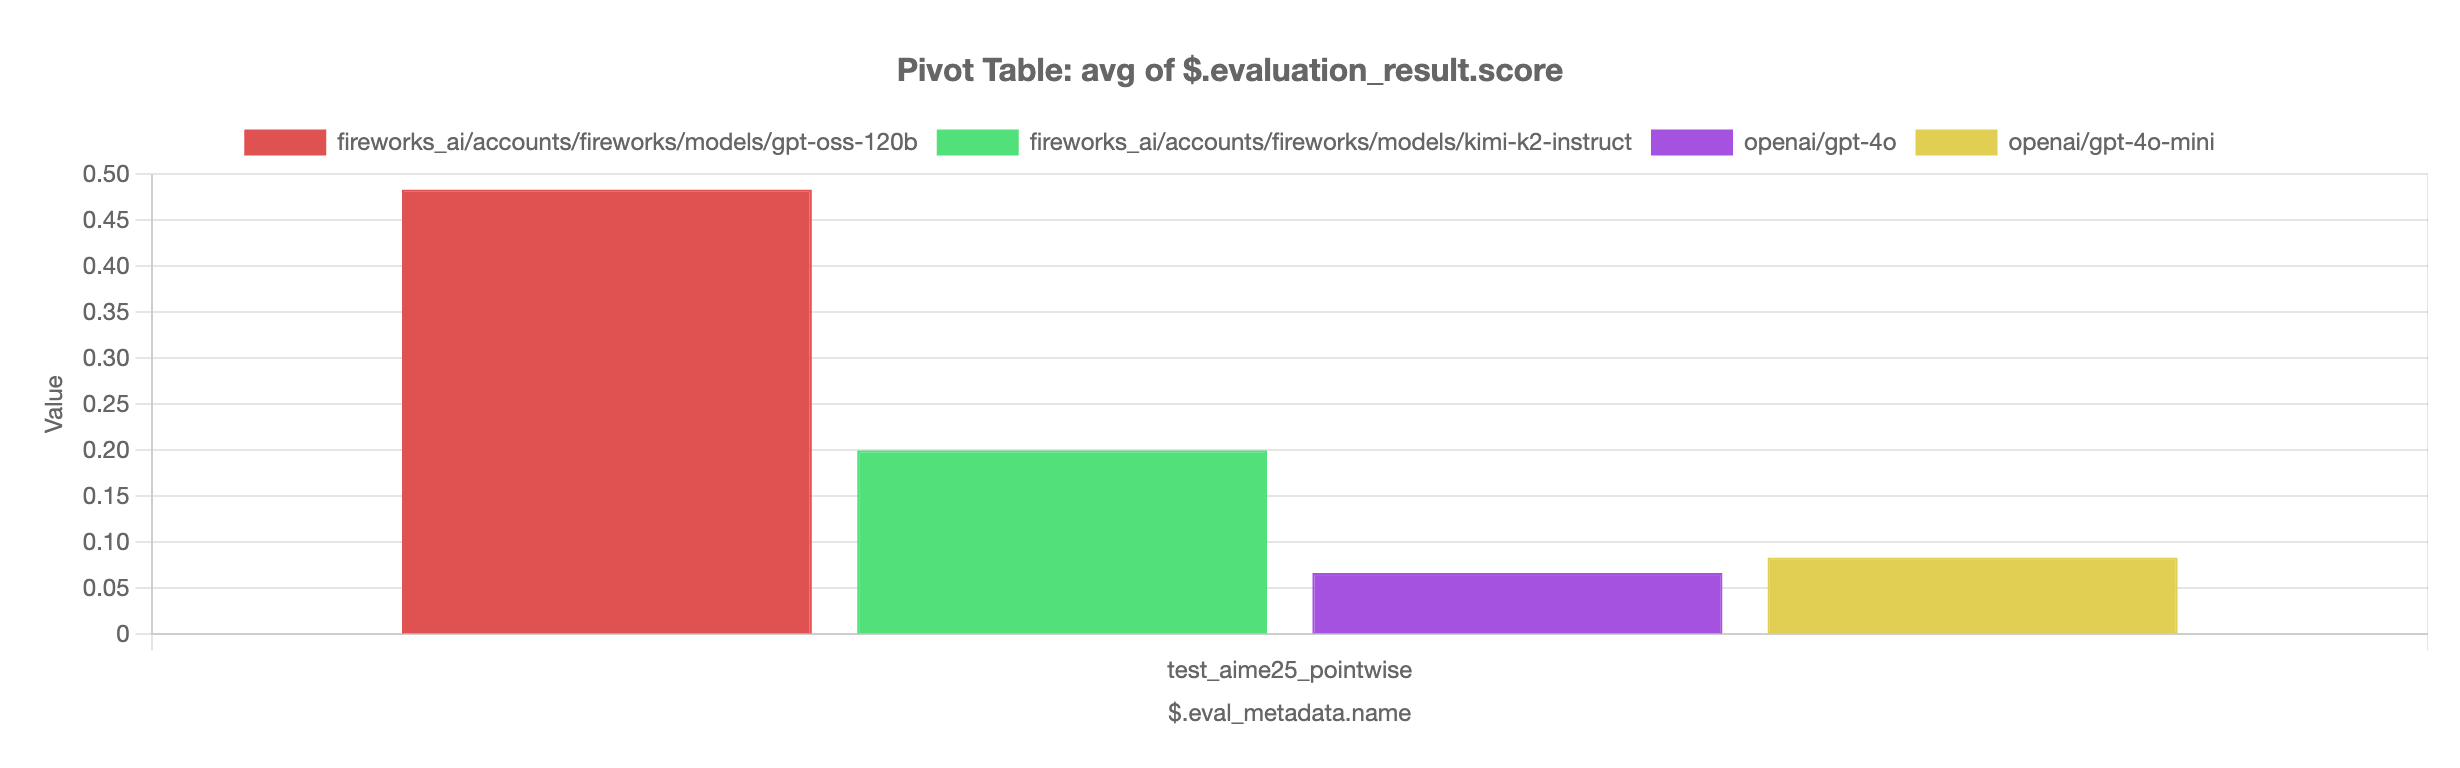
We can see that `gpt-oss-120b` out-performs the rest of the models using `"reasoning_effort": "low"`.
# Table View
Source: https://evalprotocol.io/tutorial/ui/table
The table view is the default view when you open the UI. It shows a list of
evaluation rows which you can click to inspect. Every evaluation [row](/specification#row) corresponds
to a single [rollout](/specification#rollout).
### How to open the table view
To know if you are in the table view, check that the `Table` tab is selected in
the top left corner of the UI.
Make sure you are in the Table View by checking the top left corner of the UI for the Table tab.}>
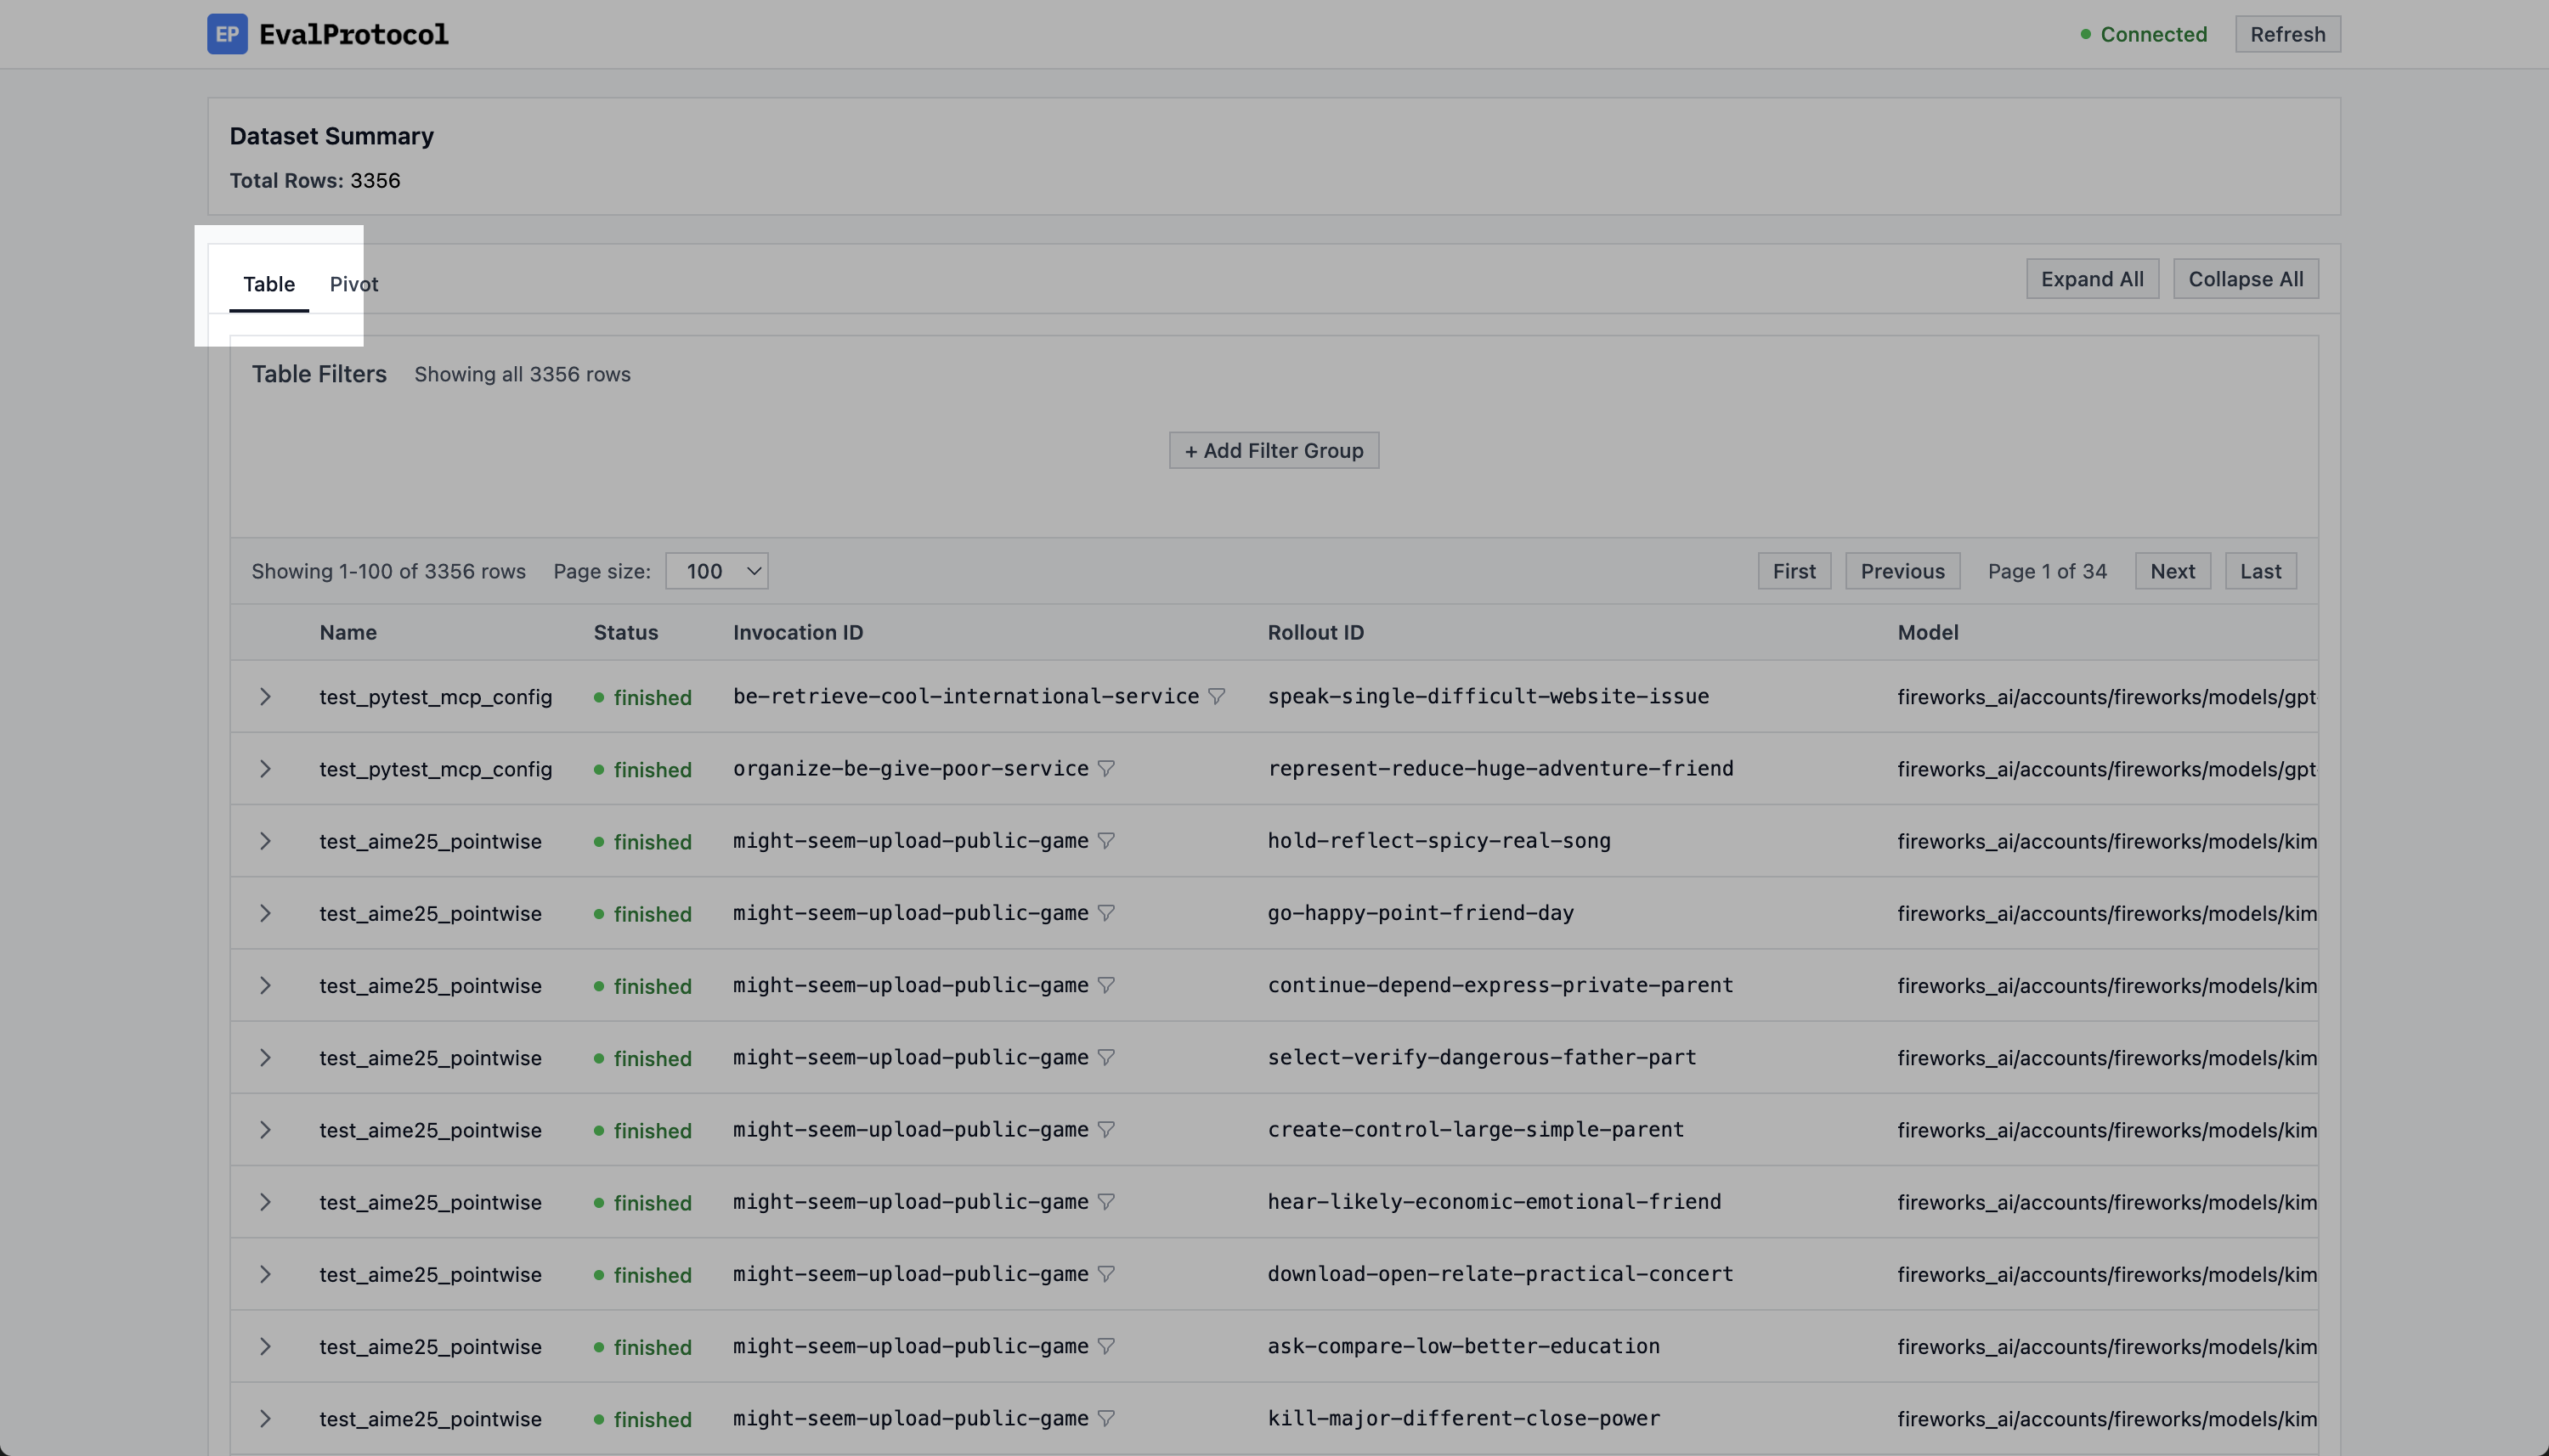
## Inspecting a row
In the table view, you will see a list of evaluation rows. For each row, you can see:
* **Name**: the test function name
* **Status**: either `running`, `finished`, `stopped`, or `error`
* **Invocation ID**: auto-generated by EP for every [invocation](/specification#invocation)
* **Rollout ID**: auto-generated by EP for every [rollout](/specification#rollout)
* **Model**: the model used for the evaluation
* **Score**: found in `evaluation_result.score`
* **Created**: the timestamp of when the row was created
List of evaluation rows.}>
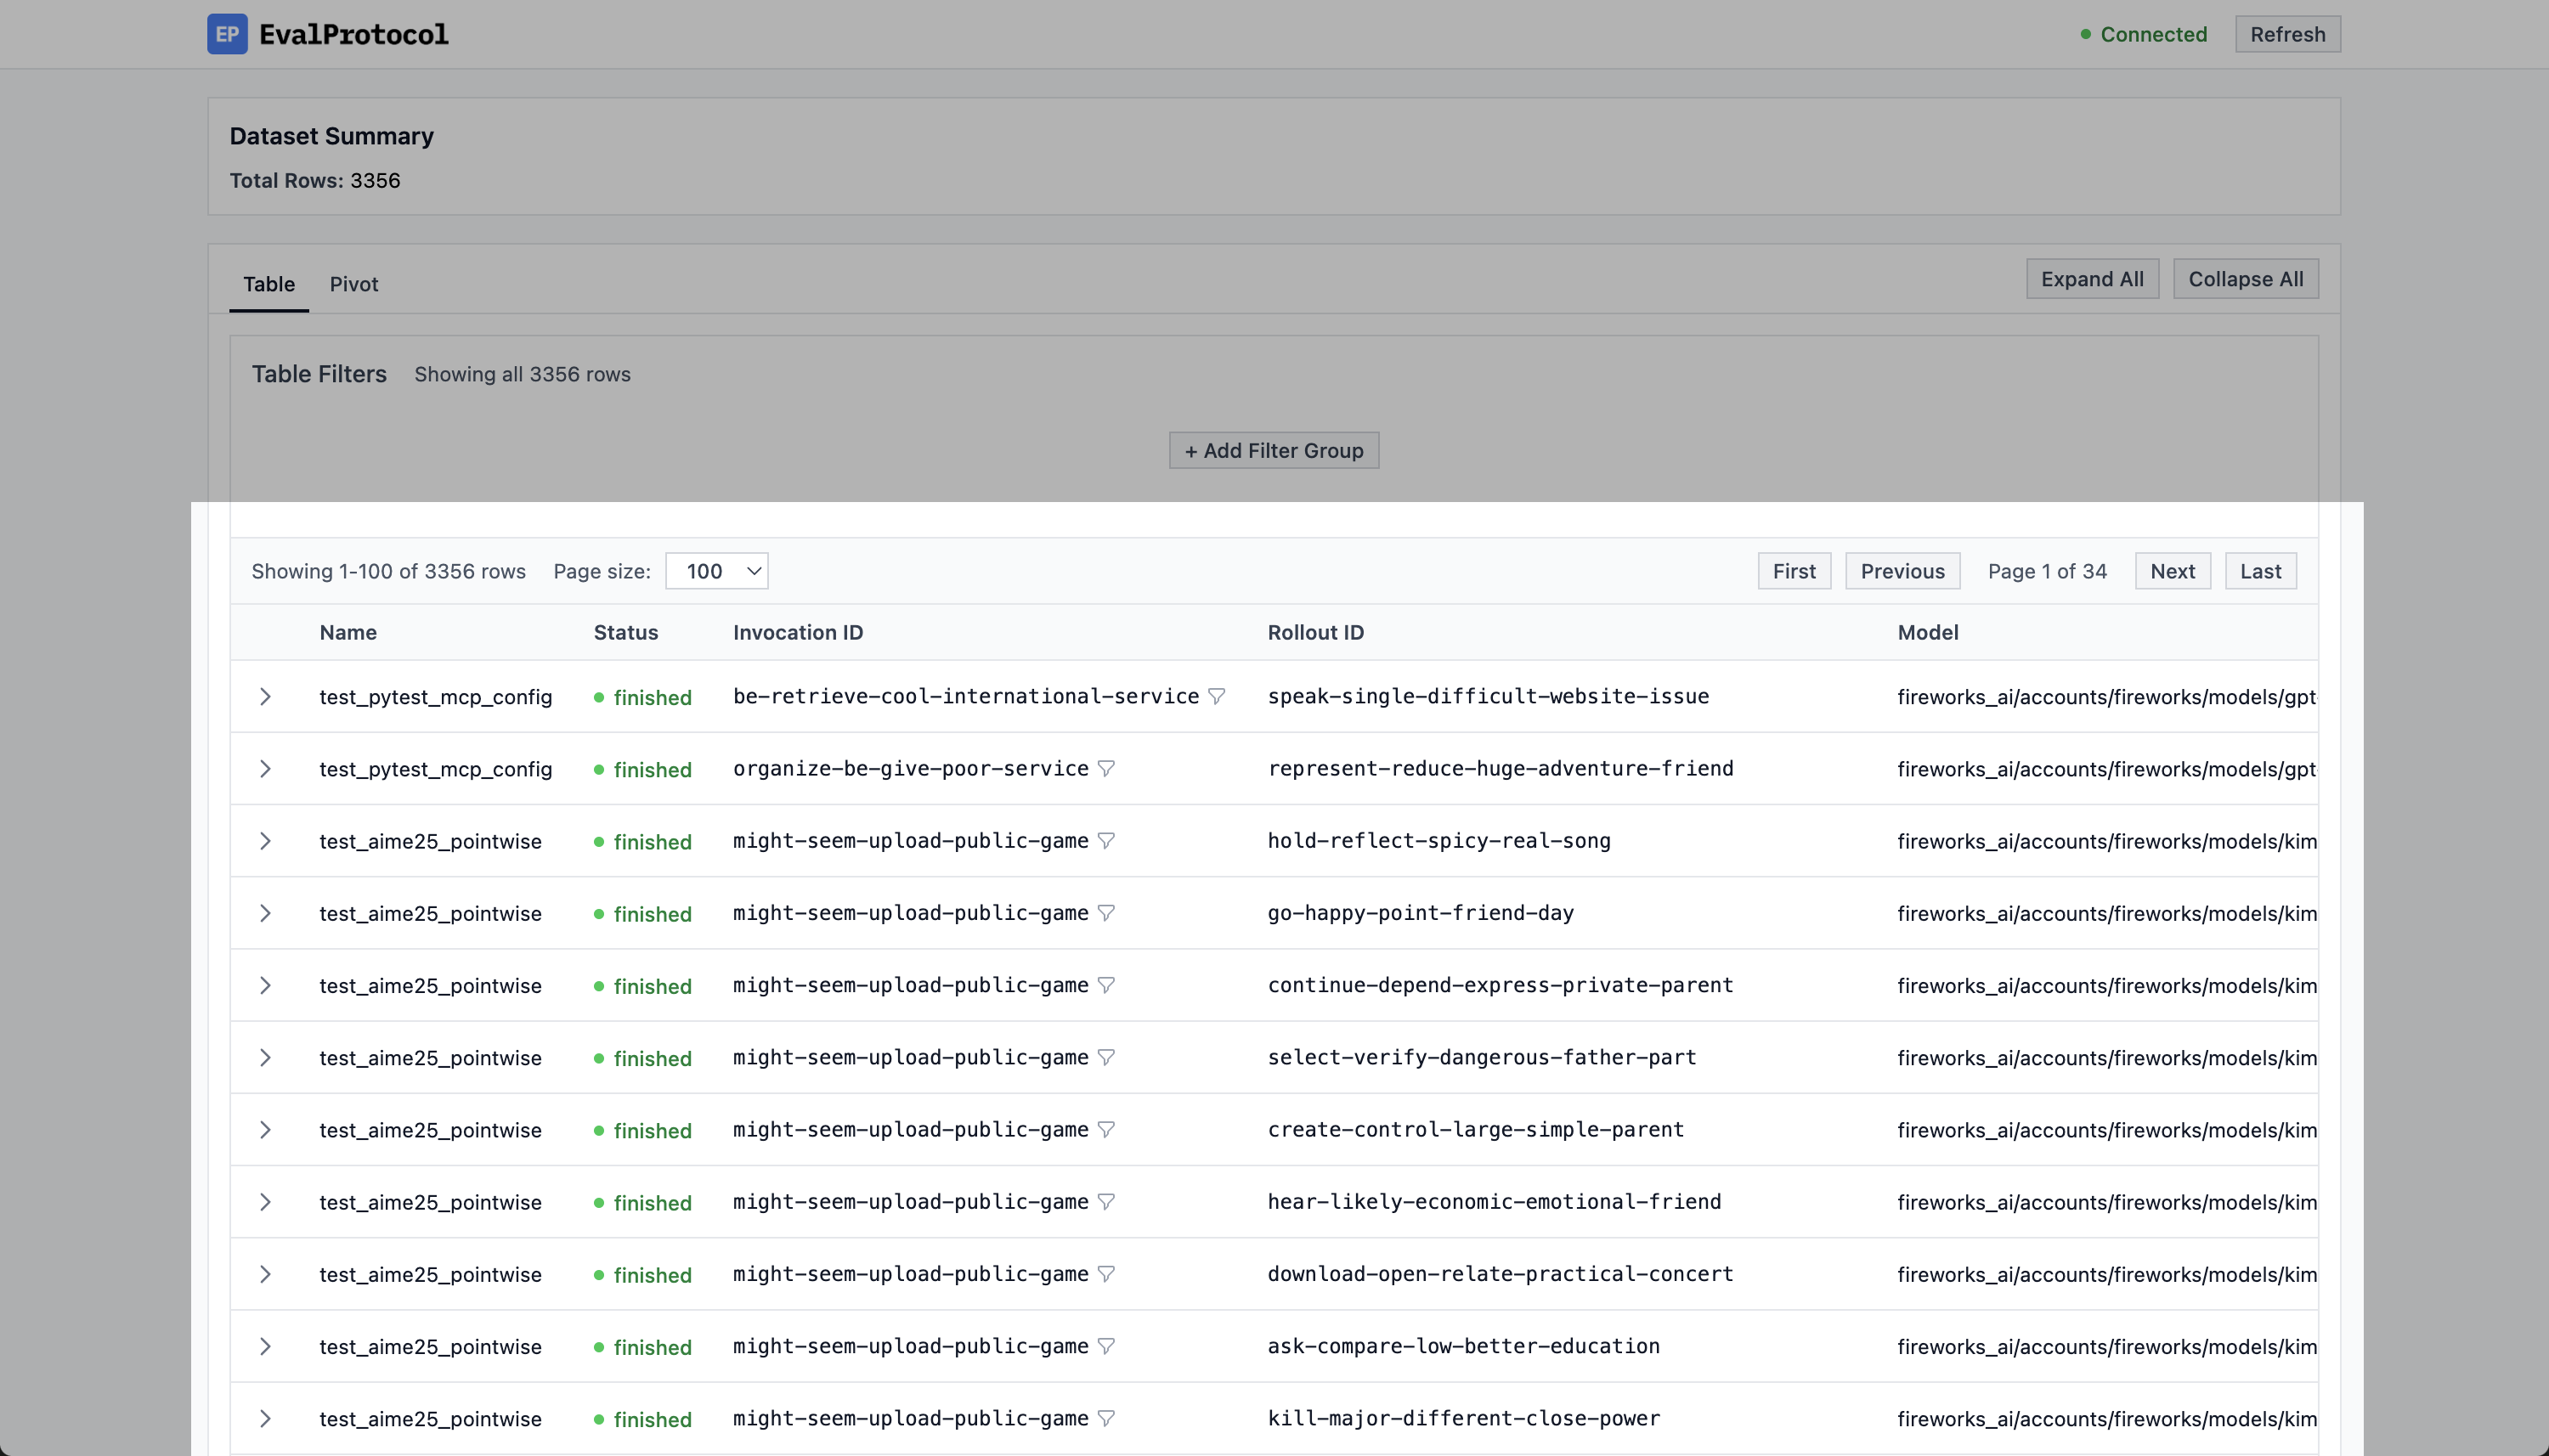
To inspect a row, hover over the row you want to inspect and click to expand.
When you expand a row, you can see the trajectory of the rollout as well as
other metadata like evaluation results, IDs, input metadata, and eval metadata.
Click on a row to inspect the evaluation.}>
### Chat Interface
On the left side of an expanded row, you can see the chat interface. This is
where you can see the trajectory of the rollout to inspect the model's responses
and tool calls.
On the left side of an expanded row, you can see the chat interface.}>
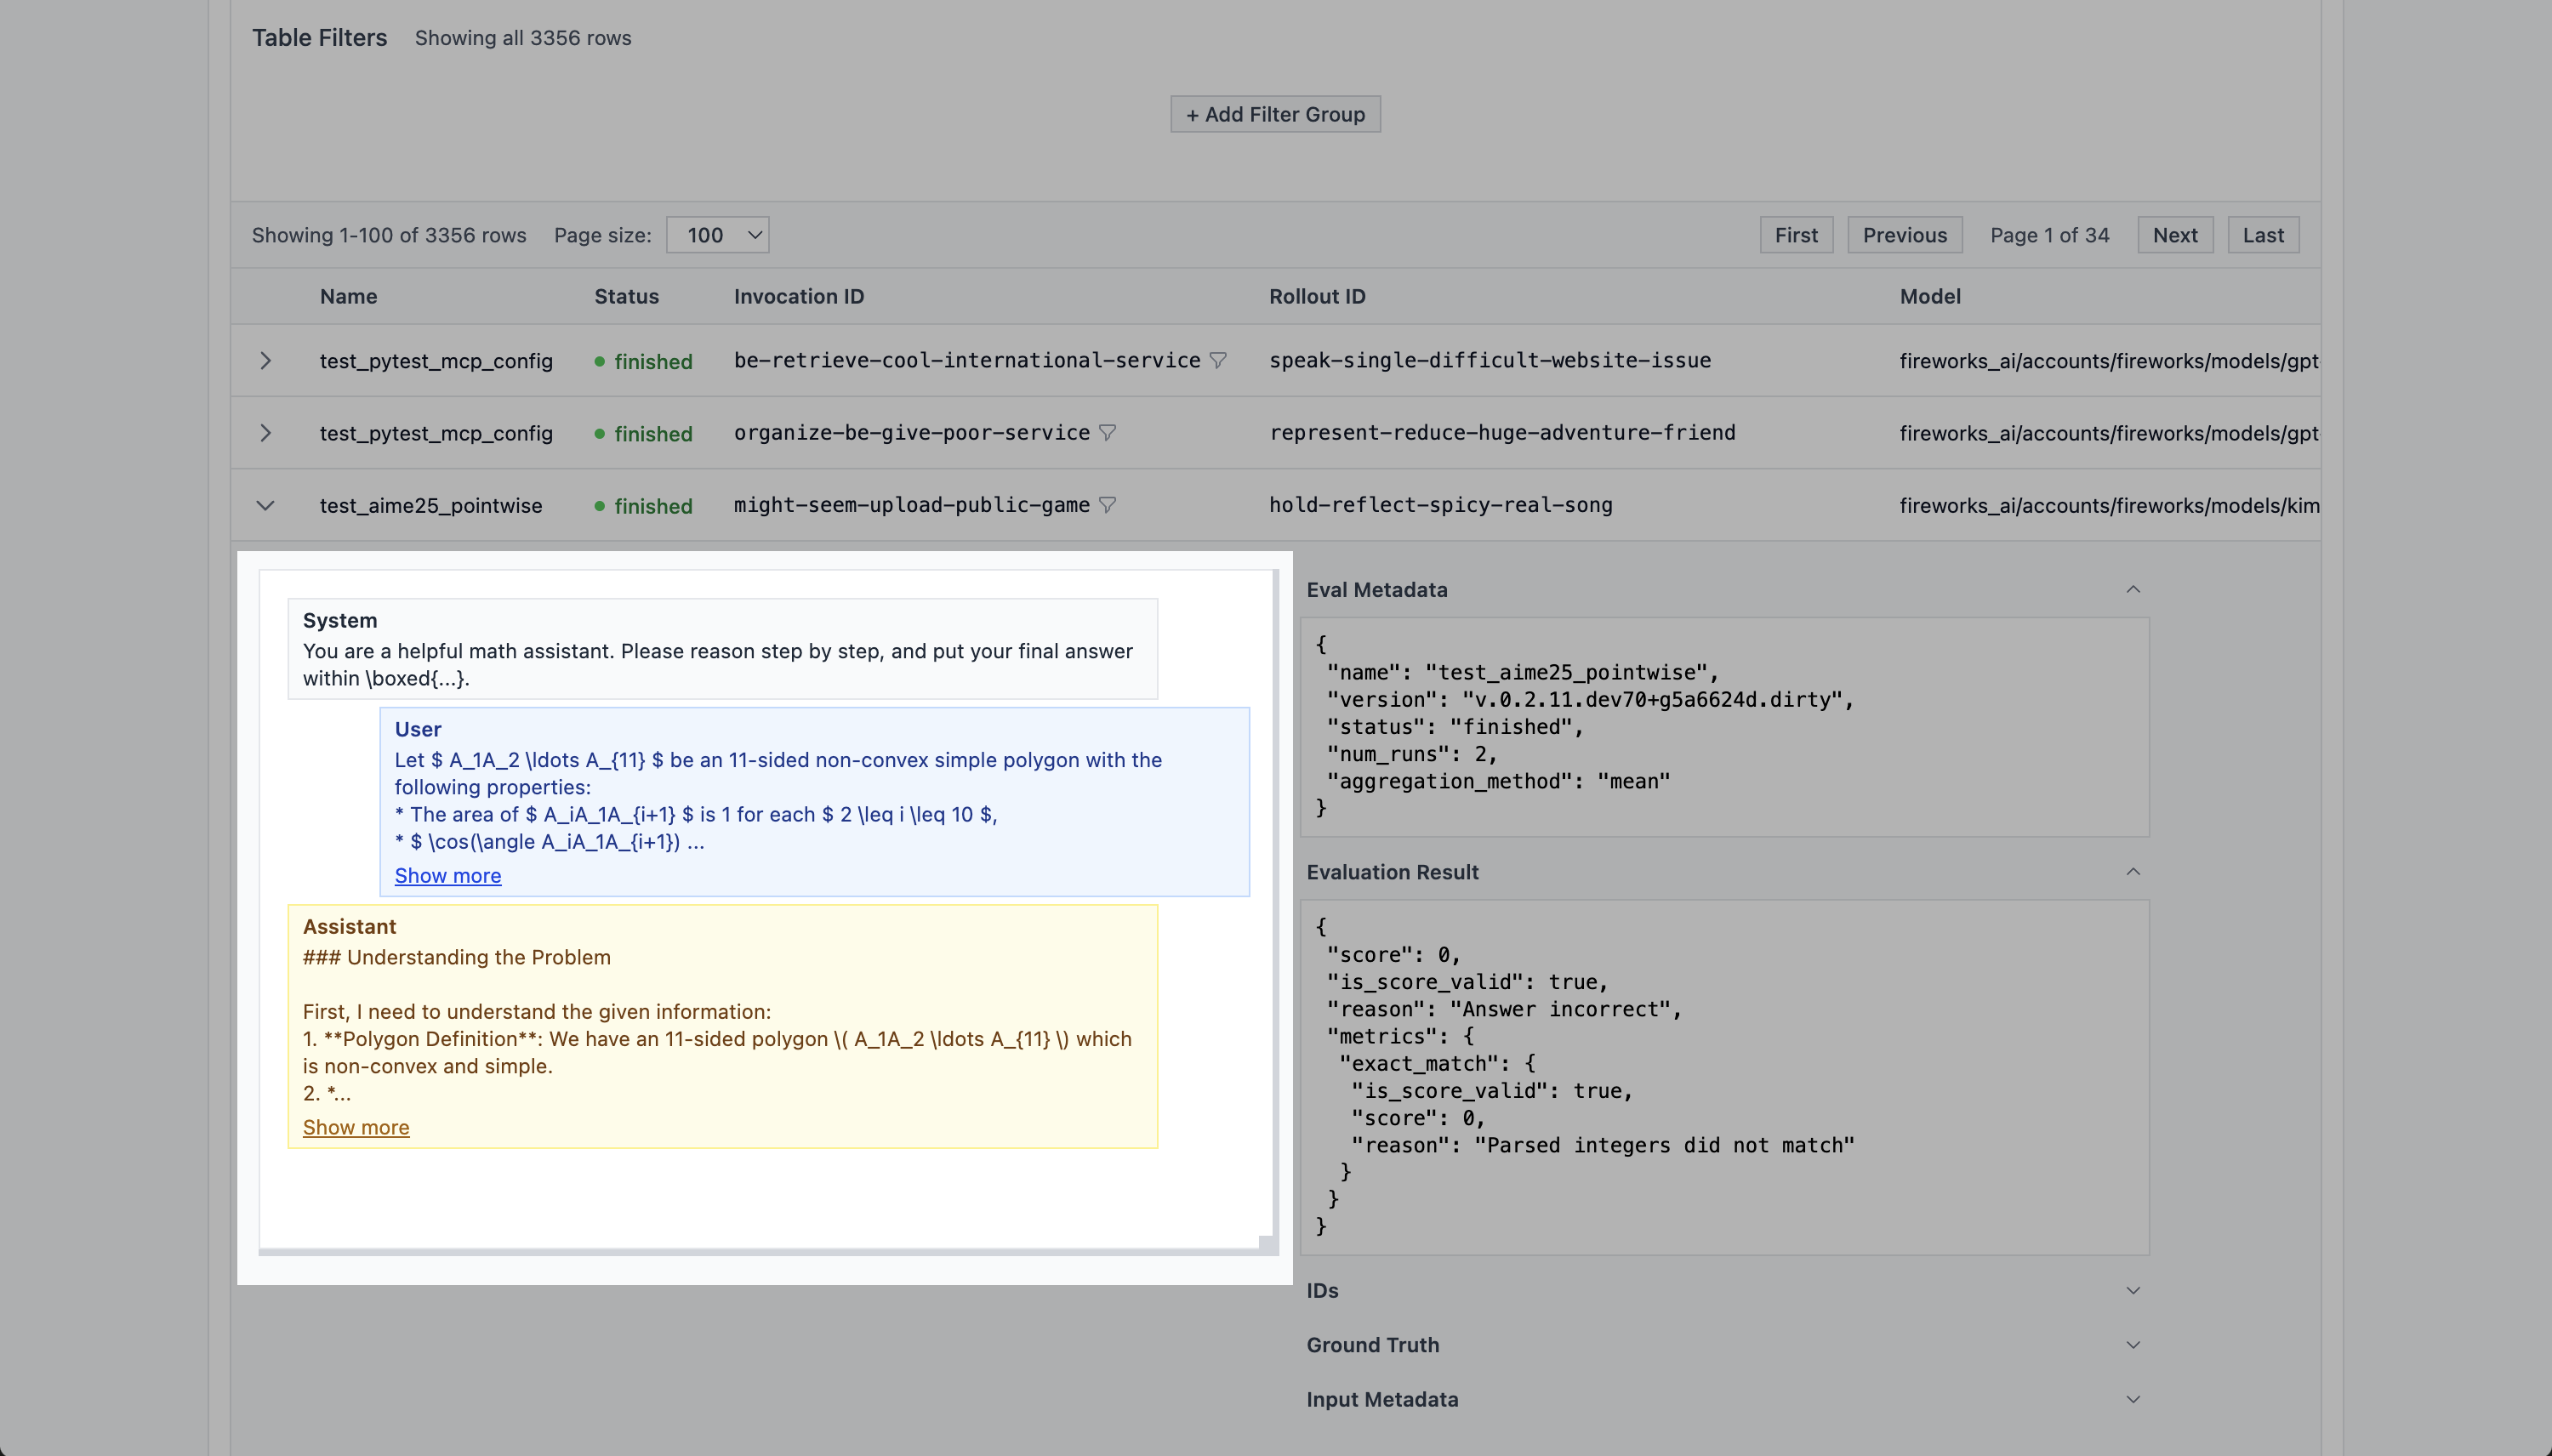
### Metadata
On the right side of an expanded row, you can see the metadata. This is where
you can see the evaluation results, IDs, input metadata, and eval metadata.
On the right side of an expanded row, you can see the metadata.}>
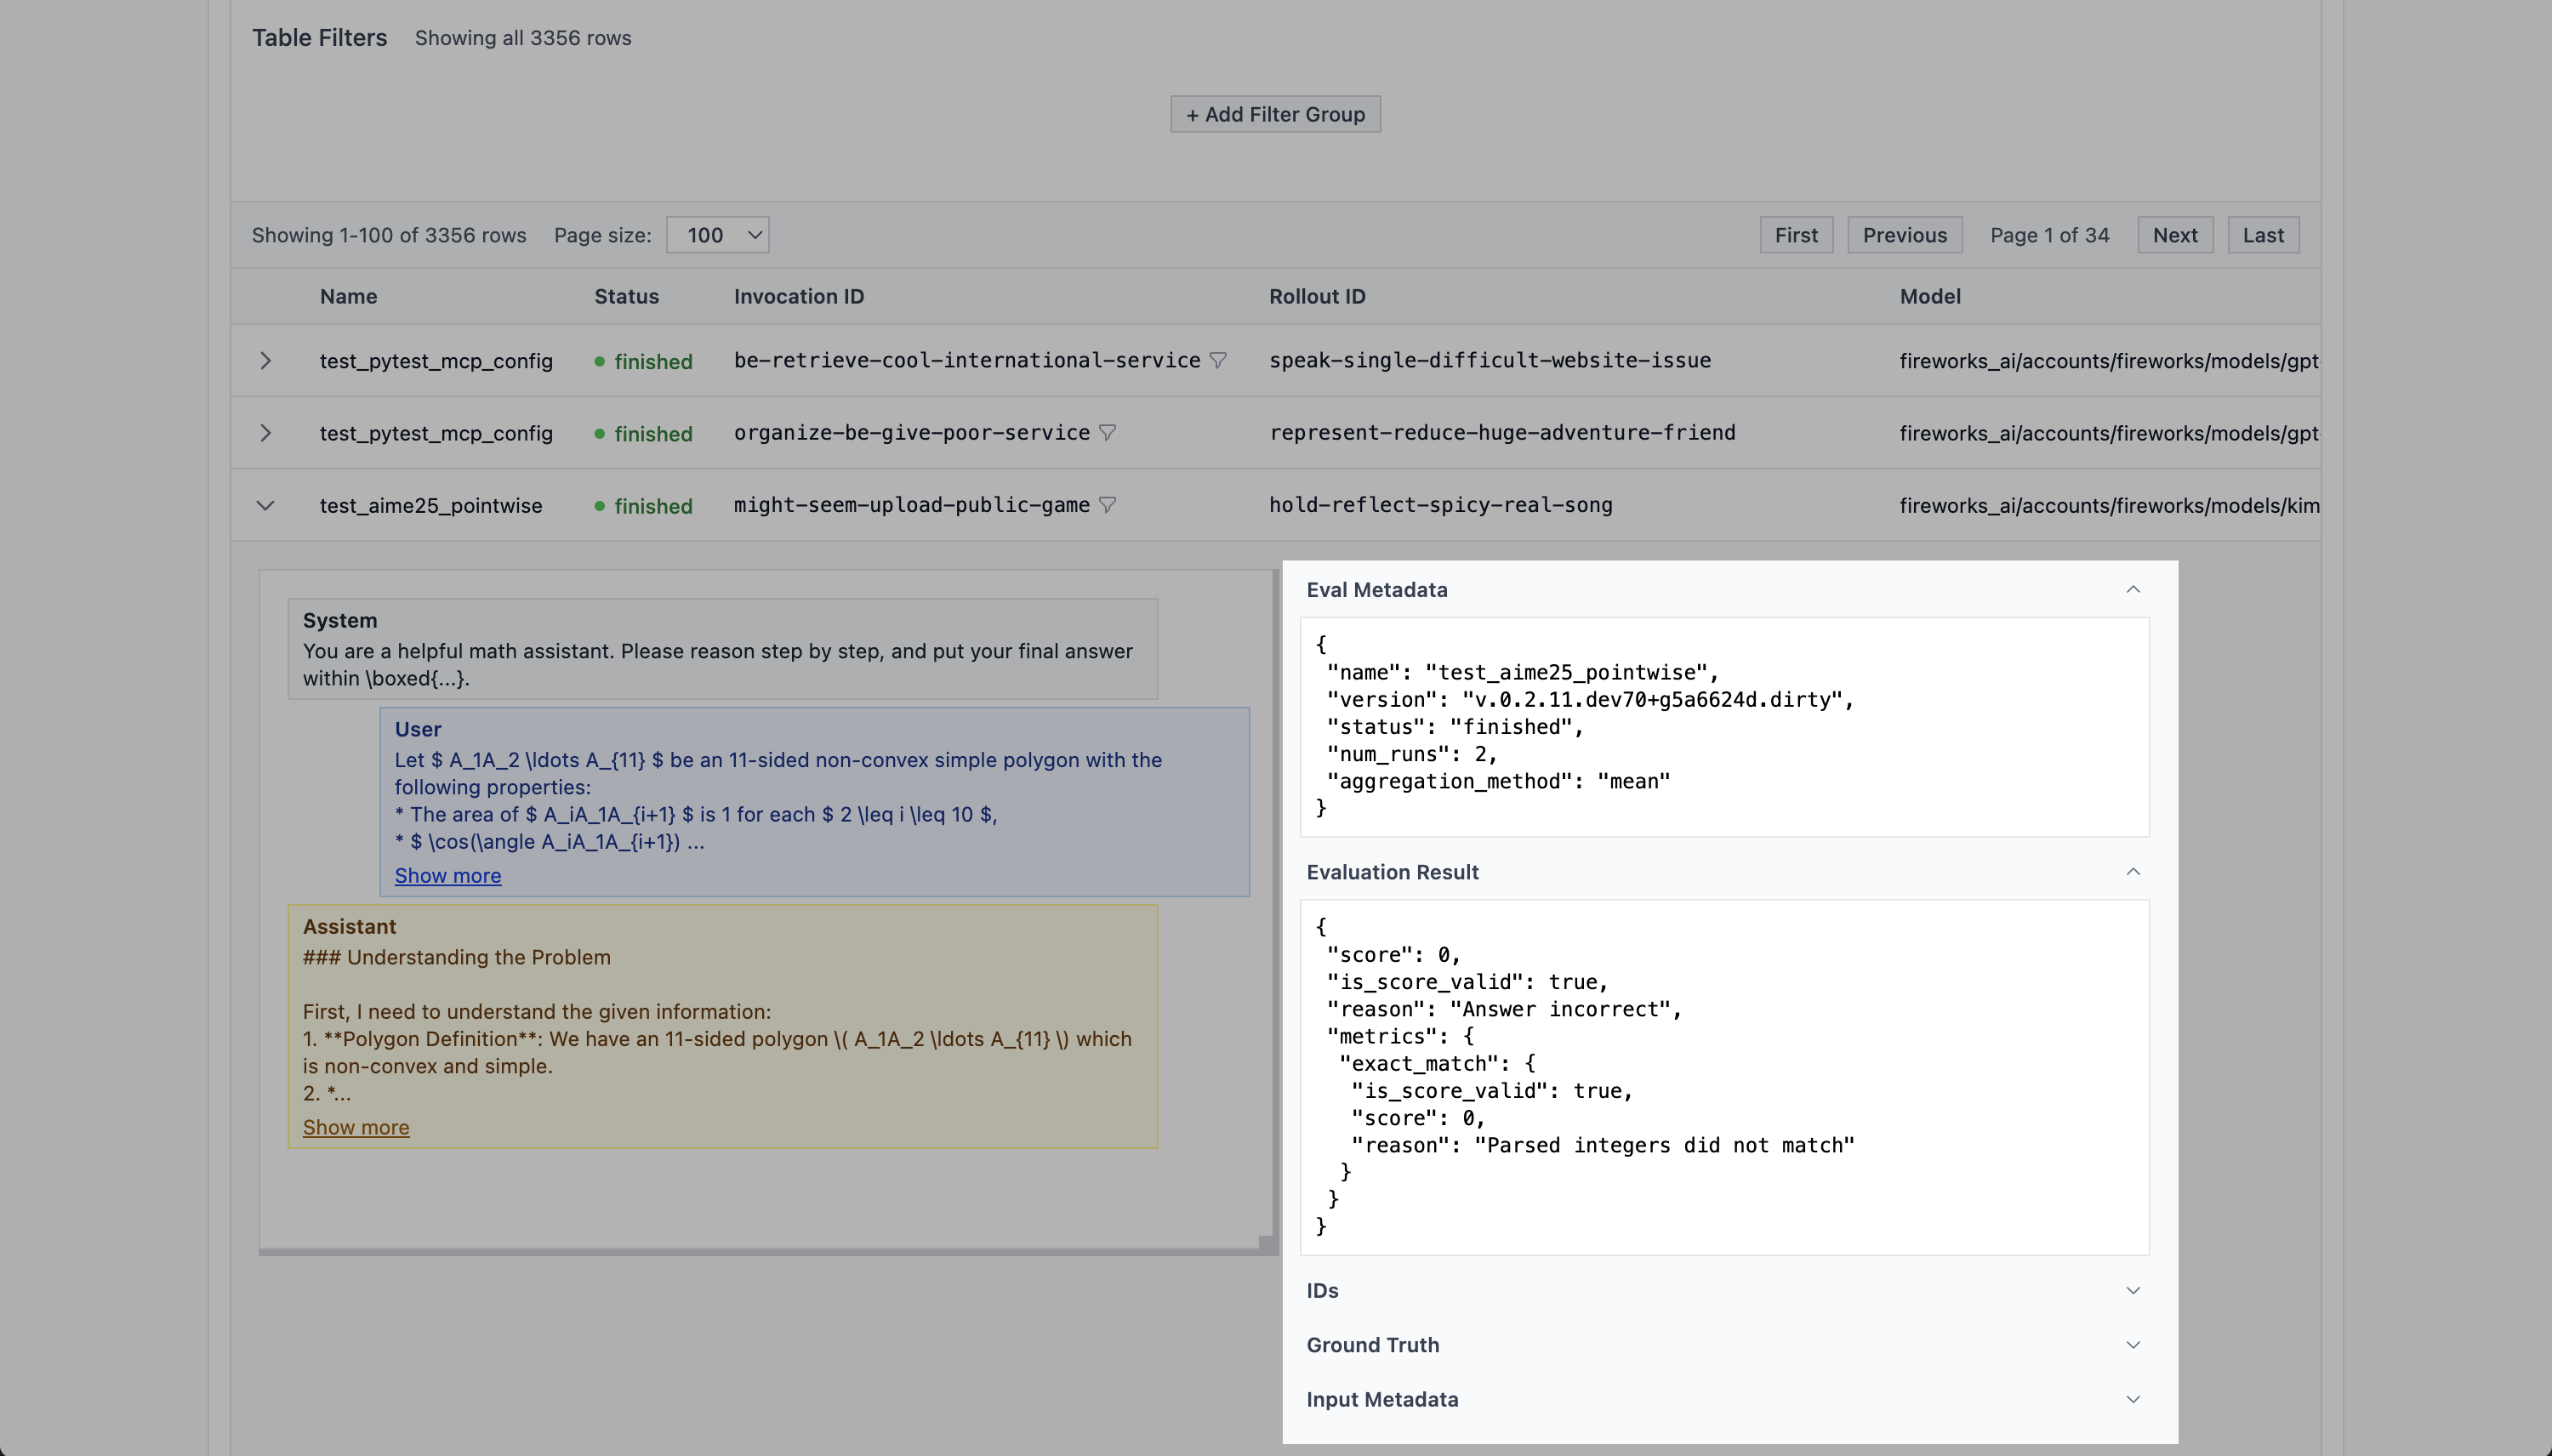
## Filtering
Above the table, you can see a section for configuring filters. You can filter based on any attribute of the evaluation row.
The filter section above the table.}>
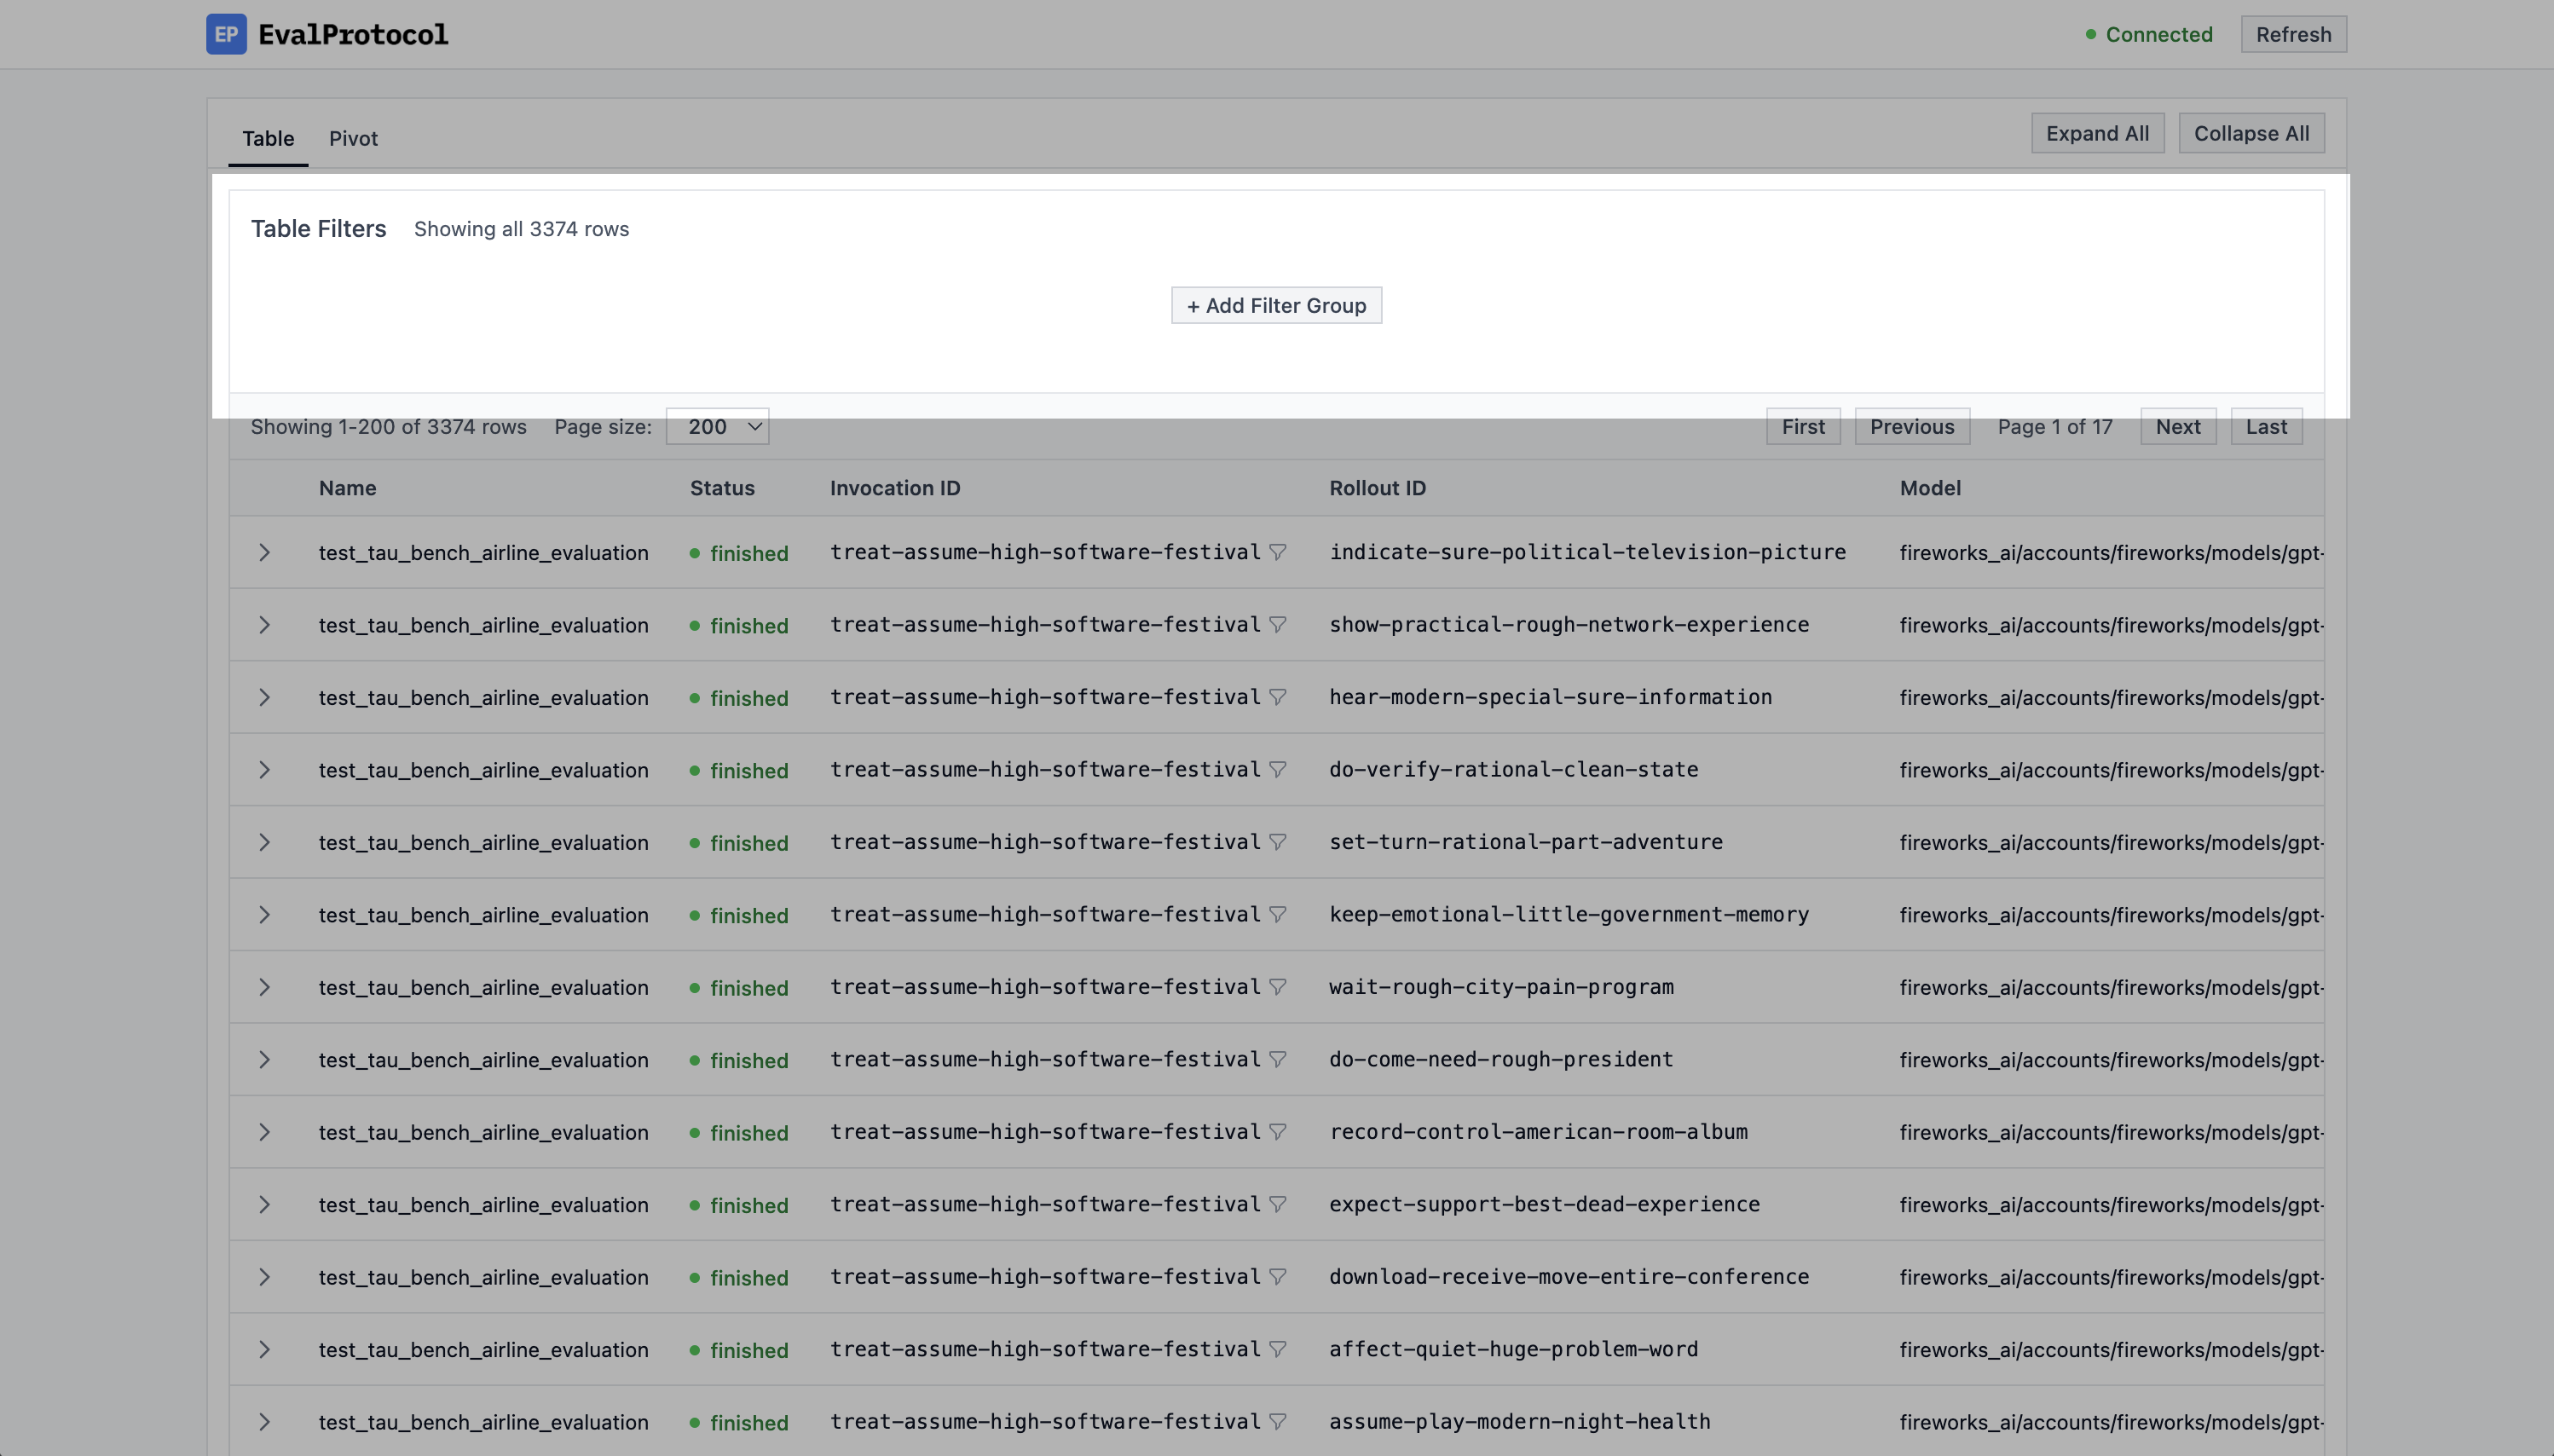
### Filtering based on Invocation ID
Often times you just want to see the rollouts for a single
[invocation](/specification#invocation). To do this, you can easily click on the
funnel icon next to the invocation ID in the table. This will automatically add
a filter for the invocation ID to the table.
Click on the funnel icon next to the invocation ID to filter the table by invocation ID.}>
### Custom filters
You can also create custom filters by clicking on the `+ Add Filter Group`
button above the table. Then you can choose to filter by `AND` or `OR` and add
filters to the group by clicking on the `+ Add Filter to Group` button.
Click on the + Add Filter Group button above the table to create a custom filter. In this example, we filter for scores equal to 0, models with gpt in the name, and a specific run_id.}>
## Viewing live rollouts
When it takes a long time to run an eval, it can be helpful to see the live
rollouts so you can track the progress of an eval and catch unexpected errors or problems.
Whenever you run an `@evaluation_test`, the UI automatically shows `running`
tests and you can watch rollouts live in the chat interface. When a test finishes,
detailed evaluation results appear to the right of the chat.
Checkout this example of a test running in VSCode and the UI updating with the
rollout.
Expand running rows to see the chat interface update with the rollout.}>
## Next Steps
Often times you want to ask questions like "how did the model perform on this
eval across this dataset?" or "which model should I use for my application?".
Creating and running evals helps you answer these questions, but answering these
questions requires computing some aggregate metrics across a set of evaluation rows.
To do this, you can use the [Pivot View](/tutorial/ui/pivot) to pivot the data
and see the data in a different way.
# Why Eval Protocol?
Source: https://evalprotocol.io/why
AI quality is a hard problem. Building a great AI system isn't just about using a better model—it's about making better decisions across prompts, data, model versions, tool usage, and user workflows. To do that well, you need great *evals*.
**Eval Protocol (EP)** was created to help developers treat evaluation as a core part of the development loop, not an afterthought. Whether you're benchmarking single-turn tasks or training complex multi-turn agents, EP gives you a consistent way to define, run, and monitor evaluations—at every stage of system development.
### Evaluations as Code
At the heart of EP is a simple but powerful idea: **rubrics are just pytest functions**.
Each rubric specifies how to run a model on a task and how to score the result. These functions can be:
* Parameterized over models, datasets, or configurations
* Composed together to run controlled experiments
* Used to generate datasets for *supervised fine-tuning* or *reinforcement learning*
Because rubrics are plain Python, developers can leverage the full testing ecosystem—assertions, fixtures, parametrization—while still producing rich, structured evaluation results that can be stored, visualized, and reused across different tasks and workflows.
### One Format, Two Modes
EP supports both static and dynamic evaluation:
1. **Static Evals**\
Evaluate models on curated test sets (e.g., prompt-response pairs with expected outputs). Use this to compare models, debug regressions, or gate releases. These evals can be versioned and automatically run in CI.
2. **Dynamic Evals**\
Evaluate agents as they interact with tools or environments over multiple steps. Each step logs the observation, action (e.g., a tool call), and feedback from the rubric. These reward traces can be used for reinforcement learning (e.g., PPO or GRPO), or analyzed post-hoc to improve agent design.
The same rubric function can be reused in both modes—turning one-off tests into feedback loops that power real learning.
### Rubrics Are the New Prompts
Just as prompt engineering shapes model behavior before inference, *rubric engineering* shapes behavior after the fact—by defining how to measure success.
EP makes it easy to iterate on rubrics just like prompts. Rubrics can return:
* Scalar rewards (for RL)
* Structured error information
* Partial credit scoring (for tasks like math, tool use, etc.)
* Assertions and failure modes
This makes it straightforward to express domain-specific quality measures while protecting against reward hacking and brittle metrics.
### Reference: RL for Agents
In his [talk on reinforcement learning for agents](https://youtu.be/JIsgyk0Paic), Will Brown emphasizes that future agents won't emerge from prompt chaining alone—they require *feedback loops*. He argues that capabilities like tool use and self-correction only arise when models are trained in environments with structured rewards and rich instrumentation.
EP was designed with that exact workflow in mind: rubrics that double as rewards, environments that log every step, and infrastructure that makes it trivial to go from test case to fine-tuning dataset to full RL training run.
### Build the Feedback Loops You Need
With EP, you get one evaluation framework that supports:
* ✅ Offline benchmarking (for model selection and quality tracking)
* ✅ Dataset generation (for SFT and RLHF)
* ✅ Structured instrumentation (for tool-using agents and planners)
* ✅ Reward shaping and debugging (for custom training workflows)
* ✅ CI integration (so regressions are caught early)
You define your evals once—as code—and reuse them everywhere. That's how today's brittle AI pipelines become tomorrow's self-improving agents.
EP is for developers who want to turn evaluations into part of their training loop—not just their test suite.
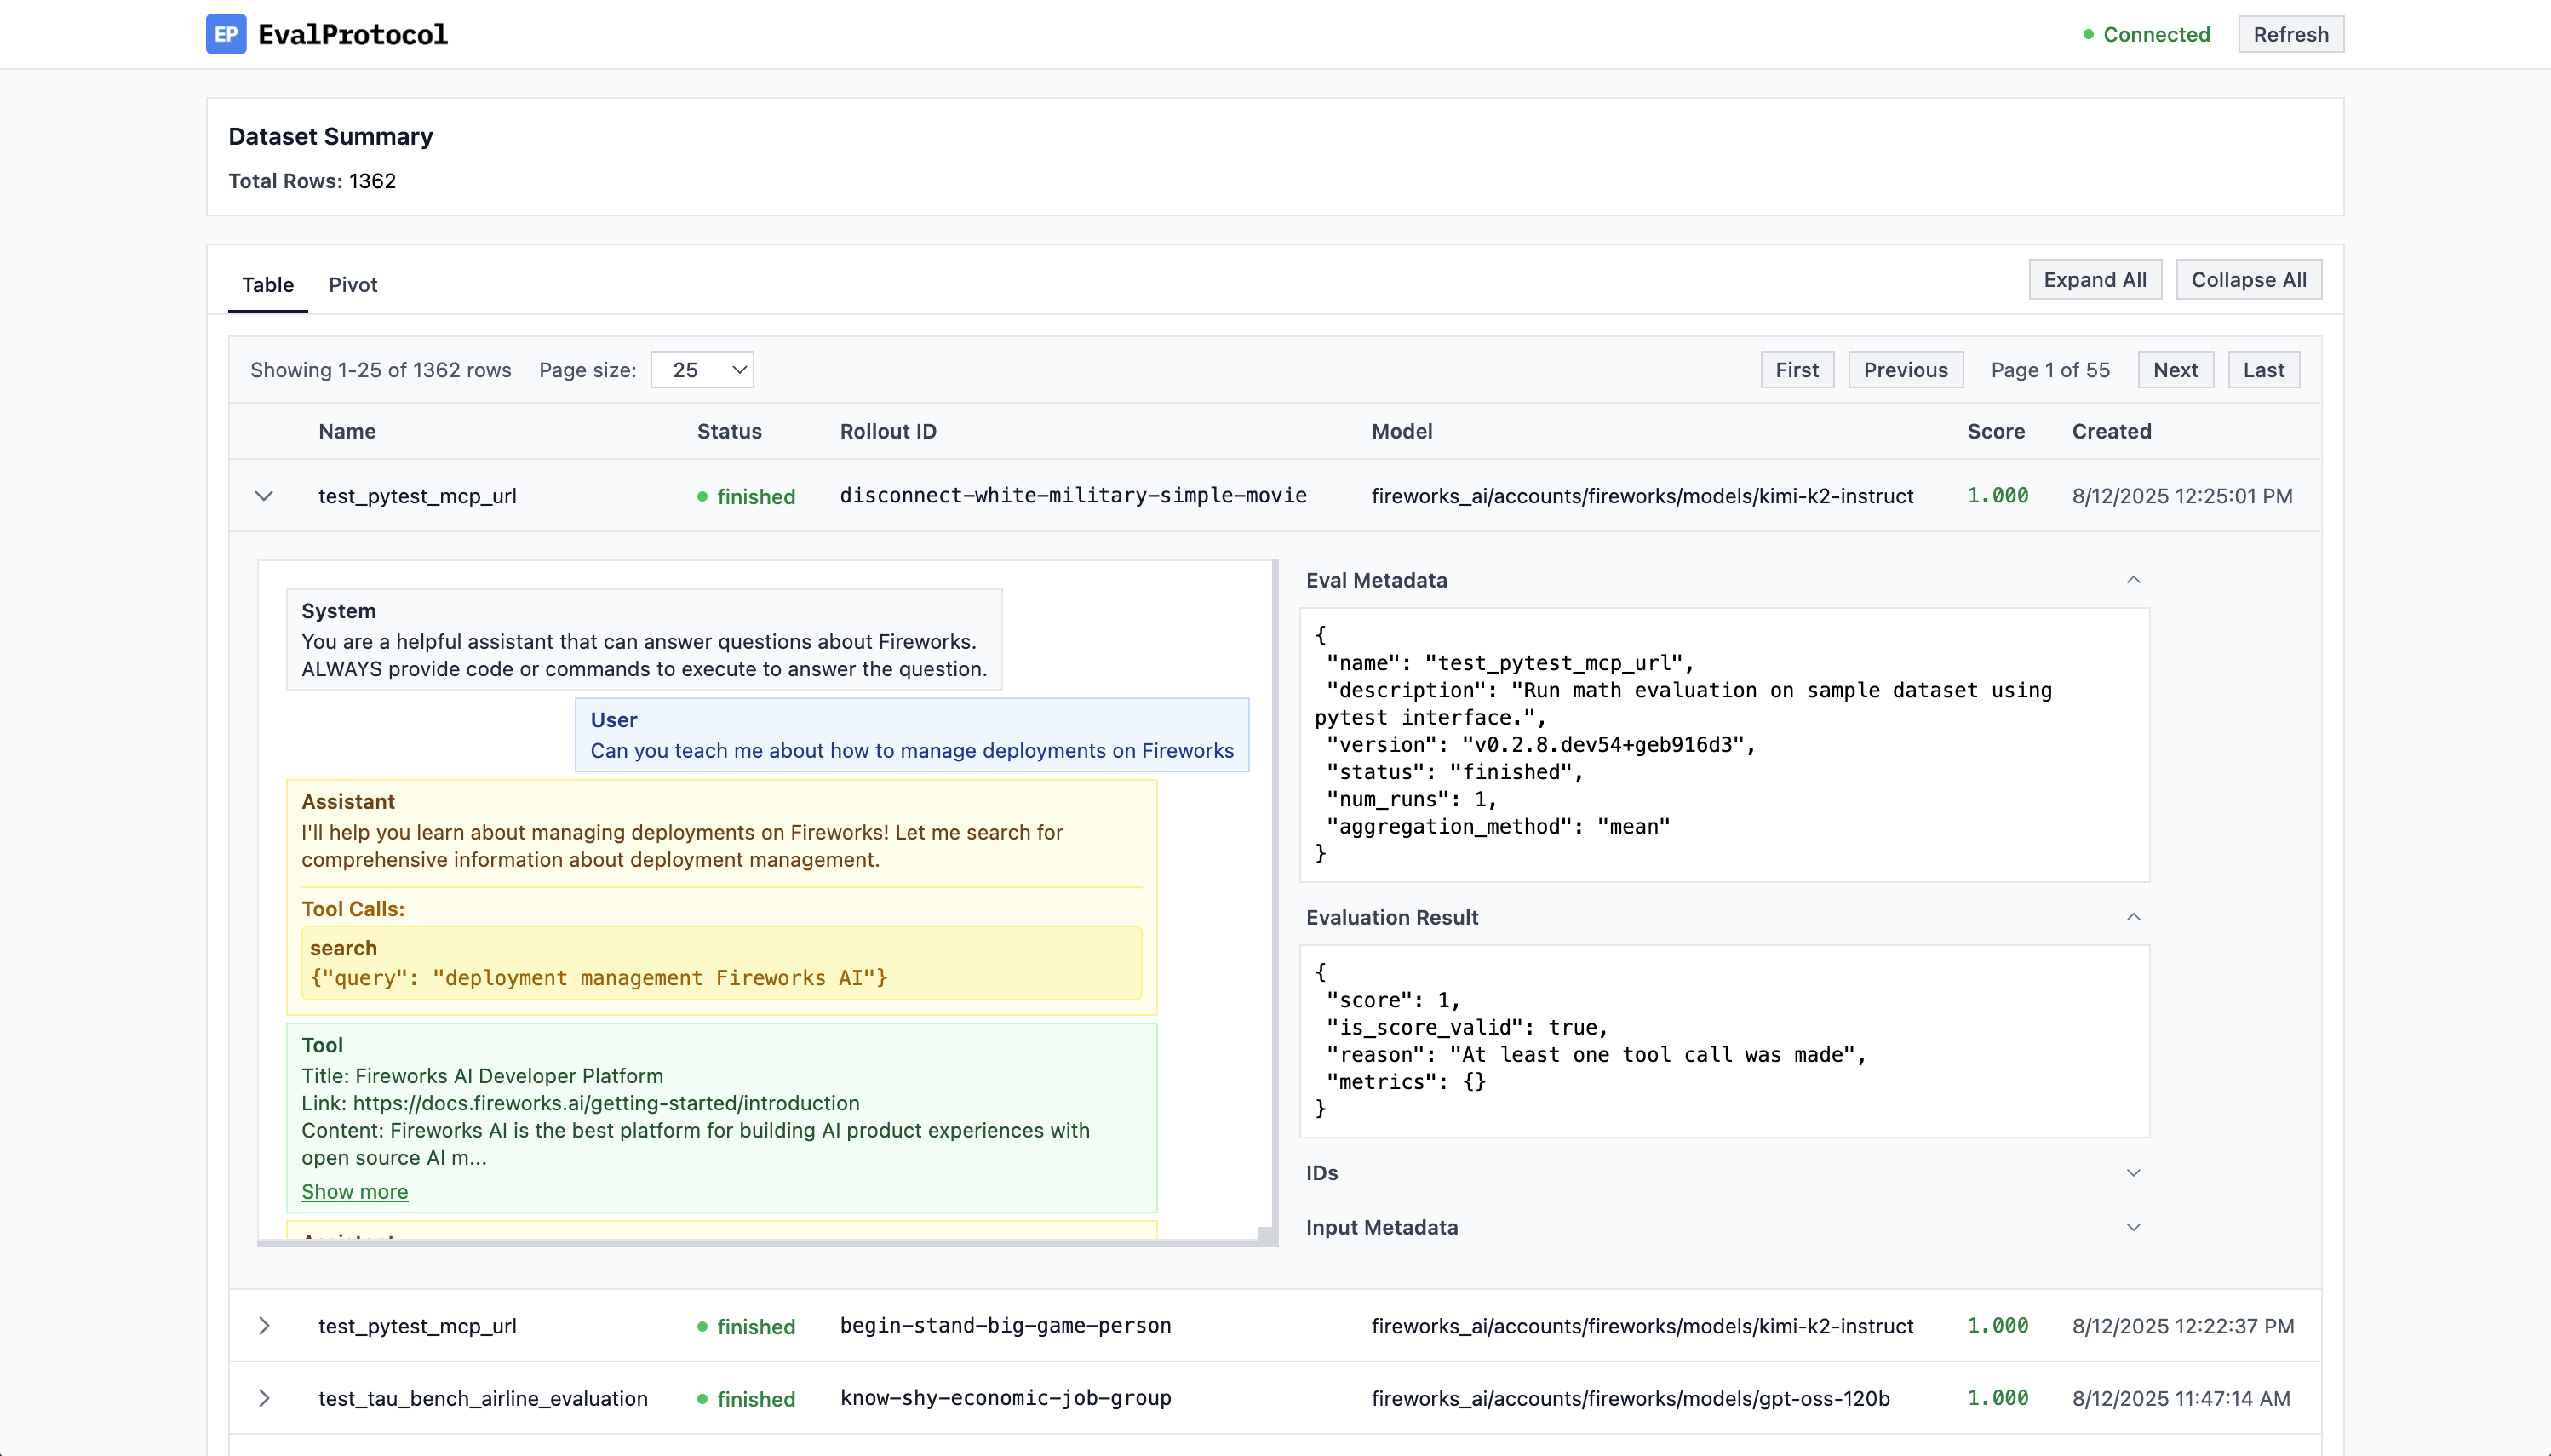 ## Getting Started
Ready to dive in? Install EP with a single command and start evaluating your models:
```shell
pip install eval-protocol
```
## Quick Example
Here's a simple test function that checks if a model's response contains **bold** text formatting:
## Getting Started
Ready to dive in? Install EP with a single command and start evaluating your models:
```shell
pip install eval-protocol
```
## Quick Example
Here's a simple test function that checks if a model's response contains **bold** text formatting: